
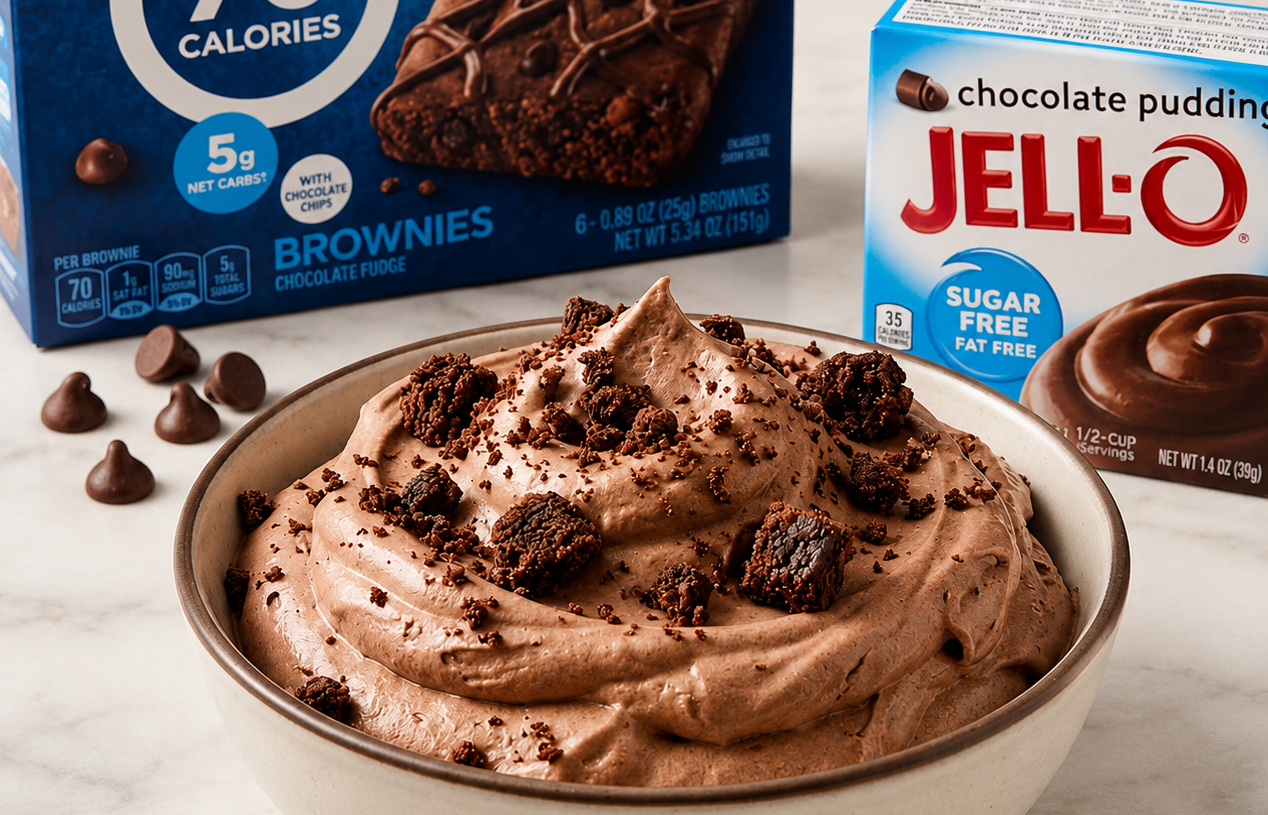
🛒 Ingredients
Chocolate Pudding Layer
- 1 box (1.4 oz / 39 g) sugar-free, fat-free instant chocolate pudding mix
- 2 cups cold skim milk
- 1 teaspoon pure vanilla extract
- 1 tablespoon unsweetened cocoa powder, optional, for deeper chocolate flavor
Brownie & Cool Whip Mixture
- 4 Fiber One Chocolate Fudge Brownies (about 25 g each), cut or broken into small pieces
- 2 cups light or fat-free whipped topping, thawed
- 2 tablespoons mini sugar-free chocolate chips, optional
- 1 tablespoon unsweetened cocoa powder, optional for dusting
Optional Topping
- 1 additional Fiber One Chocolate Fudge Brownie, finely crumbled
- 2 tablespoons light whipped topping
- A small sprinkle of unsweetened cocoa powder
👩🍳 Step-by-Step Instructions
1. Prepare the Ingredients
Before starting, gather all of your ingredients and make sure the milk is very cold. The whipped topping should be completely thawed but still chilled.
Cold ingredients help the pudding mixture thicken properly and make the finished dessert lighter and creamier.
2. Make the Chocolate Pudding
Pour 2 cups of cold skim milk into a medium mixing bowl.
Add the 1.4-ounce box of sugar-free, fat-free instant chocolate pudding mix.
Using a whisk, beat the mixture for approximately 2 minutes, or according to the pudding package directions, until it begins to thicken.
3. Add Vanilla
Add 1 teaspoon of pure vanilla extract to the chocolate pudding.
The vanilla doesn’t make the dessert taste like vanilla. Instead, it helps round out the chocolate flavor and gives the pudding a more balanced, dessert-like taste.
4. Make the Chocolate Flavor Deeper
For a more intense chocolate flavor, add 1 tablespoon unsweetened cocoa powder.
Whisk thoroughly until the cocoa is completely incorporated.
This step is optional, but it is especially useful if you prefer a dark-chocolate flavor.
5. Let the Pudding Set
Allow the pudding mixture to stand for approximately 3–5 minutes.
It should become noticeably thicker.
If the mixture looks extremely loose, place it in the refrigerator for about 5–10 minutes before continuing.
6. Prepare the Brownies
Take 4 Fiber One Chocolate Fudge Brownies and cut them into small bite-sized pieces.
You don’t want every piece to be tiny crumbs. Keep some pieces slightly larger so you can get chewy brownie bites throughout the dessert.
Reserve about 2 tablespoons of the brownie crumbs for decorating the top.
7. Fold in the Whipped Topping
Once the pudding has thickened, gently fold in 2 cups of light or fat-free whipped topping.
Use a rubber spatula rather than aggressively stirring.
Fold from the bottom of the bowl toward the top until the mixture is evenly combined.
8. Keep the Mixture Fluffy
Do not overmix the pudding and whipped topping.
The goal is to maintain some of the airiness from the whipped topping.
Overmixing can make the dessert heavier and less fluffy.
9. Add the Brownie Pieces
Gently fold approximately three-quarters of the brownie pieces into the chocolate mixture.
Save the remaining pieces for the top.
This creates little pockets of brownie throughout the dessert rather than leaving all the brownie pieces on the surface.
10. Add Optional Chocolate Chips
If desired, fold in 2 tablespoons of mini sugar-free chocolate chips.
This is completely optional.
For the lowest-calorie and lowest-point version, simply leave them out.
11. Transfer to a Serving Dish
Spoon the chocolate brownie mixture into an 8-inch square baking dish, small serving dish, or deep glass container.
Spread the mixture gently with a spatula.
Do not press it down too firmly because you want to preserve its light, mousse-like texture.
12. Smooth the Top
Use the back of a spoon or spatula to gently smooth the top.
For a more attractive presentation, you can create small decorative swirls across the surface.
13. Add Brownie Crumbs
Sprinkle the reserved brownie crumbs evenly over the top.
You can also crumble a little extra brownie over individual portions when serving.
14. Add a Light Cocoa Dusting
For a bakery-style finish, lightly dust the top with unsweetened cocoa powder.
Use only a small amount.
A fine dusting gives the dessert a beautiful chocolate appearance without adding significant calories.
15. Cover the Dessert
Cover the dish tightly with plastic wrap or a suitable airtight lid.
This prevents the dessert from absorbing refrigerator odors and keeps the whipped topping fresh.
16. Refrigerate
Place the dessert in the refrigerator for at least 2 hours.
For the best texture, I recommend chilling it for approximately 3–4 hours.
The brownie pieces soften slightly during chilling while the chocolate filling becomes thicker and more stable.
17. Don’t Freeze It for the Best Texture
Although the dessert can technically be frozen, refrigeration is recommended.
Freezing can change the texture of the whipped topping and pudding mixture after thawing.
If you want a frozen-style chocolate dessert, the recipe can be adapted, but the classic version is best served chilled.
18. Portion Before Serving
For easier calorie and point control, divide the dessert into 8 equal portions.
You can use a measuring cup or simply divide the dish evenly with a knife or spatula.
Individual dessert cups are another excellent option.
19. Serve Cold
Serve the dessert directly from the refrigerator.
For an attractive presentation, add a small spoonful of light whipped topping and a few brownie crumbs to each serving.
Keep the garnish modest to maintain the low-point nature of the recipe.
20. Enjoy
Each spoonful delivers creamy chocolate pudding, fluffy whipped topping, and chewy brownie pieces.
The combination tastes much more indulgent than the ingredient list suggests, making it an excellent option when you want a satisfying chocolate dessert without making a traditional full-size cake.
🍫 How to Make It Even More Chocolatey
If you love intense chocolate flavor, use 1½ tablespoons of unsweetened cocoa powder instead of 1 tablespoon.
You can also add ½ teaspoon instant espresso powder to the pudding mixture. Espresso doesn’t make the dessert taste like coffee; instead, it intensifies the chocolate flavor.
Another option is to add a very small pinch of salt. Salt helps balance sweetness and makes chocolate taste richer.
💡 Tips for the Best No-Bake Brownie Dessert
Use cold milk. Instant pudding thickens best when prepared with cold milk.
Don’t overmix the whipped topping. Gentle folding keeps the dessert fluffy.
Cut the brownies into different-sized pieces. A mixture of crumbs and bite-sized pieces creates a better texture.
Chill before serving. The dessert becomes significantly better after resting in the refrigerator.
Use a light whipped topping. This keeps the recipe lighter while still providing the creamy texture you want.
Measure your ingredients carefully. Small changes in brownie pieces, whipped topping, or milk can change the calorie and point values.
🥄 Individual Dessert Cups
For parties or portion-controlled desserts, divide the mixture among 8 small dessert cups.
Add a spoonful of the chocolate pudding mixture to each cup, followed by brownie pieces, then another layer of the chocolate mixture.
Finish each cup with a few brownie crumbs.
Cover and refrigerate for at least 2 hours.
Individual cups are particularly useful when serving this dessert at gatherings because everyone receives a clearly measured portion.
🍫 Layered Version
You can also turn this into a beautiful layered dessert.
Start with a small layer of brownie pieces at the bottom of the dish.
Add a layer of chocolate pudding mixture.
Repeat the brownie and chocolate layers until the dish is filled.
Finish with a thin layer of whipped topping and brownie crumbs.
This version looks especially attractive in a clear glass trifle bowl because the chocolate layers are visible from the side.
❄️ Make-Ahead Instructions
This dessert is excellent for make-ahead preparation.
You can prepare it up to 24 hours in advance and keep it refrigerated.
For the freshest appearance, add the final brownie crumb topping shortly before serving.
If the dessert is stored overnight, the brownie pieces will become softer and more cake-like.
Some people actually prefer this texture because it resembles a creamy chocolate brownie pudding.
🧊 Storage
Store leftovers covered in the refrigerator.
For the best quality, enjoy within approximately 2–3 days.
Because this recipe contains whipped topping and milk-based pudding, it should remain refrigerated and should not be left sitting at room temperature for extended periods.
🔄 Easy Ingredient Substitutions
If you don’t have skim milk, you can use another milk of your choice, but keep in mind that the nutrition and WW-style points will change.
You can use regular light whipped topping instead of fat-free whipped topping.
For a stronger chocolate flavor, use additional unsweetened cocoa powder.
If Fiber One brownies aren’t available, a reduced-calorie chocolate brownie can be substituted. However, the nutrition and SmartPoints estimate will need to be recalculated based on the specific brownie used.
❤️ How to Keep This Dessert Low in SmartPoints
The easiest way to keep this dessert low in points is portion control.
Use sugar-free fat-free pudding, skim milk, light or fat-free whipped topping, and a measured amount of reduced-calorie brownies.
Avoid adding regular chocolate syrup, caramel sauce, full-fat whipped cream, nuts, or large amounts of chocolate chips if you’re trying to keep the points low.
The brownie pieces provide enough chocolate flavor that you don’t need a heavy chocolate topping.
📊 Approximate Nutrition Information
Per serving — 1/8 of recipe:
- Calories: approximately 125–145
- Protein: approximately 3–4 g
- Total Carbohydrates: approximately 18–21 g
- Dietary Fiber: approximately 3–5 g
- Net Carbohydrates: approximately 14–17 g
- Total Fat: approximately 3–5 g
- Saturated Fat: approximately 1–2 g
- Sugar: approximately 5–7 g
- Sodium: approximately 250–350 mg
Nutrition will vary depending on the exact brands of brownie, pudding mix, milk, and whipped topping used.
⭐ WW SmartPoints Estimate
Approximately 3–4 WW SmartPoints per serving
This is an estimated SmartPoints value, not an official WW calculation. WW has changed its points system over time, and individual products can also have different values depending on their nutrition labels.
For the lowest-point version, use:
- Sugar-free fat-free pudding
- Skim milk
- Fat-free/light whipped topping
- Reduced-calorie brownies
- No additional chocolate chips
- Unsweetened cocoa powder instead of chocolate sauce
Serving size: 1/8 of the prepared dessert.
Because the brownie brand and whipped topping can vary considerably, entering the exact nutrition information from your packages into your current WW calculator will give the most accurate point value.
🍽️ Portion-Control Guide
One of the best features of this recipe is that it feels like a rich dessert even though the portion is relatively modest.
Divide the completed recipe into 8 servings for the nutrition estimate above.
For a smaller sweet treat, divide it into 10 servings.
For a larger dessert portion, you can divide it into 6 servings, but the calories and SmartPoints per serving will increase.
🌟 Recipe Variations
Chocolate Peanut Butter Brownie Cool Whip
Add 1 tablespoon powdered peanut butter to the pudding mixture for a chocolate-peanut-butter flavor while keeping the recipe relatively light.
Mint Chocolate Brownie Dessert
Add ¼ teaspoon peppermint extract to the pudding mixture.
Do not add too much peppermint extract because its flavor is extremely concentrated.
Mocha Brownie Dessert
Add ½ teaspoon instant espresso powder to the chocolate pudding mixture.
This gives the dessert a deeper, richer chocolate flavor.
Dark Chocolate Version
Add 1–1½ tablespoons unsweetened cocoa powder and a tiny pinch of salt.
This produces a more intense dark-chocolate profile.
📝 Recipe Summary
No Bake Chocolate Brownie Cool Whip Dessert is a simple refrigerator dessert made with creamy sugar-free chocolate pudding, fluffy whipped topping, and pieces of chocolate fudge brownie. It requires no oven, no complicated techniques, and no special equipment.
The dessert is especially useful when you’re craving chocolate but don’t want to spend hours baking. It can be prepared ahead, portioned into individual cups, and kept refrigerated until you’re ready to serve.
The combination of creamy pudding and whipped topping creates a light mousse-like consistency, while the brownie pieces add satisfying chocolate texture. Chilling the dessert allows all the flavors to blend together and gives the brownie pieces a softer, cake-like bite.
For a low SmartPoints version, keep the recipe based on sugar-free pudding, skim milk, light or fat-free whipped topping, and measured reduced-calorie brownie pieces. Skip optional chocolate chips and heavy toppings when you want to keep the points as low as possible.
🍫 Final Recipe at a Glance
Yield: 8 servings
Prep: 15 minutes
Chill: 2–4 hours
Method: No-Bake
Calories: ~125–145 per serving
WW SmartPoints: ~3–4 per serving, estimated
Best served: Thoroughly chilled
Storage: Refrigerate and enjoy within 2–3 days
This No-Bake Chocolate Brownie Cool Whip Dessert is creamy, fluffy, chocolate-rich, portion-friendly, and easy enough to make whenever a chocolate craving hits.