Ingredients
For the Vegetable Filling
- Zucchini
- Carrots
- Green cabbage
- Onion
- Garlic
- Fresh dill
- Fresh parsley
- Salt
- Black pepper
- Paprika
- Olive oil
For the Creamy Sauce
- Eggs
- Plain yogurt
- Milk
- Vegetable oil
- Melted butter
- Salt
For the Pastry
- Phyllo pastry sheets
- Melted butter
- Vegetable oil
For the Topping
- Egg yolk
- Yogurt
- Sesame seeds
- Fresh dill
- Black pepper
Directions
1. Prepare the Vegetables
Begin by washing the zucchini, carrots, cabbage, fresh dill, and parsley thoroughly under cool running water. Pat the vegetables dry with clean kitchen towels.
The vegetables should be relatively dry before cooking because excess moisture can make the pastry soggy. This is especially important for zucchini, which naturally contains a considerable amount of water.
Trim the ends of the zucchini and carrots. Remove any damaged outer leaves from the cabbage and peel the onion and garlic.
2. Grate the Zucchini and Carrots
Using the large holes of a box grater, grate the zucchini and carrots into separate bowls.
Do not grate the zucchini too finely because very fine pieces can release moisture more quickly during cooking. Medium-sized shreds are ideal because they maintain some texture inside the finished börek.
Once grated, lightly sprinkle the zucchini with a small amount of salt and leave it for approximately 10 minutes. The salt will draw out excess moisture.
3. Remove Excess Moisture from the Zucchini
After the zucchini has rested, place it in a clean kitchen towel or several layers of cheesecloth.
Gather the towel around the zucchini and squeeze firmly over the sink. Continue squeezing until you have removed as much liquid as reasonably possible.
This step is extremely important. If the zucchini remains very wet, the filling can release liquid during baking and prevent the pastry from becoming crisp and golden.
4. Shred the Cabbage
Thinly shred the cabbage with a sharp knife or food processor.
The cabbage should be cut into thin strands so that it cooks evenly and blends naturally with the zucchini and carrots.
If the cabbage pieces are very large or thick, they may remain crunchy while the pastry becomes fully baked. Thin shredding gives the filling a softer, more cohesive texture.
5. Prepare the Aromatics and Herbs
Finely chop the onion and garlic.
Next, finely chop the fresh dill and parsley. Fresh herbs are highly recommended because they provide a bright flavor that balances the richness of the pastry and creamy sauce.
Reserve a small amount of dill and parsley for the topping if desired.
6. Cook the Onion and Garlic
Heat a large skillet over medium heat and add the olive oil.
Add the chopped onion and cook for approximately 4–5 minutes, stirring occasionally, until the onion becomes soft and translucent.
Add the minced garlic and cook for another 30–60 seconds. Avoid browning the garlic too heavily because burnt garlic can give the entire filling a bitter flavor.
7. Add the Carrots and Cabbage
Add the shredded carrots and cabbage to the skillet.
Cook the vegetables over medium heat, stirring regularly, until they begin to soften. This usually takes approximately 6–8 minutes.
The goal is not to completely cook the vegetables until they become mushy. They should be softened enough to combine easily with the other ingredients while still retaining some texture.
8. Add the Zucchini
Add the squeezed zucchini to the skillet with the carrots and cabbage.
Continue cooking for approximately 5–7 minutes, stirring frequently.
The vegetables will release some additional moisture as they cook. Continue cooking until most of that moisture has evaporated.
The filling should look moist but not watery. If liquid is visible at the bottom of the skillet, continue cooking for another few minutes.
9. Season the Vegetable Filling
Season the vegetables with salt, black pepper, and paprika.
Stir thoroughly so that the seasoning is distributed evenly throughout the mixture.
You can adjust the seasonings according to your taste. A small amount of chili flakes can also be added if you prefer a mildly spicy börek.
10. Add the Fresh Herbs
Remove the skillet from the heat and stir in the chopped dill and parsley.
Mix well so that the herbs are distributed throughout the vegetables.
Adding the fresh herbs after cooking preserves more of their flavor and keeps the filling bright and aromatic.
Taste the filling and adjust the seasoning if necessary. Remember that the pastry and sauce will also contain some salt, so avoid oversalting the filling.
11. Cool the Vegetable Filling
Transfer the cooked vegetable mixture to a large bowl or shallow tray.
Spread it out slightly so that it cools more quickly.
Allow the filling to cool until it is warm or close to room temperature. Do not place very hot filling directly onto delicate phyllo pastry because the heat can soften the pastry and make it difficult to layer.
For the best results, the filling should be completely cool before assembly.
12. Prepare the Creamy Sauce
While the vegetable filling cools, prepare the sauce.
In a medium bowl, whisk together the eggs, plain yogurt, milk, vegetable oil, melted butter, and a small amount of salt.
Whisk until the mixture is smooth and creamy, with no visible streaks of egg or large pieces of yogurt.
This sauce is essential because it keeps the interior layers tender while helping the exposed pastry become beautifully golden and crisp.
13. Prepare the Baking Dish
Preheat the oven to 375°F (190°C).
Grease a large rectangular baking dish with melted butter or vegetable oil. A dish approximately 9 × 13 inches works well for this recipe.
Make sure the bottom and corners are lightly coated so that the pastry does not stick after baking.
14. Prepare the Phyllo Pastry
Carefully remove the phyllo pastry from its packaging.
Keep the unused sheets covered with a slightly damp, clean kitchen towel while you work. Phyllo dries out quickly when exposed to air, and dry sheets can crack or break.
Do not worry if a sheet tears slightly. Small tears can easily be covered by another sheet and will not usually affect the final result.
15. Create the First Pastry Layer
Place one sheet of phyllo pastry into the prepared baking dish.
Allow some of the edges to extend slightly over the sides of the dish.
Brush the sheet lightly with the creamy sauce or a mixture of melted butter and oil. Place another sheet on top and brush again.
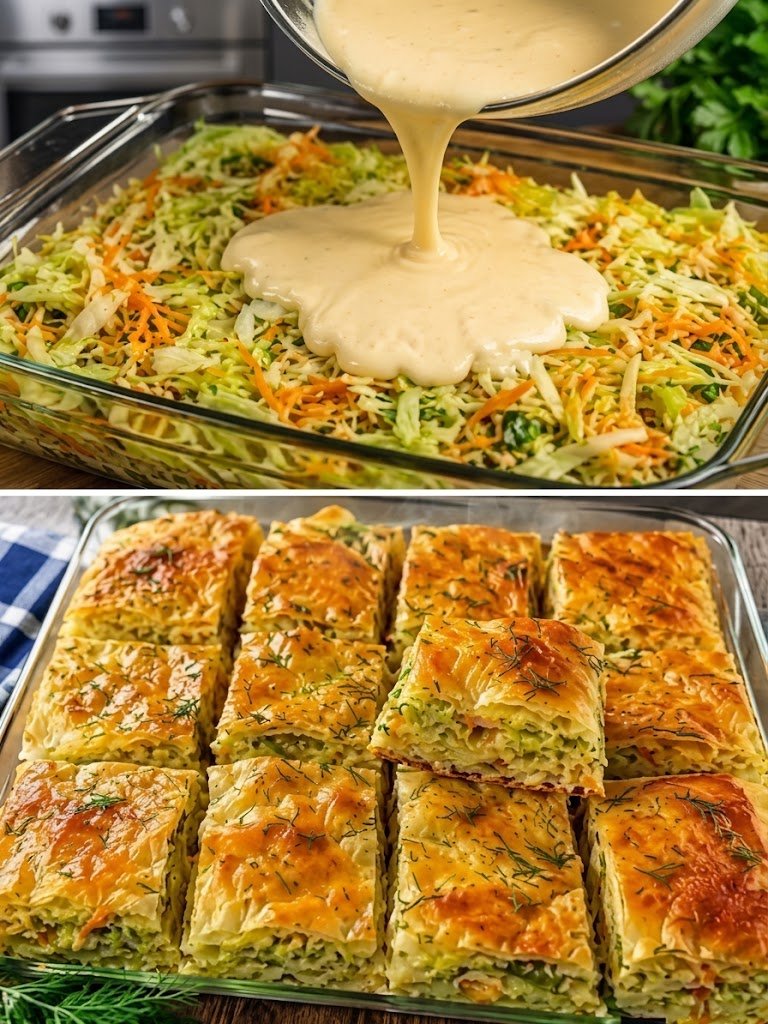
Continue layering several sheets in this way. The bottom layers provide structure for the vegetable filling and help create the crisp golden base seen in the finished dish.
16. Add the First Layer of Vegetable Filling
Spread approximately half of the cooled vegetable mixture evenly over the pastry.
Use the back of a spoon or spatula to distribute the filling from corner to corner.
Do not press the vegetables down too firmly. A light, even layer allows the pastry to remain airy while the filling stays tender.
17. Add More Phyllo and Sauce
Place another sheet of phyllo over the vegetables.
Brush it generously but evenly with the creamy sauce.
Repeat with additional phyllo sheets, brushing each one before adding the next.
These middle layers create the characteristic flaky structure of the börek and prevent the filling from becoming concentrated in one area.
18. Add the Remaining Vegetable Filling
Spread the remaining vegetable filling evenly over the second pastry layer.
Make sure the filling reaches close to the edges without being packed too tightly.
If the filling appears particularly wet, give it one final stir before adding it to the pastry. Excess moisture is the main enemy of crisp phyllo.
19. Finish with the Remaining Phyllo
Continue layering the remaining phyllo sheets over the vegetable filling.
Brush each sheet with the creamy sauce as you work.
The final several sheets should be arranged carefully because they will form the visible golden top of the börek.
Brush the final sheet generously enough to encourage browning, but avoid flooding it with sauce.
20. Tuck in the Edges
If the pastry sheets extend significantly over the sides of the baking dish, fold the excess pastry inward.
Tuck the edges neatly around the sides of the börek.
Brush the folded edges with the remaining sauce. This helps them bake into a crisp, golden border rather than becoming dry.
21. Prepare the Golden Topping
In a small bowl, combine the egg yolk with a spoonful of yogurt.
Whisk until completely smooth.
Brush this mixture gently over the top of the assembled pastry.
The egg-yolk topping gives the börek its attractive deep golden color and helps create the glossy surface visible after baking.
22. Add the Final Garnish
Sprinkle sesame seeds over the top if desired.
You can also add a small amount of finely chopped dill or parsley for color.
Avoid adding too much garnish because the golden pastry should remain the main visual feature.
23. Cut Before Baking
Using a sharp knife, carefully score the assembled börek into portions before placing it in the oven.
You can cut it into rectangles, squares, or long strips depending on the presentation you prefer.
Do not necessarily cut all the way through the bottom layers. Deep scoring is enough to make serving easier later.
Pre-cutting also helps prevent the delicate baked pastry from cracking when you try to portion it after baking.
24. Bake the Börek
Place the baking dish in the preheated 375°F (190°C) oven.
Bake for approximately 35–45 minutes, or until the top is deeply golden, crisp, and visibly flaky.
The exact baking time will depend on the size and depth of your baking dish and the thickness of the pastry layers.
If the top begins browning too quickly while the center still needs more time, loosely cover the dish with aluminum foil and continue baking.
25. Check the Center
Before removing the börek from the oven, check the center carefully.
The top should be golden brown, and the pastry should look crisp rather than pale or soft.
If you inserted a knife into one of the scored sections, the interior should feel hot and the pastry layers should appear cooked rather than doughy.
If the center still looks wet, continue baking for another 5–10 minutes.
26. Rest Before Serving
Remove the finished börek from the oven and place the baking dish on a heat-resistant surface.
Allow it to rest for at least 15–20 minutes before serving.
This resting time allows the vegetable filling to settle and gives the pastry time to firm up.
Cutting immediately while the filling is extremely hot can cause the layers to slide apart and release more moisture.
27. Cut and Serve
Follow the original scoring lines and cut the börek into individual portions.
Use a sharp knife or spatula to lift each piece carefully from the baking dish.
The finished pieces should have a crisp, golden exterior with multiple flaky layers surrounding a tender vegetable filling.
Serve warm or slightly cooled.
28. How to Keep the Börek Crisp
For the crispiest texture, avoid covering the hot börek immediately after removing it from the oven.
Steam trapped beneath a lid or plastic wrap can soften the phyllo.
Allow the börek to cool uncovered for at least 15–20 minutes before storing any leftovers.
If reheating later, use an oven or air fryer rather than a microwave whenever possible.
29. Reheating Instructions
To reheat leftover portions, place them on a baking sheet and heat at approximately 350°F (175°C) for 10–15 minutes.
The exact time depends on the size of the pieces and whether they are refrigerated.
An air fryer also works extremely well. Heat individual pieces at approximately 350°F (175°C) for 5–8 minutes until hot and crisp.
Avoid reheating the pastry for too long because excessive heat can dry out the vegetable filling.
30. Storage Instructions
Allow leftovers to cool completely before storing.
Place the pieces in an airtight container and refrigerate for up to 3–4 days.
For the best texture, place parchment paper between layers if stacking several pieces.
The pastry may soften slightly during refrigeration, but reheating it in the oven will restore much of its original crispness.
31. Make-Ahead Instructions
The vegetable filling can be prepared a day ahead.
After cooking, cool it completely and store it in a covered container in the refrigerator.
When ready to assemble, allow the filling to cool slightly while preparing the phyllo and sauce.
You can also assemble the börek several hours before baking. Keep it covered and refrigerated, then brush the final topping over the surface immediately before baking.
32. Important Tips for Success
The most important technique in this recipe is controlling moisture.
Zucchini, cabbage, and carrots all contain water, so the vegetables should be cooked until excess moisture evaporates before being placed inside the pastry.
Do not skip squeezing the zucchini. This simple step can make the difference between crisp börek and soggy börek.
Keep the phyllo covered while assembling. If the sheets dry out, they become brittle and can crack excessively.
Brush the pastry evenly rather than soaking it. Too much liquid can prevent the layers from becoming crisp.
33. How to Make the Filling More Flavorful
For a stronger savory flavor, add a small amount of dried oregano, thyme, or red pepper flakes to the vegetable mixture.
A little grated cheese can also be added if desired. Feta, mozzarella, or a mild white cheese can complement the vegetables particularly well.
If using cheese, reduce the amount of salt because many cheeses already contain significant amounts of sodium.
Fresh dill is particularly well suited to this recipe and gives the filling a fresh, aromatic flavor that pairs beautifully with zucchini and cabbage.
34. How to Get Extra-Crispy Layers
Use a combination of melted butter and vegetable oil when brushing the phyllo.
Butter provides rich flavor and encourages browning, while oil helps keep the layers crisp.
Make sure the oven is completely preheated before baking.
Do not overcrowd the oven with other dishes because this can interfere with airflow and make it harder for the pastry to brown evenly.
If your oven has a fan/convection setting, you can use it, but reduce the temperature slightly and monitor the pastry carefully because convection can brown the top faster.
35. Serving Suggestions
Serve the vegetable börek warm with plain yogurt or a simple garlic-yogurt sauce.
A fresh cucumber and tomato salad makes an excellent accompaniment and provides a refreshing contrast to the rich pastry.
You can also serve it as part of a larger breakfast or brunch spread with olives, boiled eggs, fresh vegetables, cheese, and herbs.
For lunch or dinner, pair it with a bowl of soup or a green salad.
36. Recipe Notes
This vegetable börek is flexible and can be adapted according to the vegetables available in your kitchen.
You can add finely shredded bell peppers, spinach, leeks, mushrooms, or additional herbs.
The important thing is to cook vegetables with high moisture content before adding them to the pastry.
For a richer version, add cheese between the vegetable layers.
For a lighter version, use less butter and rely primarily on olive oil or vegetable oil for brushing the pastry.
37. Final Result
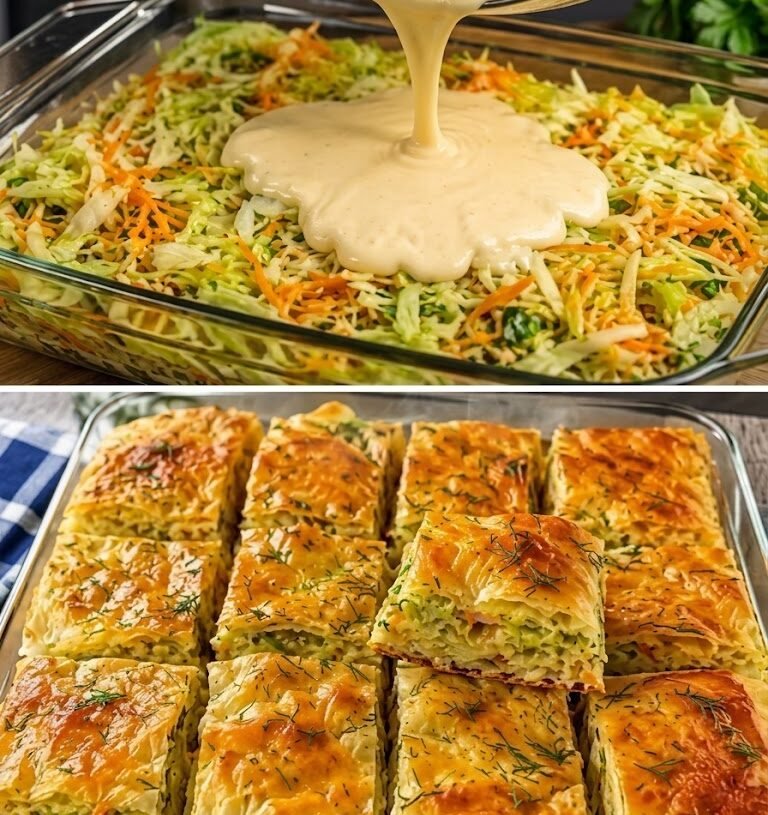
The finished börek should be beautifully golden on top, crisp around the edges, and flaky throughout.
Inside, the vegetables should be tender but not watery, with the flavors of zucchini, cabbage, carrots, onion, garlic, and fresh herbs blending together.
The creamy sauce helps bind the layers while giving the interior a soft and rich texture.
When cut into portions, each piece should hold its shape while still revealing delicate layers of pastry and colorful vegetables.
This makes the dish ideal for family meals, brunches, parties, holidays, potlucks, and make-ahead entertaining.
Recipe Summary
This Golden Vegetable Börek combines crisp layers of phyllo pastry with a flavorful filling of zucchini, carrots, cabbage, onion, garlic, dill, and parsley. A creamy egg-and-yogurt sauce is layered throughout the pastry, while an egg-yolk topping creates the deeply golden finish.
The secret to successful börek is simple: remove as much moisture as possible from the vegetables, keep the phyllo covered while assembling, use enough fat to separate the pastry layers, and bake until the entire surface is deeply golden and crisp.
Serve it warm with yogurt, salad, or your favorite fresh vegetables for a satisfying savory meal.