
Description
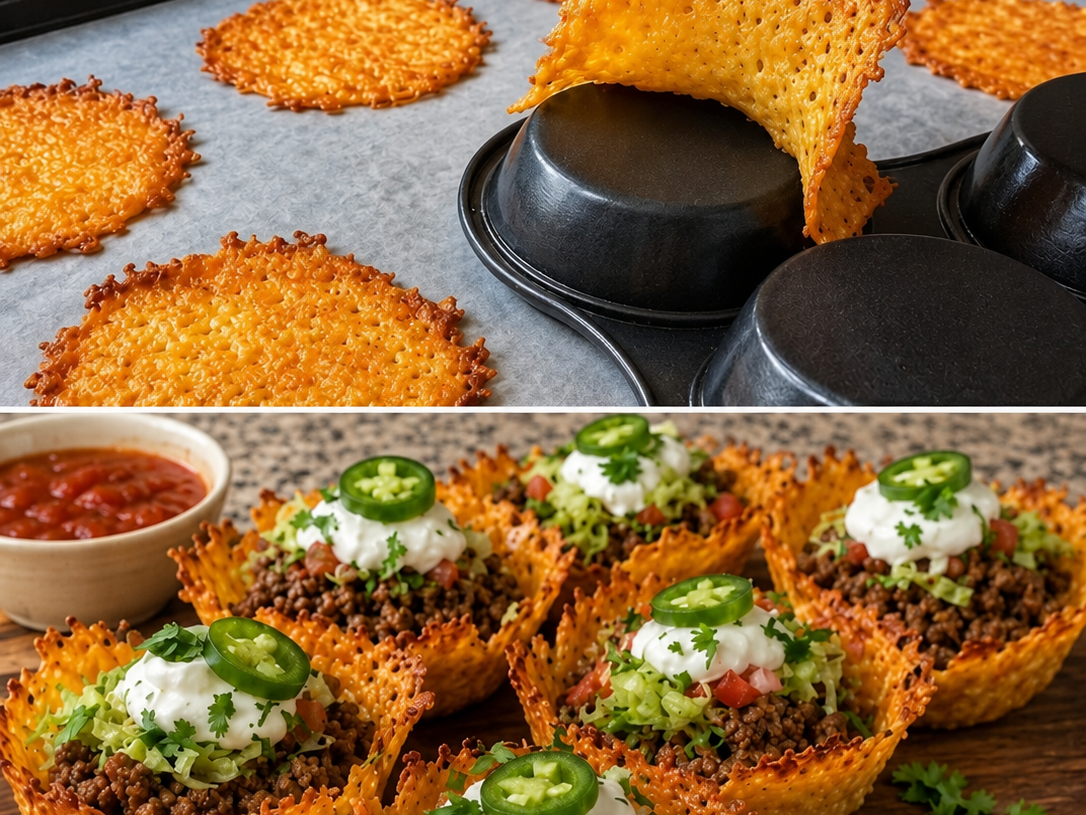
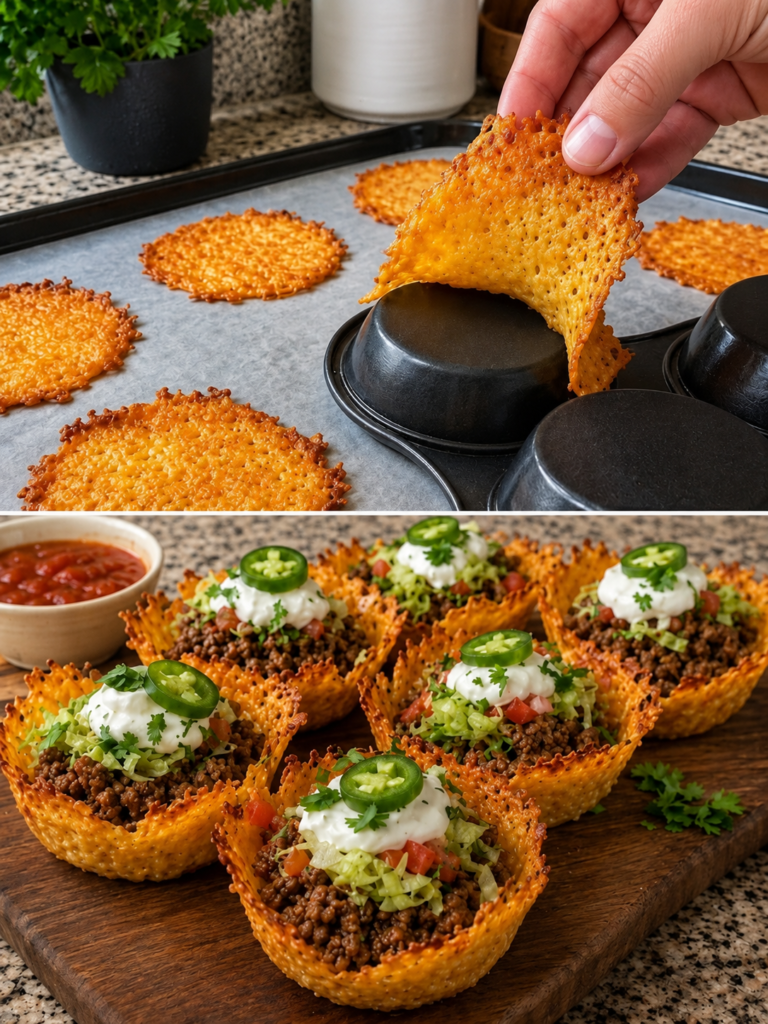
These Zero Carb Taco Cups turn melted cheese into crispy, golden taco shells filled with juicy seasoned ground beef and fresh toppings.
They are packed with protein and deliver classic taco flavor without traditional tortillas or flour-based shells.
Perfect for anyone looking for a fun high-protein, low-carb meal that is easy to customize.
Note: The cheese shells themselves can be essentially carb-free depending on the cheese brand, but toppings such as lettuce, tomato, salsa, and sour cream add small amounts of carbohydrates. Always check nutrition labels for your specific ingredients.
Can These Zero Carb Taco Cups Support Weight Loss Goals?
They can fit into a weight-conscious eating pattern when portions and total daily calories are considered. Ground beef and cheese provide substantial protein, which can make the meal satisfying and filling. Replacing traditional flour or corn tortillas with cheese shells also reduces the carbohydrate contribution of the meal. For a lighter version, use lean ground beef and control the amount of cheese and calorie-dense toppings.
Do Zero Carb Taco Cups Fit a High-Protein Lifestyle?
Yes, these taco cups are naturally high in protein because they combine seasoned ground beef with cheese shells.
The cheese provides the crispy shell while the beef supplies most of the protein in the filling.
Using lettuce, jalapeño, cilantro, and a small amount of tomato adds freshness without significantly increasing carbs.
Depending on portion size and ingredients, each serving can provide 40+ grams of protein.
Why This Recipe Is Special
- Ultra-low-carb: Cheese replaces conventional taco shells.
- High-protein: Seasoned ground beef and cheese create a satisfying protein-rich meal.
- Keto-friendly: No flour tortillas or traditional taco shells are required.
- Crispy and crunchy: Baked cheese develops beautifully browned, lacy edges.
- Customizable: Add your favorite low-carb taco toppings to every cup.
My Personal Experience
- The cheese shells are the star.
Baking the cheese until the edges become deeply golden gives each cup an irresistible crispy texture. - The seasoned beef makes them satisfying.
A flavorful taco seasoning blend turns simple ground beef into a savory filling that pairs perfectly with the cheese. - Shaping them while warm is important.
The cheese needs to be flexible enough to mold before it cools and becomes crisp. - Fresh toppings balance the richness.
Lettuce, jalapeño, cilantro, and a little sour cream add freshness to the rich beef and cheese. - They are excellent for portioned meals.
Preparing individual taco cups makes serving simple and gives everyone their own crispy taco bowl.
Perfect For
- Weeknight dinners
- High-protein meal prep
- Low-carb and keto-style meal plans
- Game-day snacks
- Family taco nights
- Quick lunches
- Parties and appetizers
- Mexican-inspired dinners
Why You’ll Love This Recipe
- No traditional taco shells: The cheese creates the shell without flour or corn tortillas.
- Crispy edges: Golden-brown cheese provides plenty of crunch.
- Protein-packed filling: Ground beef makes every cup hearty and satisfying.
- Easy to customize: Add jalapeños, avocado, sour cream, lettuce, or cilantro.
- Fun to serve: Individual taco cups look impressive on a platter.
- Quick preparation: The cheese shells and beef can be prepared in a short amount of time.
Common Mistakes to Avoid
- Overbaking the cheese: Cheese that becomes too dark can turn bitter and difficult to shape.
- Shaping the shells too late: Letting the cheese cool completely makes it brittle instead of flexible.
- Using watery toppings: Excess salsa or tomatoes can quickly soften crispy cheese shells.
- Overfilling the cups: Too much beef and topping can make the shells difficult to pick up and eat.
Required Equipment
- Large baking sheet — provides a flat surface for evenly baking the cheese.
- Parchment paper or silicone baking mat — helps prevent the cheese from sticking.
- Non-stick skillet — browns the ground beef evenly with minimal sticking.
- Inverted muffin tin — provides an easy structure for shaping the warm cheese shells.
- Spatula — helps lift and transfer the warm cheese rounds.
- Instant-read thermometer — confirms the ground beef reaches a safe internal temperature.
Storage Instructions
Cheese shells: Store completely cooled shells in an airtight container lined with a paper towel for up to 2–3 days. Keep the shells separate from wet toppings to preserve their crunch.
Beef filling: Refrigerate cooked beef in a separate airtight container for 3–4 days.
Freezer: The seasoned beef can be frozen for up to 2–3 months in a freezer-safe container. Cheese shells are best made fresh because freezing can affect their crisp texture.
Reheating: Reheat the beef in a skillet over medium-low heat or microwave until hot. Re-crisp cheese shells briefly in a 350°F (175°C) oven if necessary.
For high-protein meal prep, keep the beef and cheese shells separate until serving.
Recipe Details
- Preparation Time: 15 minutes
- Cooking Time: 20 minutes
- Total Time: 35 minutes
- Servings: 4 servings, 2 taco cups per serving
- Best Season: All-season
- Total Calories: Approximately 540 calories per serving
Short 3-Line Description
Crispy baked cheese shells are filled with juicy, taco-seasoned ground beef and fresh low-carb toppings.
These fun taco cups skip traditional tortillas while delivering plenty of protein and savory flavor.
They’re an easy low-carb, keto-friendly option for dinner, meal prep, or snacking.
📝 Ingredients
For the Cheese Taco Cups
- 12 oz (340 g) shredded cheddar cheese — freshly shredded melts well
- 1/2 tsp chili powder
- 1/4 tsp smoked paprika
- 1/4 tsp ground cumin
- 1/4 tsp garlic powder
For the Taco Beef
- 1 lb (454 g) lean ground beef, 90% lean preferred
- 1 tsp chili powder
- 1 tsp ground cumin
- 1/2 tsp smoked paprika
- 1/2 tsp garlic powder
- 1/2 tsp onion powder
- 1/4 tsp salt, or to taste
- 1/4 tsp black pepper
- 1 tbsp water
Optional Low-Carb Toppings
- 1 cup shredded romaine lettuce
- 1/2 cup diced tomato
- 1/3 cup sour cream
- 1 small jalapeño, thinly sliced
- 2 tbsp chopped fresh cilantro
- 1/4 cup shredded cheddar cheese
- 1/4 cup salsa, preferably no-added-sugar
Ingredient note: For the lowest possible carbohydrate count, choose cheese, salsa, and taco seasonings without added sugar and check the nutrition labels.
Directions
1. Preheat the oven
Preheat your oven to 375°F (190°C).
Line a large baking sheet with parchment paper or a silicone baking mat.
2. Make the cheese rounds
Divide the shredded cheddar into 8 equal portions and place them on the prepared baking sheet, leaving at least 2 inches between each portion.
Sprinkle lightly with chili powder, smoked paprika, cumin, and garlic powder.
3. Bake the cheese
Bake at 375°F (190°C) for 6–9 minutes.
Watch closely during the final minutes.
Visual cue: The centers should look melted and bubbly while the edges become golden brown and slightly crisp.
4. Shape the taco cups
Allow the cheese rounds to cool for approximately 30–60 seconds, just until they are firm enough to handle but still flexible.
Carefully lift each round with a spatula and drape it over the outside of an inverted muffin tin cup.
Gently press the sides around the cup to create a bowl shape.
Let cool for 3–5 minutes until completely crisp.
High-protein cooking tip: Work with a few cheese rounds at a time because they become difficult to shape once fully cooled.
5. Brown the beef
While the cheese is baking, heat a non-stick skillet over medium-high heat.
Add the ground beef and cook for approximately 6–8 minutes, breaking it apart with a spatula.
Cook until browned throughout.
6. Season the filling
Reduce the heat to medium.
Add chili powder, cumin, smoked paprika, garlic powder, onion powder, salt, black pepper, and water.
Cook for another 2–3 minutes, stirring frequently.
Texture cue: The beef should be moist and well coated with seasoning but not watery.
7. Check the beef
Cook the ground beef to an internal temperature of 160°F (71°C).
Remove from the heat and allow it to rest for about 2 minutes.
8. Fill the taco cups
Place approximately 1/4 cup seasoned beef into each crisp cheese cup.
Top with lettuce, tomato, sour cream, jalapeño, cilantro, and a small amount of salsa as desired.
Serving tip: Add wet toppings immediately before serving to help keep the cheese shells crisp.
Nutrition Facts
Per Serving — Approximate
Based on 2 taco cups per serving and the main ingredients, before optional toppings:
| Nutrient | Approximate Amount |
|---|---|
| Calories | ~540 kcal |
| Fat | ~38 g |
| Cholesterol | ~145 mg |
| Sodium | ~850 mg |
| Potassium | ~400 mg |
| Total Carbohydrates | ~3 g |
| Fiber | ~0 g |
| Net Carbs | ~3 g |
| Sugars | ~1 g |
| Protein | ~45 g |
| Calcium | ~550 mg |
Nutrition values are approximate and vary according to the ground beef, cheese, seasonings, and toppings used. Optional toppings will increase the carbohydrate and calorie totals.
Notes
- Storage: Keep crispy cheese shells and beef filling in separate airtight containers.
- Reheating: Reheat beef separately; briefly warm cheese shells in a 350°F oven to restore crispness.
- Allergy: Contains dairy. Check seasoning and salsa labels for additional allergens.
- Flavor boost: Add fresh lime juice, cilantro, jalapeño, or a pinch of chipotle powder immediately before serving.
- Extra crunch: Add finely shredded lettuce just before serving rather than during storage.
- Lower-carb topping: Use sour cream, shredded cheese, jalapeño, cilantro, and avocado while limiting higher-carb salsa and tomatoes.
- Zero-carb clarification: The plain cheese shell can be extremely low in carbohydrate, but the completed taco cups are not necessarily literally zero-carb once beef seasonings and toppings are included.
Frequently Asked Questions
1. Are Zero Carb Taco Cups really zero-carb?
The cheese shells can contain virtually no carbohydrates depending on the cheese, but the complete recipe may contain small amounts from seasonings and toppings.
2. Can I use ground turkey instead of beef?
Yes, lean ground turkey works well and creates a lighter, high-protein filling.
3. How do I keep the cheese cups crispy?
Keep the shells completely separate from wet ingredients and fill them immediately before serving.
4. Can I make the cheese shells ahead of time?
Yes, bake and cool them completely, then store them in an airtight container for about 2–3 days.
5. What cheese works best for taco cups?
Cheddar provides excellent flavor and browning, while Monterey Jack, Colby Jack, or a cheddar-Jack blend can also work.
6. Can I make these suitable for meal prep?
Yes, prepare the beef and cheese shells separately and assemble each serving just before eating to preserve the crunch.