
Description
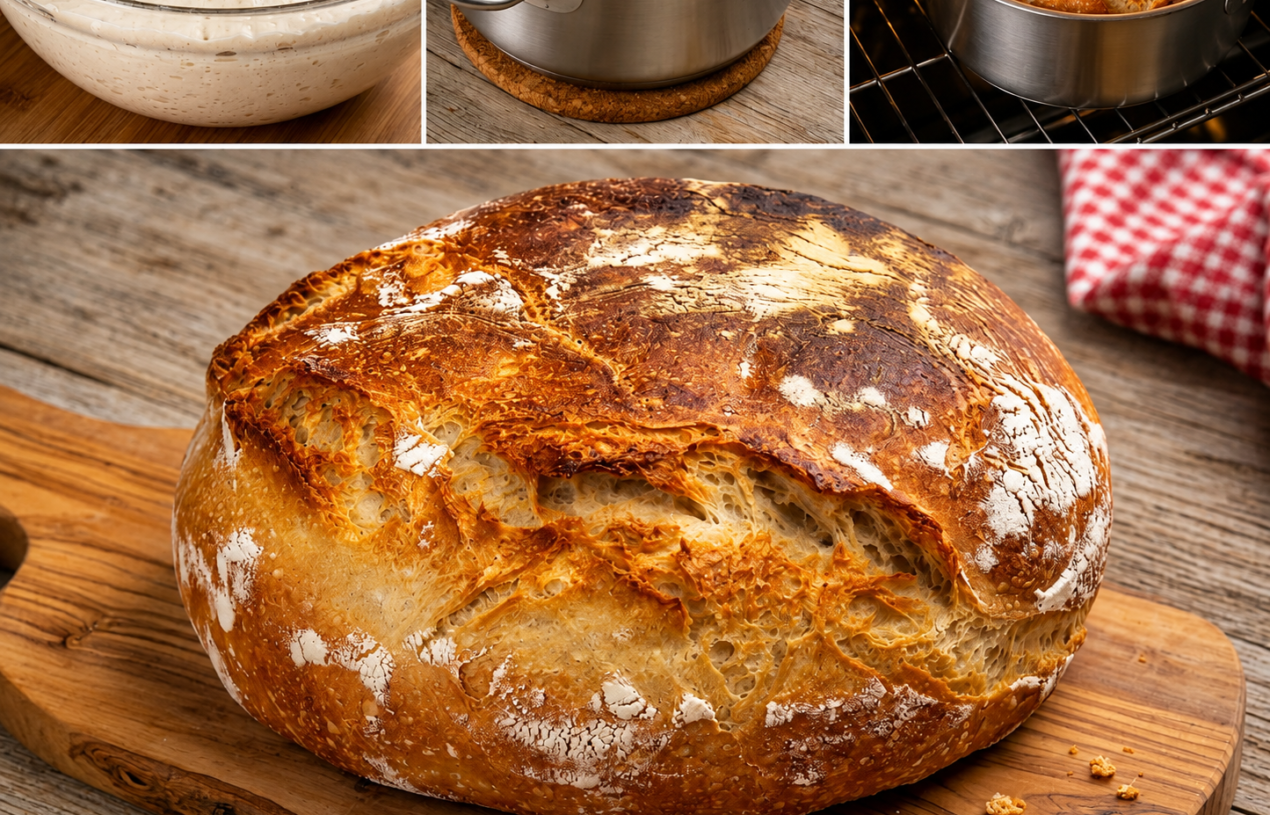
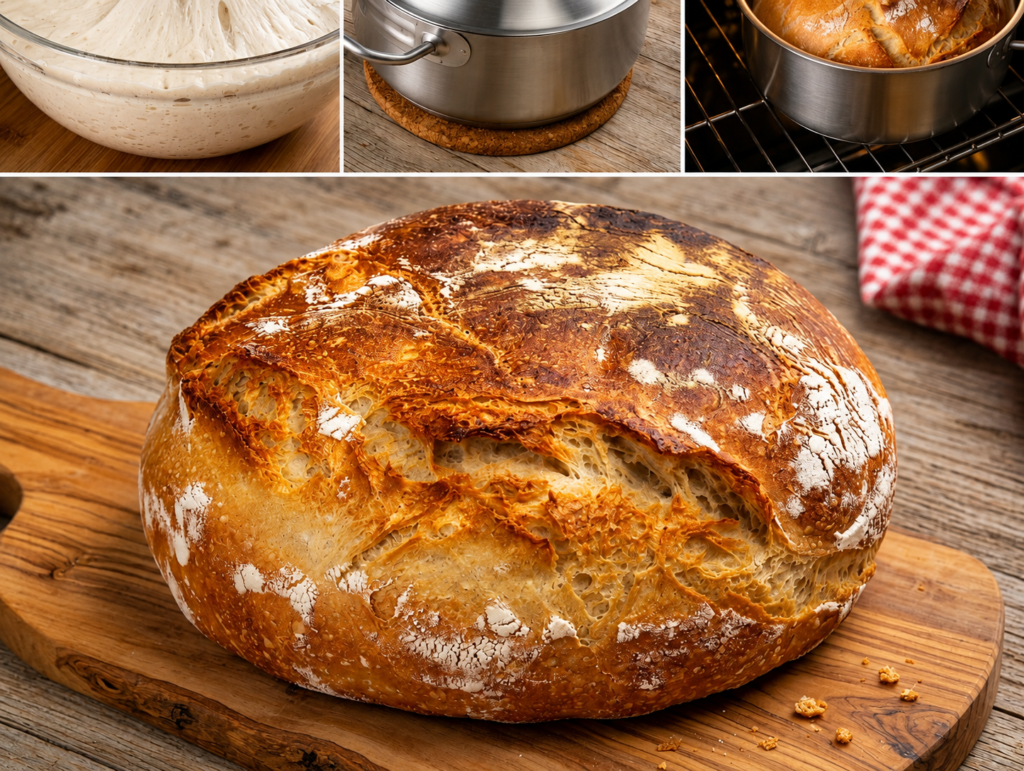
This wholesome sourdough bread has a beautifully crisp, golden crust and a soft, chewy center with the signature tang of natural fermentation. Whole-wheat flour and vital wheat gluten add extra protein and fiber, making it more suitable for a high-protein, diabetes-conscious eating pattern than traditional white bread.
It is important to note that this bread is not carb-free and is not automatically suitable for every person with diabetes; portion size and individual carbohydrate needs still matter.
Short 3-Line Description
Golden and crusty outside, soft and chewy inside, this homemade sourdough is full of rustic flavor.
Whole-wheat flour and added gluten provide more protein and fiber than conventional white bread.
Enjoy a measured portion alongside eggs, cottage cheese, chicken, or other protein-rich foods.
Can This Sourdough Bread Support Weight Loss Goals?
It can fit into a weight-management eating pattern when portions are appropriate. The combination of whole-wheat flour, fiber, fermentation, and additional protein can make each serving more satisfying than a highly refined bread. However, sourdough bread still provides substantial carbohydrates and calories, so portion size and the toppings served with it matter.
Does Sourdough Bread Fit a High-Protein Lifestyle?
Yes, this version is designed to provide more protein than ordinary sourdough by using vital wheat gluten alongside whole-wheat and bread flour.
Its net carbs are still moderate rather than extremely low, so it is better described as higher-protein and diabetes-conscious, not keto.
Pairing one slice with eggs, Greek yogurt, cottage cheese, turkey, or another protein source can create a more balanced meal.
The exact nutrition will vary according to flour, starter, slice size, and ingredients used.
Why This Recipe Is Special
- Higher-protein: Vital wheat gluten increases protein without requiring large amounts of extra flour.
- Whole-wheat goodness: Whole-wheat flour contributes fiber and a deeper, nutty flavor.
- Naturally fermented: A long sourdough fermentation develops the characteristic tang and chewy texture.
- Diabetes-conscious: No added sugar is needed, although the bread still contains carbohydrates.
- Homemade & versatile: Perfect for breakfast toast, sandwiches, or alongside protein-rich meals.
My Personal Experience
- The crust is my favorite part.
The long fermentation and hot baking create a beautifully browned, crisp exterior while the center stays chewy. - It has a satisfying sourdough tang.
The extended fermentation gives the loaf a deeper flavor than quick yeast breads. - The added protein works well.
Vital wheat gluten helps create a pleasantly chewy crumb while increasing the protein content. - It slices beautifully once cooled.
Allowing the loaf to cool completely makes it easier to cut into neat slices without crushing the crumb.
Perfect For
This sourdough is ideal for breakfast, meal prep, sandwiches, packed lunches, avocado toast, or alongside eggs and other protein-rich foods. It can also work in a diabetes-conscious meal plan when carbohydrate portions are accounted for. For a lower-carb meal, pair one slice with eggs, lean meat, cottage cheese, or vegetables rather than adding sugary spreads.
Why You’ll Love This Recipe
- Crispy, bakery-style crust
High-heat baking produces a gorgeous golden exterior.
The inside remains soft, chewy, and flavorful. - Naturally tangy flavor
Sourdough starter provides a pleasant fermented taste.
A longer fermentation allows the flavor to develop naturally. - More protein than ordinary sourdough
Whole-wheat flour and vital wheat gluten increase protein.
It works especially well with protein-rich breakfast toppings. - No added sugar
The dough does not require table sugar or sweeteners.
This makes it easier to incorporate into a diabetes-conscious eating pattern.
Common Mistakes to Avoid
- Using an inactive starter — A weak starter can result in a dense loaf with little rise.
- Adding too much flour during shaping — Excess flour can make the dough dry and heavy.
- Under-fermenting the dough — Look for noticeable expansion, bubbles, and a lighter, airier texture.
- Cutting immediately after baking — The crumb needs time to finish setting; slicing too early can make it gummy.
Required Equipment
- Large mixing bowl — Gives the dough plenty of room to ferment and expand.
- Kitchen scale — Provides accurate flour and water measurements for consistent sourdough.
- Dough scraper — Makes folding and shaping the sticky dough easier.
- Dutch oven — Traps steam for a crisp crust and excellent oven spring.
- Parchment paper — Makes transferring the shaped loaf into the Dutch oven easier.
- Sharp bread lame or knife — Allows controlled scoring before baking.
- Wire cooling rack — Prevents condensation from softening the crust.
Storage Instructions
Room temperature: Once completely cool, store the loaf in a breathable bread bag or paper bag for about 2–3 days.
Refrigerator: For longer storage, place sliced bread in an airtight container or sealed bag for up to 5–7 days, although refrigeration may make the bread less soft.
Freezer: Slice the cooled loaf and freeze individual slices in a freezer-safe bag for up to 2–3 months. Separate slices with parchment so they can be removed individually.
For the best texture, toast frozen slices directly from the freezer. The protein and carbohydrate content remains essentially the same, but portion size should still be considered.
Recipe Details
- Preparation Time: 30 minutes active
- Fermentation Time: 8–12 hours
- Cooking Time: 40–45 minutes
- Total Time: Approximately 9–13 hours
- Servings: 12 slices
- Best Season: All-season
- Calories: Approximately 165 calories per slice
- Difficulty: Intermediate
Nutrition is an approximate estimate and will vary depending on the flour, starter, slice thickness, and brands used.
📝 Ingredients
Sourdough Dough
- 100 g active sourdough starter, 100% hydration
- 350 g whole-wheat flour
- 150 g bread flour
- 50 g vital wheat gluten
- 360 g water, room temperature
- 10 g fine sea salt
Note: Use a lively, recently fed starter that is bubbly and has visibly risen. Vital wheat gluten is used to increase the protein content and strengthen the dough.
Directions
1. Mix the dough
In a large bowl, combine the 100 g active sourdough starter and 360 g water over low/no heat. Stir until mostly dissolved.
Add the whole-wheat flour, bread flour, and vital wheat gluten. Mix until no dry flour remains.
The dough should look rough and shaggy rather than smooth.
2. Rest — 30 minutes
Cover and let the dough rest at room temperature for 30 minutes.
This rest allows the flour to hydrate and makes the dough easier to develop.
3. Add salt
Sprinkle in the 10 g salt and work it thoroughly into the dough using wet hands.
The dough should become cohesive and slightly elastic.
4. Stretch and fold — about 2 hours
For the first 2 hours, perform a set of stretch-and-folds every 30 minutes.
Lift one side of the dough, stretch gently, and fold it over itself. Rotate the bowl and repeat several times.
By the final fold, the dough should feel noticeably stronger and smoother.
High-protein tip: Avoid aggressively adding flour while folding; the gluten structure is what gives this loaf its strength.
5. Bulk fermentation — 4–6 hours
Cover the bowl and leave it at comfortable room temperature for approximately 4–6 hours, depending on starter activity and room temperature.
The dough should become noticeably puffier, develop bubbles, and increase in volume by roughly 50–75%.
Do not rely solely on the clock—the dough’s appearance is the best indicator.
6. Shape
Lightly flour the work surface and gently turn out the dough.
Shape it into a tight round without aggressively pressing out all the gas.
Place it seam-side up in a well-floured banneton or lined bowl.
7. Final proof — 1–2 hours
Cover and allow the shaped dough to proof for approximately 1–2 hours at room temperature.
A gently pressed area should slowly spring back rather than immediately returning to its original position.
8. Preheat the oven
Place a Dutch oven inside and preheat the oven to 475°F (245°C) for at least 30 minutes.
The Dutch oven needs to be thoroughly hot for strong oven spring.
9. Score and bake
Carefully transfer the dough onto parchment.
Score the top with a sharp lame or knife.
Place it into the hot Dutch oven and bake covered at 450°F (232°C) for 25 minutes.
10. Finish baking
Remove the lid and reduce the temperature to 425°F (220°C).
Bake for another 15–20 minutes, until the crust is deeply golden brown.
The loaf should sound hollow when tapped underneath.
11. Cool completely
Transfer to a wire rack and cool for at least 1–2 hours before slicing.
This allows the interior crumb to finish setting and prevents a gummy texture.
Nutrition Facts — Per Slice, Approximate
| Nutrient | Amount |
|---|---|
| Calories | ~165 kcal |
| Total Fat | ~1.5 g |
| Cholesterol | ~0 mg |
| Sodium | ~325 mg |
| Potassium | ~150 mg |
| Total Carbohydrates | ~30 g |
| Fiber | ~4 g |
| Net Carbs | ~26 g |
| Sugars | ~1 g |
| Protein | ~8 g |
| Calcium | ~25 mg |
Important: These are approximate values. Because sourdough starters vary in hydration and flour composition, actual nutrition can differ.
Notes
- Storage: Freeze sliced bread for convenient portion control and longer storage.
- Reheating: Toast refrigerated or frozen slices until warm and crisp.
- Allergy: Contains wheat/gluten and is not suitable for people avoiding gluten.
- Flavor boost: Add 1–2 teaspoons of dried rosemary, garlic powder, or caraway seeds to the dough.
- For a diabetes-conscious meal: Keep the serving moderate and pair the bread with protein and non-starchy vegetables.
- No added sugar: The recipe does not require sugar, honey, or syrup.
Frequently Asked Questions
1. Is sourdough bread diabetic-friendly?
It can be included in a diabetes-conscious eating pattern, but it still contains carbohydrates, so portion size matters.
2. Is this sourdough bread low-carb?
It is lower in refined ingredients than conventional white bread but is not a truly low-carb or keto bread, with approximately 26 g net carbs per slice.
3. Why is vital wheat gluten included?
It strengthens the dough and increases the protein content without adding a large amount of additional flour.
4. Can I make this without vital wheat gluten?
Yes, but the loaf will have less protein and may have a somewhat different texture and structure.
5. Can I use only whole-wheat flour?
Yes, although the loaf will generally be denser and more strongly flavored than this whole-wheat/bread-flour blend.
6. What should I eat with this bread?
For a more balanced, protein-focused meal, serve a slice with eggs, cottage cheese, Greek yogurt, turkey, chicken, or another protein-rich food.