
Description
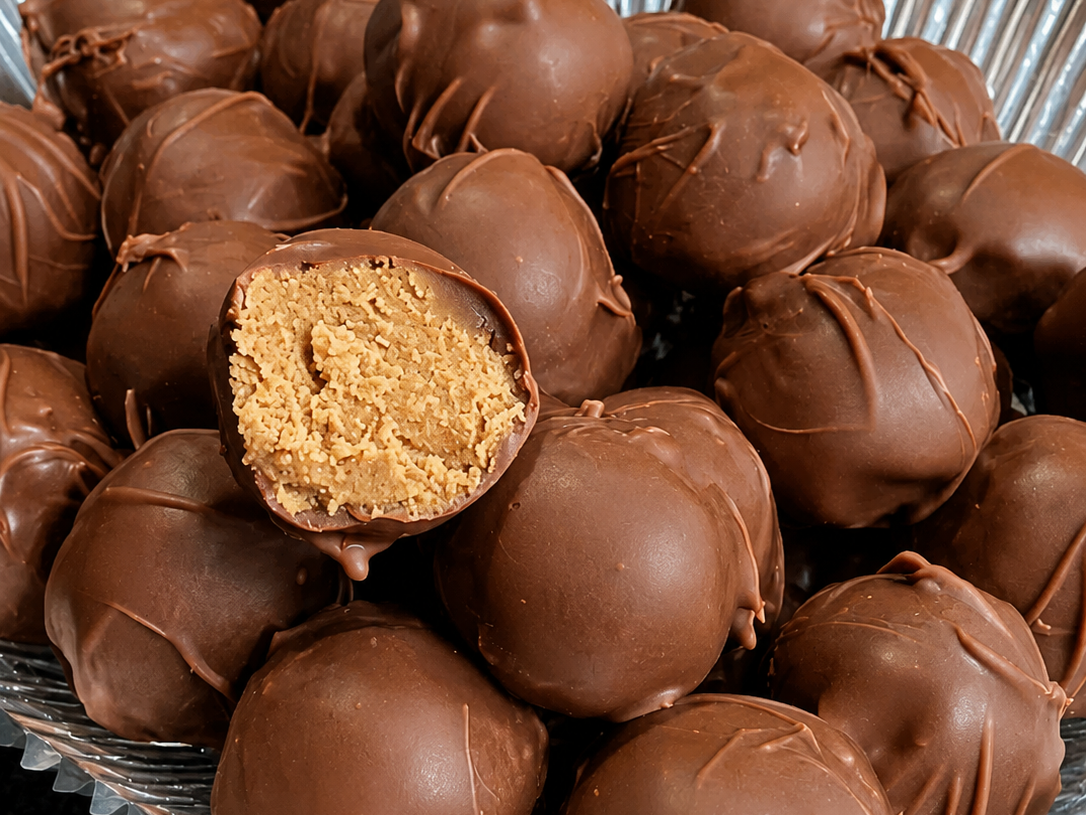
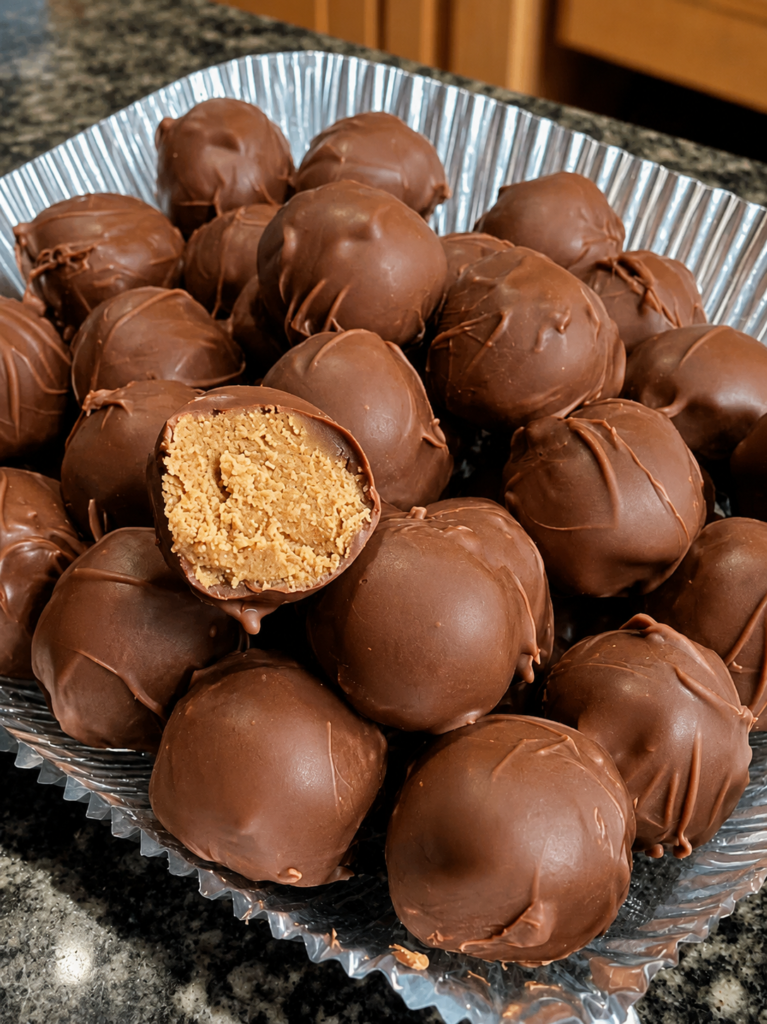
These Peanut Butter Chocolate Protein Truffles combine rich chocolate, creamy peanut butter, and a soft, satisfying protein-packed center in one delicious bite. Each truffle is coated in a smooth sugar-free chocolate shell for that classic candy-shop finish.
Made with peanut butter, protein powder, almond flour, and a low-carb sweetener, these treats offer a convenient high-protein, lower-carb dessert without relying on traditional added sugar.
They are easy to prepare, require no complicated baking, and are perfect when you want a chocolate treat that fits into a balanced low-carb lifestyle.
Can This Peanut Butter Chocolate Protein Truffle Recipe Support Weight Loss Goals?
These truffles can fit into a weight-conscious eating pattern because the peanut butter and protein powder provide protein and fat that can make a small serving satisfying. Keeping the truffles bite-sized also makes portion control easier than with many larger desserts.
However, peanut butter and chocolate are calorie-dense ingredients, so enjoying one or two truffles as a planned treat is more appropriate than treating them as an unlimited snack. Choosing unsweetened peanut butter and sugar-free chocolate can also help keep added sugars and carbohydrates lower.
Does This Recipe Fit a High-Protein Lifestyle?
Yes, these Peanut Butter Chocolate Protein Truffles can fit well into a high-protein lifestyle, providing approximately 10g of protein per serving depending on the protein powder and chocolate used. The recipe uses peanut butter, protein powder, and almond flour for its protein-rich base while sugar-free chocolate helps keep carbohydrates relatively low. Each truffle contains approximately 3g net carbs in this version. They work especially well as a controlled snack or small dessert alongside an overall protein-focused eating pattern.
Why This Recipe Is Special
- High-protein: Protein powder and peanut butter give the creamy center an extra protein boost.
- Lower-carb: Sugar-free chocolate and a zero-sugar sweetener help reduce traditional dessert carbohydrates.
- No baking required: The filling comes together quickly without turning on the oven.
- Rich and satisfying: Chocolate and peanut butter create a classic flavor combination in every bite.
- Meal-prep friendly: Make a batch and keep individual truffles refrigerated for convenient snacks.
My Personal Experience
- The peanut butter center is my favorite part.
It has a soft, slightly crumbly texture that contrasts beautifully with the firm chocolate coating.
Letting the mixture chill before rolling makes shaping the truffles much easier. - The chocolate coating makes them feel like a real dessert.
A thin shell gives each bite a satisfying chocolate snap before the peanut butter filling melts in your mouth.
Adding a small drizzle of chocolate on top also gives them a homemade candy-shop appearance. - They are especially convenient for portion-controlled snacking.
Making smaller truffles means you can prepare several servings at once and refrigerate them.
This makes it easier to grab a planned protein-rich treat instead of reaching for a sugary dessert. - The recipe is easy to customize.
A little vanilla, sea salt, cinnamon, or espresso powder can completely change the flavor.
You can also use chocolate or vanilla protein powder depending on the taste you prefer.
Perfect For
These Peanut Butter Chocolate Protein Truffles are perfect for afternoon snacks, meal prep, lunchbox treats, post-workout snacks, weekend desserts, holiday dessert trays, parties, and low-carb meal plans.
They are also convenient when you want something sweet without baking an entire cake or batch of cookies. Keep them chilled and serve straight from the refrigerator for the best texture.
Why You’ll Love This Recipe
- Chocolate and peanut butter perfection: The combination delivers a rich, familiar dessert flavor in a small bite.
- Protein-packed center: Protein powder adds substantial protein without requiring a large serving.
- No oven needed: Simply mix, chill, roll, coat, and refrigerate.
- Easy to portion: Small truffles make it simple to control serving size.
- Freezer friendly: Keep extras frozen for a longer-lasting homemade treat.
- Great texture: The creamy peanut butter filling pairs beautifully with the crisp chocolate shell.
Common Mistakes to Avoid
- Using runny peanut butter: Very oily peanut butter can make the filling too loose, so stir it thoroughly and use a naturally thick variety.
- Skipping the chilling step: Warm filling is difficult to roll and can fall apart during coating.
- Overheating the chocolate: Excessive heat can make chocolate thick or dull, so melt it gently.
- Making the truffles too large: Larger pieces require more coating and make portion sizes harder to control.
Required Equipment
- Mixing bowl — Provides enough space to combine the filling evenly.
- Small cookie scoop — Creates consistently sized truffles for even portions.
- Baking sheet — Gives the finished truffles a flat surface for chilling.
- Parchment paper — Prevents the chocolate coating from sticking.
- Microwave-safe bowl — Makes gentle chocolate melting quick and convenient.
- Fork or dipping tool — Helps lift coated truffles cleanly from the chocolate.
Storage Instructions
Place finished truffles in an airtight container with parchment paper between layers.
Refrigerate for approximately 7–10 days. Keeping them chilled helps the chocolate shell remain firm and preserves the texture of the peanut butter filling.
For longer storage, place the truffles in a freezer-safe airtight container or freezer bag with parchment between layers. Freeze for approximately 2–3 months.
Thaw frozen truffles in the refrigerator for several hours or overnight. For a firmer, candy-like texture, they can also be enjoyed partially frozen.
Recipe Details
Preparation Time: 20 minutes
Chilling Time: 30 minutes
Chocolate Setting Time: 15–20 minutes
Cooking Time: 5 minutes
Total Time: Approximately 55–75 minutes
Servings: 20 truffles
Best Season: All-season
Total Calories: Approximately 165 calories per serving
Nutrition is an approximate estimate and will vary depending on the peanut butter, protein powder, sweetener, and sugar-free chocolate used.
Short 3-Line Description
These Peanut Butter Chocolate Protein Truffles combine a creamy peanut butter protein center with a rich sugar-free chocolate coating.
They are easy to make, lower in carbohydrates, and perfect for portion-controlled snacking.
Enjoy them chilled as a satisfying high-protein dessert or make-ahead treat.
📝 Ingredients
Peanut Butter Protein Filling
- 1 cup (258g) natural creamy peanut butter, unsweetened
- 1 cup (approximately 100g) vanilla or chocolate protein powder
- ½ cup (48g) finely ground almond flour
- ¼ cup (28g) powdered erythritol or monk-fruit sweetener
- 2 tablespoons (30g) plain unsweetened Greek yogurt
- 1 teaspoon vanilla extract
- ¼ teaspoon fine sea salt
- 1–2 tablespoons unsweetened almond milk, only if needed
Chocolate Coating
- 6 oz (170g) sugar-free dark chocolate or sugar-free chocolate chips
- 1 teaspoon coconut oil, optional, for a smoother coating
Optional Garnishes
- A small pinch of flaky sea salt
- Finely chopped peanuts
- Unsweetened cocoa powder
- A drizzle of melted sugar-free chocolate
Ingredient notes: Choose peanut butter with no added sugar when possible. Protein powders vary considerably in sweetness and absorbency, so add almond milk gradually rather than all at once. For a peanut-free version, use an appropriate seed or nut butter if suitable for your dietary needs.
Directions
1. Prepare the Filling
Add the peanut butter, protein powder, almond flour, powdered sweetener, Greek yogurt, vanilla extract, and sea salt to a medium mixing bowl.
Mix with a sturdy spatula until a thick dough forms.
Texture cue: The mixture should be soft enough to roll but firm enough to hold its shape.
2. Adjust the Texture
If the mixture seems dry or crumbly, add 1 teaspoon of unsweetened almond milk at a time.
Mix after each addition.
Avoid adding too much liquid because the filling should remain thick enough to form balls.
High-protein tip: Protein powders absorb liquid differently, so gradual adjustment produces the best texture.
3. Chill the Mixture
Cover the bowl and refrigerate for approximately 20–30 minutes.
The filling should become noticeably firmer and easier to handle.
4. Shape the Truffles
Line a baking sheet with parchment paper.
Use a small cookie scoop to portion the mixture into approximately 20 equal pieces.
Roll each portion gently between your palms until smooth.
Place the balls on the prepared baking sheet.
5. Chill Again
Refrigerate the shaped truffles for another 10–15 minutes.
Visual cue: They should feel firm and hold their rounded shape when picked up.
6. Melt the Chocolate
Place the sugar-free chocolate in a microwave-safe bowl.
Heat at 50% power for 20–30 seconds at a time, stirring thoroughly after each interval.
Continue until nearly melted, then stir until completely smooth.
If desired, mix in 1 teaspoon coconut oil for a thinner coating.
Important: Do not overheat the chocolate.
7. Coat the Truffles
Place one chilled truffle into the melted chocolate.
Use a fork or dipping tool to turn it until completely coated.
Lift it out and allow excess chocolate to drip back into the bowl.
Place the coated truffle onto the parchment-lined sheet.
8. Add Optional Garnishes
While the chocolate is still wet, sprinkle lightly with chopped peanuts or flaky sea salt.
For an elegant finish, drizzle a little extra melted chocolate over the tops.
9. Set the Chocolate
Transfer the tray to the refrigerator for approximately 15–20 minutes.
The chocolate should become firm and glossy.
10. Serve
Once completely set, transfer the truffles to an airtight container.
Serve chilled or allow them to sit at room temperature for approximately 5 minutes for a softer peanut butter center.
High-Protein Cooking Tips
- Choose a protein powder with a flavor that complements chocolate and peanut butter.
- Use Greek yogurt sparingly because too much moisture can make the filling difficult to roll.
- Use natural peanut butter without added sugar for a simpler ingredient profile.
- Keep the truffle size consistent so each serving has a similar amount of protein and calories.
- Chill the filling before coating to prevent it from becoming soft in the warm chocolate.
Nutrition Facts — Per Serving
Approximate values for 1 truffle when the recipe makes 20 truffles.
| Nutrient | Approximate Amount |
|---|---|
| Calories | 165 kcal |
| Fat | 11 g |
| Cholesterol | 5 mg |
| Sodium | 105 mg |
| Potassium | 145 mg |
| Total Carbohydrates | 7 g |
| Fiber | 4 g |
| Net Carbs | 3 g |
| Sugars | 1 g |
| Protein | 10 g |
| Calcium | 65 mg |
These values are estimates. Actual macros can vary significantly depending on the protein powder, chocolate brand, peanut butter, and sweetener.
Notes
- Storage: Keep refrigerated in an airtight container for 7–10 days.
- Freezing: Freeze for up to 2–3 months in a well-sealed freezer container.
- Reheating: No reheating is necessary; allow frozen truffles to thaw in the refrigerator.
- Best texture: Refrigerated truffles have the firmest chocolate shell and softest filling.
- Allergy information: Contains peanuts, almonds, milk, and potentially other allergens depending on the protein powder and chocolate used.
- Nut-free option: Use a suitable seed butter and seed-based flour if appropriate for your dietary requirements.
- Flavor boost: Add ½ teaspoon espresso powder for a deeper chocolate flavor.
- Extra crunch: Mix finely chopped roasted peanuts into the filling.
- Chocolate variation: Use dark, milk-style, or white sugar-free chocolate according to your preference.
- Salted version: A tiny sprinkle of flaky sea salt on the chocolate coating creates a delicious sweet-and-salty contrast.
- Diabetic-friendly consideration: This recipe uses lower-sugar ingredients, but individual blood-glucose responses can differ, so portion size and the specific products used still matter.
Frequently Asked Questions
1. Can I make these Peanut Butter Chocolate Truffles without protein powder?
Yes, but the recipe will no longer have the same high-protein profile and you may need additional almond flour to achieve a rollable texture.
2. Can I use regular peanut butter?
Yes, but unsweetened peanut butter is preferable when you want to keep added sugars and carbohydrates lower.
3. Why is my truffle mixture too dry?
Protein powder absorbs moisture differently, so add almond milk one teaspoon at a time until the mixture becomes soft enough to roll.
4. Can I use a different protein powder?
Yes, whey, casein, or a suitable plant-based protein powder can work, although the texture may require slight adjustments.
5. How many truffles should I eat per serving?
One truffle is the calculated serving in this recipe, making it easier to control calories and carbohydrates while enjoying a sweet treat.
6. Can I make these ahead of time?
Absolutely; they are ideal for meal prep and can be refrigerated for about 7–10 days or frozen for up to 2–3 months.