
Description
This High-Protein Milk Bread is soft, fluffy, lightly sweet, and wonderfully tender, making it a delicious alternative to traditional milk bread. The recipe combines vital wheat gluten, almond flour, whey protein, and psyllium husk to create a bread with a satisfying texture while increasing protein and reducing the carbohydrate load.
Instead of relying primarily on refined wheat flour and sugar, this diabetes-conscious version uses a carefully balanced combination of protein-rich ingredients and lower-carb flours. It has a soft crumb that works beautifully for breakfast toast, sandwiches, or a simple afternoon snack.
Because carbohydrate needs vary from person to person, consider your individual meal plan and portion size when enjoying this bread.
Can This Milk Bread Support Weight Loss Goals?
This bread can fit into a weight-conscious eating pattern because its protein-rich ingredients can make each serving more satisfying than a comparable portion of conventional white bread.
The combination of whey protein, vital wheat gluten, almond flour, and egg contributes protein while keeping the portion relatively moderate in carbohydrates. However, calories still count, so spreading butter, nut butter, or other calorie-dense toppings generously over several slices can substantially increase the overall calorie intake.
Does This Recipe Fit a High-Protein Lifestyle?
Yes, this version is specifically designed to be higher in protein and lower in net carbohydrates than conventional milk bread. Vital wheat gluten, whey protein, almond flour, egg, and milk contribute the majority of the protein. One slice contains approximately 8g protein and 7g net carbs, depending on the ingredients and brands used. It can work especially well as part of a protein-focused breakfast or lunch.
Why This Recipe Is Special
- High-protein: Whey protein and vital wheat gluten significantly increase the protein content.
- Lower-carb: Almond flour and oat fiber replace much of the refined flour traditionally used in milk bread.
- Soft and fluffy: Psyllium and gluten help create a flexible, bread-like crumb.
- Lightly sweet: A small amount of allulose provides gentle sweetness without relying on regular sugar.
- Versatile: Perfect for toast, sandwiches, breakfast, or meal-prep portions.
My Personal Experience
- The crumb is surprisingly soft.
The combination of psyllium, milk, egg, and gluten gives this bread a tender texture.
It stays pleasantly moist rather than becoming dry immediately after cooling. - It makes excellent breakfast toast.
A slice becomes lightly crisp on the outside while remaining soft inside.
It pairs especially well with eggs, cottage cheese, or sugar-free nut butter. - The protein ingredients don’t overwhelm the flavor.
Using an unflavored whey protein powder keeps the bread tasting like a mild, homemade milk bread.
A little vanilla can be added if you prefer a slightly sweeter breakfast-style loaf. - Slicing after cooling makes a big difference.
The loaf continues setting as it cools, which helps create cleaner slices.
Cutting it while piping hot can compress the delicate crumb.
Perfect For
This bread is ideal for breakfast, sandwiches, meal prep, lunchboxes, post-workout meals, savory snacks, toast, and lower-carb eating plans.
It is especially useful when you want a bread option that provides more protein than conventional white bread. Pair it with eggs, turkey, chicken, tuna, cottage cheese, or Greek yogurt for an even more protein-focused meal.
Why You’ll Love This Recipe
- Soft enough for sandwiches
The crumb is tender but sturdy enough to hold sandwich fillings.
It won’t feel as dense as many traditional low-carb breads. - Protein-packed ingredients
Whey protein and vital wheat gluten provide substantial protein.
Egg and almond flour contribute additional protein and richness. - Lower in net carbs
Oat fiber and almond flour help reduce digestible carbohydrates.
This makes the bread more suitable for carbohydrate-conscious meal planning. - Freezer friendly
Individual slices can be frozen and reheated as needed.
This makes it easy to keep homemade protein bread available throughout the week. - No large amount of added sugar
Allulose provides sweetness without using a conventional sugar-heavy formula.
The small amount of regular sugar used for yeast activation contributes only a modest amount to the overall loaf.
Common Mistakes to Avoid
- Adding too much liquid — Low-carb dough can become sticky quickly, so add water gradually and allow the psyllium time to hydrate.
- Using flavored whey protein — Vanilla or sweetened protein powder can dramatically change the flavor and sweetness of the bread.
- Over-kneading the dough — Gluten needs development, but excessive kneading can produce a dense, chewy loaf.
- Slicing while hot — Let the loaf cool completely before cutting to prevent a compressed or gummy center.
Required Equipment
- 9 × 5-inch loaf pan — Gives the dough enough room to rise into a classic sandwich-loaf shape.
- Digital kitchen scale — Provides accurate measurements for gluten, flour, and protein powder.
- Large mixing bowl — Makes it easier to combine the relatively dense dough.
- Small saucepan — Useful for gently warming the milk.
- Stand mixer with dough hook — Makes kneading the high-gluten dough easier.
- Kitchen thermometer — Helps verify that the milk is warm rather than excessively hot.
- Wire cooling rack — Allows steam to escape so the bottom doesn’t become soggy.
Storage Instructions
Allow the loaf to cool completely before storing.
For short-term storage, place the bread in an airtight bread bag or container and keep it at room temperature for approximately 2–3 days.
For longer storage, refrigerate it in an airtight container for up to 5 days. Refrigeration may make the bread slightly firmer, so toast it before serving for the best texture.
For freezing, slice the completely cooled loaf and place parchment paper between slices. Store in a freezer-safe bag with as much excess air removed as possible.
Frozen slices are best used within 2 months for maximum quality.
Reheat individual frozen slices directly in a toaster or toaster oven.
Recipe Details
Preparation Time: 25 minutes
Rising Time: 60–90 minutes
Cooking Time: 30–35 minutes
Total Time: Approximately 2 hours 20 minutes
Servings: 10 slices
Best Season: All-season
Total Calories: Approximately 150 calories per slice
Nutrition values are approximate and depend on the specific brands of whey protein, almond flour, milk, and other ingredients used.
Short 3-Line Description
This soft high-protein milk bread uses almond flour, vital wheat gluten, whey protein, and psyllium for a fluffy, satisfying crumb.
It contains significantly fewer net carbohydrates than traditional milk bread while providing approximately 8g of protein per slice.
Enjoy it toasted, as sandwich bread, or alongside a protein-rich breakfast.
📝 Ingredients
Dry Ingredients
- 1 cup (120 g) vital wheat gluten
- ½ cup (56 g) finely ground almond flour
- ¼ cup (25 g) unflavored whey protein isolate
- ¼ cup (15 g) oat fiber
- 1 tablespoon (8 g) psyllium husk powder
- 2 tablespoons (24 g) allulose
- 1½ teaspoons instant yeast
- ½ teaspoon salt
Wet Ingredients
- ½ cup (120 ml) unsweetened milk
- ⅓ cup (80 ml) warm water, plus 1–2 tablespoons if needed
- 1 large egg
- 2 tablespoons (28 g) unsalted butter, melted
- 1 teaspoon vanilla extract, optional for a subtly sweet milk-bread flavor
Yeast Note
If using active dry yeast instead of instant yeast, dissolve it in the warm milk with the small amount of sugar listed below and allow it to stand for 5–8 minutes until foamy.
For instant yeast, the recipe can use the yeast directly with the dry ingredients.
Optional Yeast Activation
If your yeast needs sugar to activate, use ½ teaspoon regular sugar with the warm milk; this small amount is distributed throughout the entire loaf.
Directions
1. Warm the Milk
Pour the milk into a small saucepan.
Warm over low heat until it reaches approximately 100–110°F (38–43°C).
The milk should feel comfortably warm, not hot.
2. Combine the Dry Ingredients
In a large mixing bowl, whisk together the vital wheat gluten, almond flour, whey protein, oat fiber, psyllium husk, allulose, yeast, and salt.
Mix thoroughly so the protein powder and psyllium are evenly distributed.
3. Combine the Wet Ingredients
In another bowl, whisk together the warm milk, warm water, egg, melted butter, and vanilla if using.
The butter should be warm and melted rather than extremely hot.
4. Make the Dough
Slowly pour the wet mixture into the dry ingredients while stirring.
The mixture will initially look somewhat loose, but the psyllium and gluten will begin absorbing liquid.
Allow the mixture to stand for 3–5 minutes.
5. Knead
Using a stand mixer fitted with a dough hook, knead on low to medium-low speed for 6–8 minutes.
If kneading by hand, knead for approximately 8–10 minutes.
The finished dough should be smooth, elastic, and slightly tacky but not wet.
High-protein cooking tip: Resist the urge to add lots of extra flour because this can make the finished bread dense and dry.
6. Adjust the Dough
If the dough feels unusually dry or cracks when pressed, add the remaining water 1 tablespoon at a time.
If it is excessively sticky, allow it to rest for another 5 minutes before adding anything else.
The dough should hold its shape when formed.
7. Shape the Loaf
Lightly grease a 9 × 5-inch loaf pan.
Shape the dough into a smooth log approximately the length of the pan.
Place it into the pan and gently press the surface level.
8. First Rise
Cover the pan loosely with plastic wrap or a clean kitchen towel.
Place it somewhere warm and draft-free.
Allow it to rise for approximately 60–90 minutes.
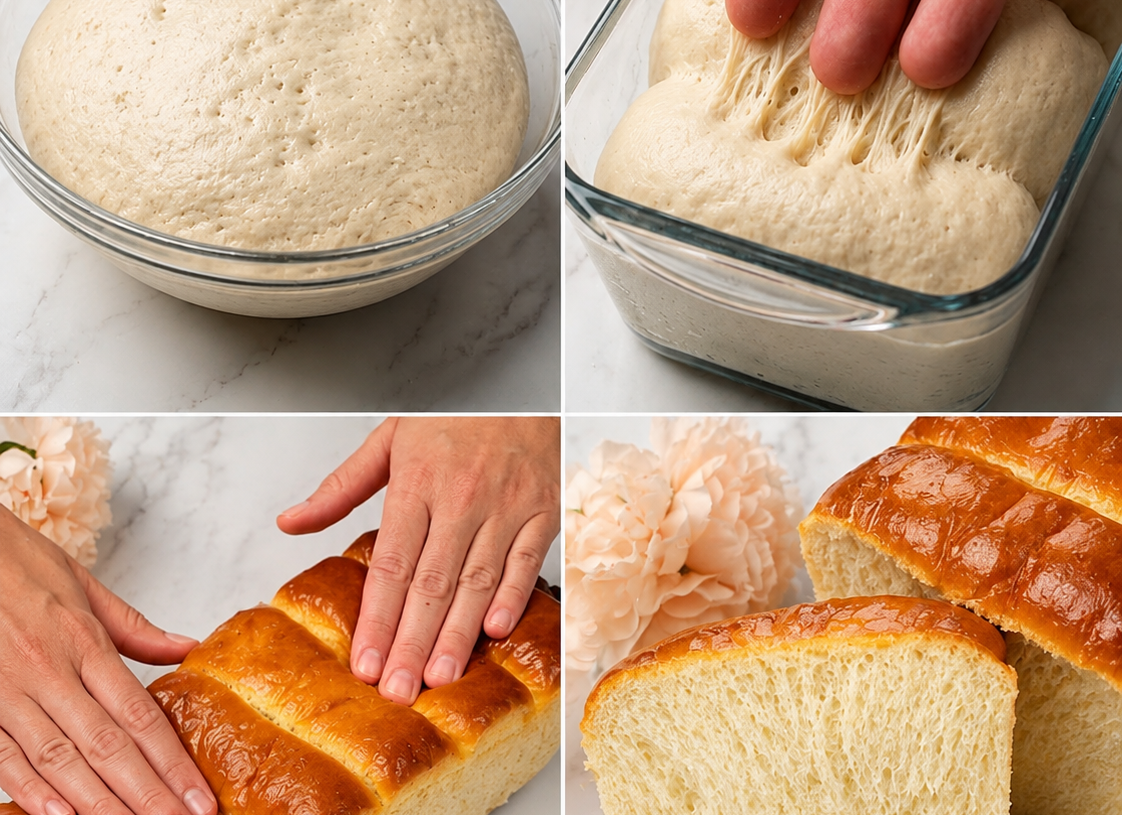
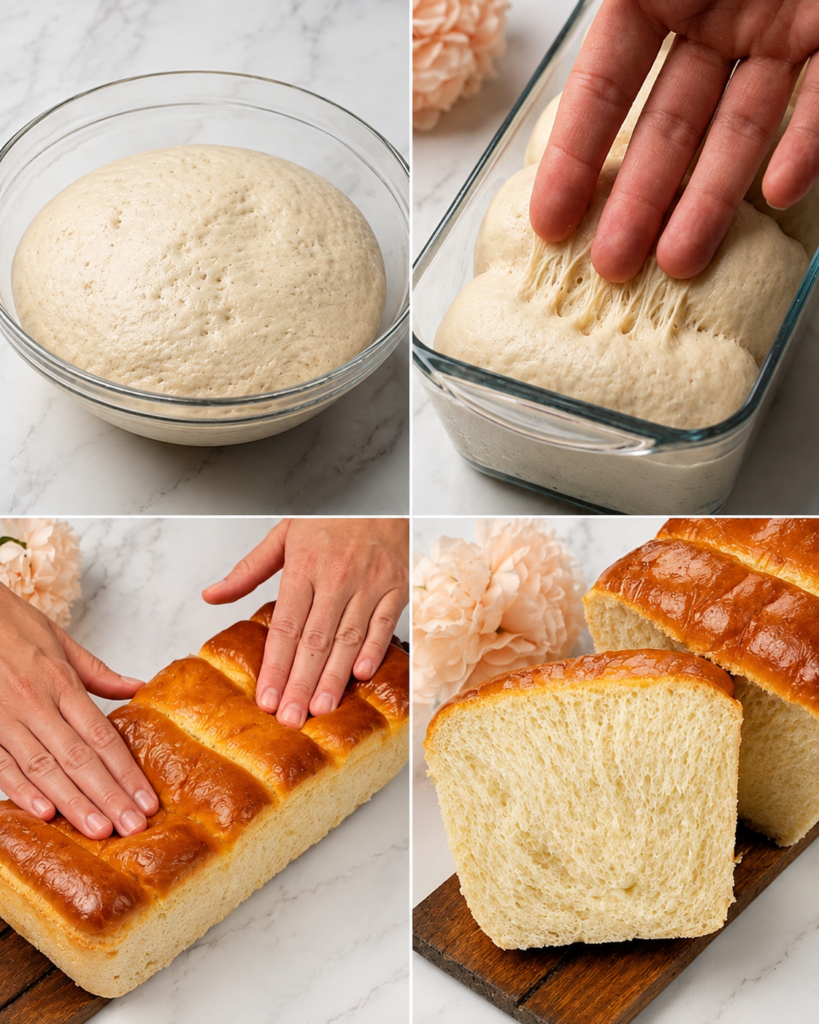
The dough should visibly expand and become soft and puffy.
Important: Don’t rely solely on doubling in size; lower-carb dough may not rise exactly like conventional wheat bread.
9. Preheat the Oven
When the dough is nearly finished rising, preheat your oven to 350°F (175°C).
Place the rack in the center position.
10. Check the Dough
Gently press the surface with one fingertip.
If the indentation slowly springs back, the dough is ready to bake.
If it immediately springs back, give it another 10–15 minutes.
11. Bake
Place the loaf in the preheated oven.
Bake at 350°F (175°C) for 30–35 minutes.
The top should become golden brown and firm.
12. Check for Doneness
For the most reliable result, the center should reach approximately 190–200°F (88–93°C).
The loaf should sound lightly hollow when tapped on top.
13. Cool
Remove the bread from the pan.
Place it on a wire rack and allow it to cool for at least 1 hour before slicing.
This cooling period allows the protein-rich crumb to finish setting.
14. Slice and Serve
Once completely cooled, use a serrated bread knife to cut the loaf into 10 even slices.
Toast lightly and serve with eggs, cottage cheese, turkey, chicken, or another protein-rich topping.
Nutrition Facts — Per Serving
Approximate, based on 10 slices:
- Calories: 150 kcal
- Fat: 8 g
- Cholesterol: 45 mg
- Sodium: 220 mg
- Potassium: 125 mg
- Total Carbohydrates: 11 g
- Fiber: 4 g
- Net Carbs: 7 g
- Sugars: 2 g
- Protein: 8 g
- Calcium: 65 mg
These figures are estimates. Actual nutrition will vary considerably depending on the whey protein, milk, almond flour, and other brands used.
Notes
- For the best texture: Measure the dry ingredients by weight whenever possible.
- Milk choice: Unsweetened low-fat or whole milk can be used, although the nutrition values will change.
- Lower-carb option: Unsweetened almond milk can replace regular milk.
- Protein boost: Serve the bread with cottage cheese, Greek yogurt, eggs, turkey, or chicken.
- Sweet version: Add cinnamon and a little extra allulose for a breakfast-style loaf.
- Savory version: Omit vanilla and add dried herbs or garlic powder.
- Toast it: Toasting improves the texture after refrigeration.
- Allergy note: This recipe contains wheat/gluten, dairy, eggs, and almonds.
- Wheat-free: Vital wheat gluten is essential to the structure of this particular recipe and cannot simply be replaced with regular flour.
- Nut-free: Almond flour would require a different flour formulation rather than a simple one-to-one substitution.
- Storage: Room temperature for 2–3 days, refrigerated for up to 5 days, or frozen for up to 2 months.
- Diabetes-conscious note: Although this bread is lower in net carbs than conventional milk bread, it still contains carbohydrates; portion size and individual dietary needs should be considered.
Frequently Asked Questions
1. Is this milk bread actually low-carb?
It is significantly lower in net carbohydrates than traditional milk bread, with approximately 7g net carbs per slice based on this formulation.
2. Is this recipe suitable for a high-protein diet?
Yes, each slice provides approximately 8g of protein, mainly from vital wheat gluten, whey protein, egg, and almond flour.
3. Can I use almond milk?
Yes, unsweetened almond milk can replace regular milk, although the flavor and nutrition values will change slightly.
4. Why didn’t my bread rise much?
Lower-carb dough containing almond flour, oat fiber, and protein powder generally rises less dramatically than conventional wheat-flour bread.
5. Can I freeze this milk bread?
Yes, slice the cooled loaf first, separate the slices with parchment, and freeze them in an airtight freezer bag for up to approximately 2 months.
6. Can I make this bread without whey protein?
You can, but the protein content and texture will change, so a direct substitution is not recommended without adjusting the rest of the formula.
Important Note
This is a diabetes-conscious, lower-carb recipe—not a medically prescribed diabetes diet food. The carbohydrate amount can vary with ingredients and serving size, so anyone managing blood glucose should account for the bread according to their individual nutrition plan.