
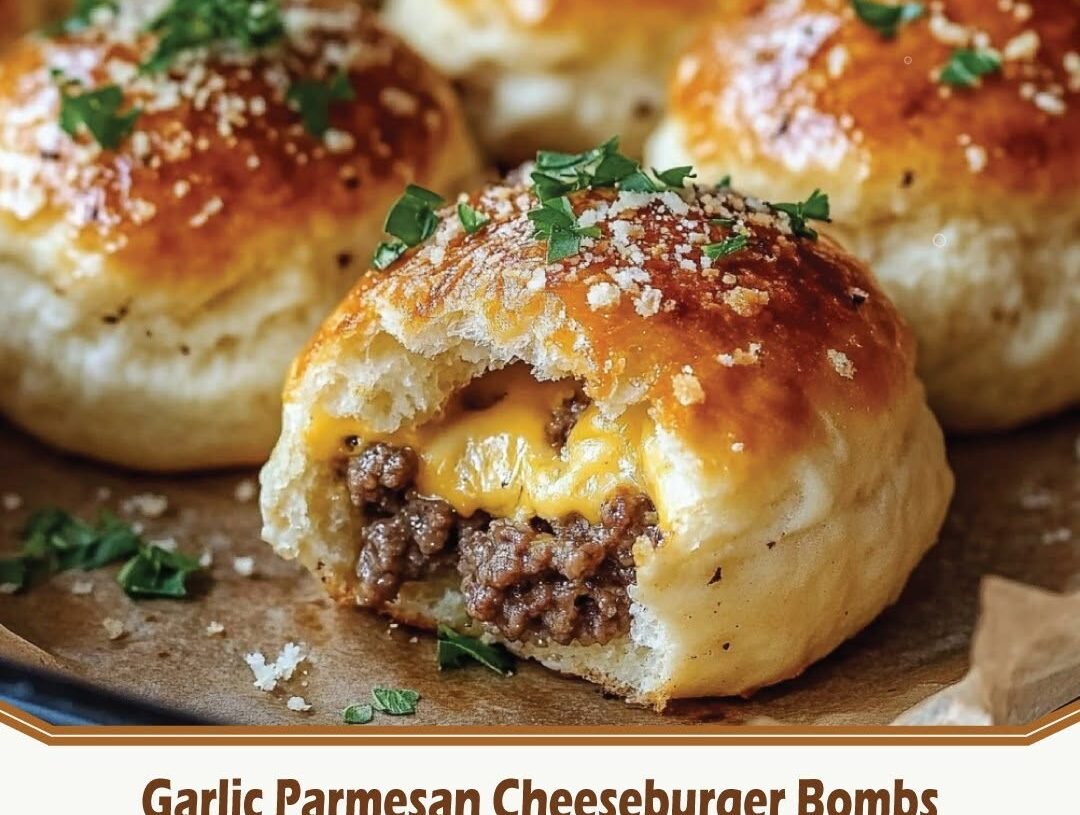
🧄 Garlic Parmesan Cheeseburger Bombs
These Garlic Parmesan Cheeseburger Bombs are soft, golden biscuit pockets filled with seasoned ground beef, melted cheddar, and creamy cheese, then finished with buttery garlic and Parmesan. They make a fun appetizer, snack, or casual family meal.
The recipe in the image shows ground beef, cheddar cheese, and cream cheese as the main filling. Similar published versions use refrigerated biscuit dough and a garlic-Parmesan butter topping. (Clap Recipes)
Recipe Details
- Prep Time: 20 minutes
- Cook Time: 15–18 minutes
- Total Time: About 35–40 minutes
- Servings: 8 cheeseburger bombs
- Oven: 375°F (190°C)
- Cuisine: American-inspired
- Category: Appetizer / Snack / Family Dinner
Ingredients
For the Cheeseburger Filling
- 1 lb (450 g) ground beef
- 1 cup (100 g) shredded cheddar cheese
- ½ cup (113 g) softened cream cheese
- ½ medium yellow onion, finely diced
- 2 cloves garlic, minced
- 1 tsp garlic powder
- 1 tsp onion powder
- 1 tbsp Worcestershire sauce
- ½ tsp smoked paprika
- ½ tsp black pepper
- ½ tsp salt, or to taste
For the Dough
- 1 can (16 oz / 450 g) refrigerated biscuit dough, about 8 biscuits
Garlic Parmesan Topping
- 2 tbsp unsalted butter, melted
- ¼ cup (25 g) finely grated Parmesan cheese
- ½ tsp garlic powder
- ½ tsp dried parsley
- 1 tbsp fresh parsley, finely chopped
These ingredient proportions are consistent with several published versions of this recipe style. (Clap Recipes)
Instructions
1. Prepare the Oven
Preheat your oven to 375°F (190°C).
Line a large baking sheet with parchment paper. This makes cleanup easier and helps prevent the biscuit dough from sticking.
2. Cook the Ground Beef
Place a large skillet over medium heat.
Add the ground beef and cook for approximately 5–7 minutes, breaking it apart with a wooden spoon or spatula as it cooks.
Cook until the beef is thoroughly browned.
3. Add the Onion and Garlic
Add the diced onion and minced garlic.
Continue cooking for another 2–3 minutes, until the onion softens and the garlic becomes fragrant.
4. Season the Beef
Add:
- Garlic powder
- Onion powder
- Worcestershire sauce
- Smoked paprika
- Black pepper
- Salt
Stir thoroughly so the seasonings coat the beef evenly.
5. Drain Excess Grease
If there is a substantial amount of excess fat in the skillet, carefully drain it.
Return the beef to the skillet.
6. Add the Cream Cheese
Reduce the heat to low.
Add the softened cream cheese and stir until it melts into the warm beef mixture.
The filling should become creamy and cohesive.
7. Add the Cheddar
Remove the skillet from the heat.
Stir in the shredded cheddar cheese until melted and evenly distributed.
Allow the filling to cool for several minutes before assembling the bombs.
This cooling step makes the dough easier to handle and reduces the chance of the hot filling weakening the biscuit dough.
8. Prepare the Biscuit Dough
Open the biscuit package and separate the biscuits.
Place each biscuit on a lightly floured surface.
Gently flatten each one into a circle approximately 4 inches wide.
Don’t roll the dough so thin that it becomes fragile.
9. Add the Filling
Place approximately 2–3 tablespoons of the beef-and-cheese mixture in the center of each flattened biscuit.
Avoid overfilling.
Too much filling can make it difficult to seal the dough and may cause the cheese to escape during baking.
10. Seal Each Bomb
Carefully pull the edges of the dough upward around the filling.
Pinch the edges firmly together.
Roll the sealed dough gently between your hands to form a round ball.
Place each bomb seam-side down on the prepared baking sheet.
11. Make the Garlic Parmesan Butter
In a small bowl, combine:
- Melted butter
- Parmesan cheese
- Garlic powder
- Dried parsley
Mix well.
12. Brush the Dough
Using a pastry brush, spread the garlic-Parmesan mixture over the tops of the stuffed dough balls.
Make sure each one receives an even coating.
13. Add Extra Parmesan
For a more pronounced Parmesan crust, sprinkle a small additional amount of Parmesan over the tops.
You can also add a little dried parsley for color.
14. Bake
Place the baking sheet in the preheated oven.
Bake for approximately 12–18 minutes, or until the biscuit dough is puffed and beautifully golden brown.
Published versions of cheeseburger bombs generally bake at around 375°F and use roughly 12–18 minutes, depending on the dough and size. (Clap Recipes)
15. Check the Beef
Because these contain ground beef, use a food thermometer rather than relying only on appearance.
Ground beef should reach a minimum internal temperature of 160°F (71°C) for safety. (Ask USDA)
16. Rest Before Serving
Remove the cheeseburger bombs from the oven and allow them to rest for about 5 minutes.
The filling will be extremely hot immediately after baking, and resting also gives the melted cheese a chance to settle.
17. Garnish
Sprinkle the warm bombs with freshly chopped parsley.
For extra flavor, you can brush them lightly with another small amount of garlic butter.
18. Serve Warm
Serve while the biscuit exterior is warm and the cheese inside is still soft and melted.
🍔 Delicious Variations
Bacon Cheeseburger Bombs
Add ½ cup cooked, finely chopped bacon to the beef mixture along with the cheddar.
Mushroom Swiss Version
Replace some of the cheddar with shredded Swiss cheese and add finely chopped sautéed mushrooms.
Jalapeño Cheeseburger Bombs
Add 2–3 tablespoons finely diced pickled or fresh jalapeños to the filling.
BBQ Cheeseburger Bombs
Replace the Worcestershire sauce with 1–2 tablespoons barbecue sauce and use cheddar cheese.
Pepper Jack Version
Replace half of the cheddar with shredded Pepper Jack for a slightly spicy, creamy filling.
Tips for Perfect Cheeseburger Bombs
Don’t overfill the dough. A moderate amount of filling is much easier to seal.
Soften the cream cheese first. It blends into the beef much more smoothly.
Cool the filling slightly. Very hot filling can make the biscuit dough difficult to work with.
Seal the edges thoroughly. Any gaps can allow melted cheese to escape.
Place them seam-side down. This helps keep the filling enclosed.
Don’t overcrowd the baking sheet. Leave enough space around each bomb for the dough to expand.
Use a thermometer for the beef. Color isn’t a reliable way to determine whether ground beef has reached a safe temperature. (Ask USDA)
Serving Ideas
These cheeseburger bombs pair nicely with:
- Ketchup
- Mustard
- Burger sauce
- Ranch dressing
- Garlic aioli
- Pickles
- Coleslaw
- Fresh vegetable sticks
- A simple green salad
- Roasted potatoes
For a party, arrange the bombs on a large platter with several dipping sauces in small bowls.
Storage
Allow leftovers to cool and refrigerate them in a covered container.
For best quality, reheat them in an oven or air fryer rather than microwaving them, which can make the biscuit exterior softer.
When reheating leftovers, make sure the filling is heated thoroughly.
For food-safety purposes, refrigerate perishable leftovers promptly rather than leaving them at room temperature for an extended period.
Frequently Asked Questions
Can I use crescent dough instead of biscuit dough?
Yes. Crescent dough produces a softer, more layered exterior, while biscuit dough creates a thicker and more substantial shell.
Can I make these ahead?
Yes. Prepare the beef filling ahead of time and refrigerate it. Allow it to cool sufficiently before assembling the bombs.
Can I freeze them?
You can freeze fully baked, cooled cheeseburger bombs in a freezer-safe container. Reheat thoroughly before serving.
Why did my cheese leak out?
The most common causes are overfilling, thin dough, or an incompletely sealed seam.
Can I use different cheese?
Absolutely. Cheddar, Monterey Jack, Colby Jack, Pepper Jack, and Swiss all work well.
Can I make them without cream cheese?
Yes. Increase the shredded cheddar slightly, although the cream cheese gives the filling its particularly creamy texture.
Nutrition Note
Nutrition varies according to the biscuit dough, ground-beef fat percentage, cheese brands, and final serving size. Since this is a rich stuffed biscuit recipe, the most useful approach is to calculate nutrition from the specific products you use rather than relying on a generic estimate.
This recipe is intended as a regular, satisfying homemade meal or snack, rather than a restrictive diet recipe.