
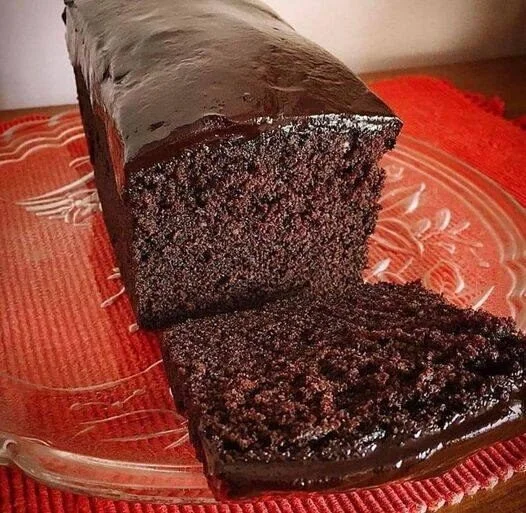
Dessert doesn’t have to be a guilty pleasure, and the Weight Watchers Flourless Chocolate Cake is the perfect example of how you can indulge without straying from your health goals. This rich, velvety, and deeply satisfying cake has all the chocolatey goodness you crave, but with a significantly reduced calorie and SmartPoint count, making it the ideal choice for anyone following the Weight Watchers program.
The beauty of this flourless chocolate cake lies in its simplicity—only a handful of ingredients are needed, and it doesn’t require the usual flour or excessive sugar found in traditional cake recipes. The result is a moist, fudgy dessert that tastes indulgent, yet is surprisingly light in terms of SmartPoints, making it perfect for a special occasion or a satisfying treat after dinner.
This recipe is designed to be versatile, allowing you to customize it with your favorite toppings or additions, and it’s an excellent choice for those who are gluten-free, as it contains no flour. Whether you’re serving it at a dinner party or enjoying it on your own, this cake will impress.
Ingredients:
- Dark Chocolate (70% cocoa or higher): 4 oz (about 115g) (WW SmartPoints: 5)
- Unsweetened cocoa powder: 2 tbsp (WW SmartPoints: 0)
- Eggs: 4 large (WW SmartPoints: 0)
- Egg whites: 2 large (WW SmartPoints: 0)
- Granulated sweetener (like Stevia or Erythritol): ½ cup (or to taste) (WW SmartPoints: 0)
- Vanilla extract: 1 tsp (WW SmartPoints: 0)
- Salt: A pinch (WW SmartPoints: 0)
- Baking powder: ½ tsp (WW SmartPoints: 0)
- Coconut oil or light butter: 2 tbsp (WW SmartPoints: 2)
- Water: ¼ cup (WW SmartPoints: 0)
Equipment:
- 9-inch round cake pan (or equivalent)
- Double boiler or microwave-safe bowl for melting chocolate
- Hand mixer or whisk for beating eggs
- Spatula for folding ingredients
Instructions:
Step 1: Preheat the Oven
Begin by preheating your oven to 350°F (175°C). This ensures that your oven is at the right temperature when the cake batter is ready to bake.
Step 2: Prepare the Cake Pan
Prepare a 9-inch round cake pan by greasing it with a light coating of non-stick cooking spray or using parchment paper to line the bottom. This will ensure that your cake comes out easily once it’s baked.
Step 3: Melt the Dark Chocolate
Place the dark chocolate in a heatproof bowl and set it over a saucepan of simmering water to create a double boiler, or you can melt it in the microwave in short bursts (15-20 seconds at a time). Stir frequently until completely melted and smooth. Remove the bowl from the heat and let it cool slightly. This step is crucial as melted chocolate is the base for the fudgy texture of the cake.
Step 4: Mix Dry Ingredients
In a separate bowl, combine the unsweetened cocoa powder, baking powder, and a pinch of salt. Mixing the dry ingredients together before incorporating them into the wet ingredients ensures they are evenly distributed throughout the batter.
Step 5: Whisk the Eggs and Sweetener
In a large mixing bowl, whisk together the eggs, egg whites, and the granulated sweetener (Stevia or Erythritol). Use a hand mixer or whisk to beat the mixture for about 3-4 minutes, or until the mixture becomes pale and slightly fluffy. This adds air into the batter, which will help the cake rise and create a light texture despite the absence of flour.
Step 6: Incorporate the Melted Chocolate
Once the chocolate has cooled slightly but is still liquid, add the melted chocolate to the egg mixture. Stir in the vanilla extract as well. The chocolate should blend smoothly with the egg mixture, creating a rich, glossy batter.
Step 7: Fold in Dry Ingredients
Carefully fold in the dry ingredients (cocoa powder, baking powder, and salt) to the wet ingredients. Use a spatula to gently mix them together, making sure everything is well-combined without overmixing. Overmixing could lead to a denser cake.
Step 8: Add Coconut Oil or Butter
Melt the coconut oil or light butter and add it to the batter, mixing gently until fully incorporated. This will contribute to the moist texture of the cake, enhancing the overall richness while still keeping the SmartPoints low.
Step 9: Add Water
Slowly stir in the water, which helps to thin the batter slightly, making it easier to pour into the pan while ensuring that the cake remains moist.
Step 10: Bake the Cake
Pour the batter into the prepared cake pan and spread it out evenly with a spatula. Place the pan in the preheated oven and bake for about 20-25 minutes. The cake should be slightly firm around the edges but still soft in the center. A toothpick inserted into the center should come out with a few moist crumbs attached, but not completely wet.
Step 11: Cool the Cake
Allow the cake to cool in the pan for 10 minutes before transferring it to a wire rack to cool completely. This resting time helps the cake firm up a little, making it easier to slice.
Step 12: Serve and Enjoy
Once the cake has cooled, slice it into 8 equal servings. You can serve it as is, or garnish with a light dusting of powdered sweetener, fresh berries, or a dollop of whipped cream (for extra SmartPoints). If you want to add more texture, consider serving it with a scoop of low-fat vanilla ice cream or a drizzle of sugar-free chocolate sauce.
Nutritional Information (Per Serving – 1 Slice):
- Calories: 130 kcal
- Protein: 3g
- Carbs: 11g
- Fat: 8g
- Fiber: 3g
- Sodium: 40mg
- WW SmartPoints: 3 SmartPoints per slice (8 servings total)
Smart WW Points Breakdown:
Each serving of this Flourless Chocolate Cake is only 3 SmartPoints, making it a fantastic dessert option for those following the Weight Watchers program. Here’s a breakdown of the key ingredients contributing to the SmartPoint count:
- Dark Chocolate: The dark chocolate adds a small number of SmartPoints but is also packed with antioxidants and delivers a rich flavor that balances the sweetness of the cake. Using chocolate that is at least 70% cocoa ensures a more intense, less sugary taste, reducing the overall SmartPoints compared to milk chocolate.
- Eggs and Egg Whites: Eggs contribute to the texture and structure of the cake without adding significant SmartPoints. By using both whole eggs and egg whites, you get the benefits of protein while keeping the fat content moderate.
- Sweetener: Using a low-calorie sweetener such as Stevia or Erythritol helps reduce the sugar content without sacrificing sweetness. These sweeteners contribute 0 SmartPoints, allowing you to enjoy a decadent dessert while keeping the SmartPoints low.
- Coconut Oil or Light Butter: The coconut oil or light butter adds moisture and richness to the cake. Although it adds 2 SmartPoints for the entire recipe, it is a small price to pay for the luscious texture it provides.
Why This Flourless Chocolate Cake is Perfect for Weight Watchers:
- Indulgent yet Low in Points: With only 3 SmartPoints per slice, this cake allows you to indulge in chocolatey goodness without overconsuming your daily points. Its rich, fudgy texture means that one slice is often enough to satisfy your dessert cravings.
- Gluten-Free: Since this cake is flourless, it is an excellent option for those who follow a gluten-free diet. The absence of flour does not sacrifice the texture or flavor—if anything, it enhances the dense, moist consistency of the cake.
- Minimal Ingredients: This cake contains only a few ingredients, all of which are easily accessible. It’s a great option for those who want a simple, straightforward dessert that doesn’t require special equipment or hard-to-find ingredients.
- Rich in Antioxidants: Dark chocolate is not only delicious but also packed with antioxidants, which have been shown to support heart health and reduce inflammation in the body. By choosing high-quality dark chocolate with at least 70% cocoa, you get all the benefits without loading up on unnecessary sugar.
- Perfect for Special Occasions: Whether you’re celebrating a birthday, a holiday, or simply want a fancy dessert for a weeknight, this flourless chocolate cake will impress your guests without costing you too many SmartPoints.
Tips for Customizing the Flourless Chocolate Cake:
- Add Coffee or Espresso: For an extra depth of flavor, try adding a teaspoon of instant coffee or espresso powder to the batter. Coffee and chocolate complement each other perfectly, enhancing the cake’s richness.
- Infuse with Orange Zest: For a citrusy twist, add the zest of one orange to the batter. The fresh, aromatic citrus flavor will brighten the chocolate without overpowering it.
- Toppings: Garnish the cake with fresh berries like raspberries or strawberries, or a light dusting of powdered sweetener. If you’re looking to keep SmartPoints low, opt for a dollop of fat-free whipped cream or a drizzle of sugar-free chocolate syrup.
- Dairy-Free Option: If you’re looking for a dairy-free alternative, you can substitute the coconut oil for a plant-based butter and ensure that the chocolate you use is dairy-free.
Storing and Serving Tips:
- Storage: Store any leftover cake in an airtight container in the refrigerator for up to 4-5 days. The cake’s flavor may even improve after a day or two as it continues to set and the chocolate deepens.
- Freezing: This cake also freezes well. Slice it into individual portions and wrap them in plastic wrap before placing them in a freezer-safe container or bag. The cake will last for up to 2 months in the freezer. Simply thaw overnight in the refrigerator or on the counter for a few hours before serving.
Final Thoughts:
The Weight Watchers Flourless Chocolate Cake is a delightful dessert that delivers all the richness and decadence of traditional chocolate cake, but with a much lighter SmartPoint count. With simple ingredients, minimal prep time, and endless customization possibilities, this cake is sure to become your go-to indulgence when you want something sweet without the guilt. Enjoy it as a treat, special occasion dessert, or any time you’re craving something chocolaty and delicious. With just 3 SmartPoints per slice, you can savor every bite and still stay on track with your health goals.