
Description
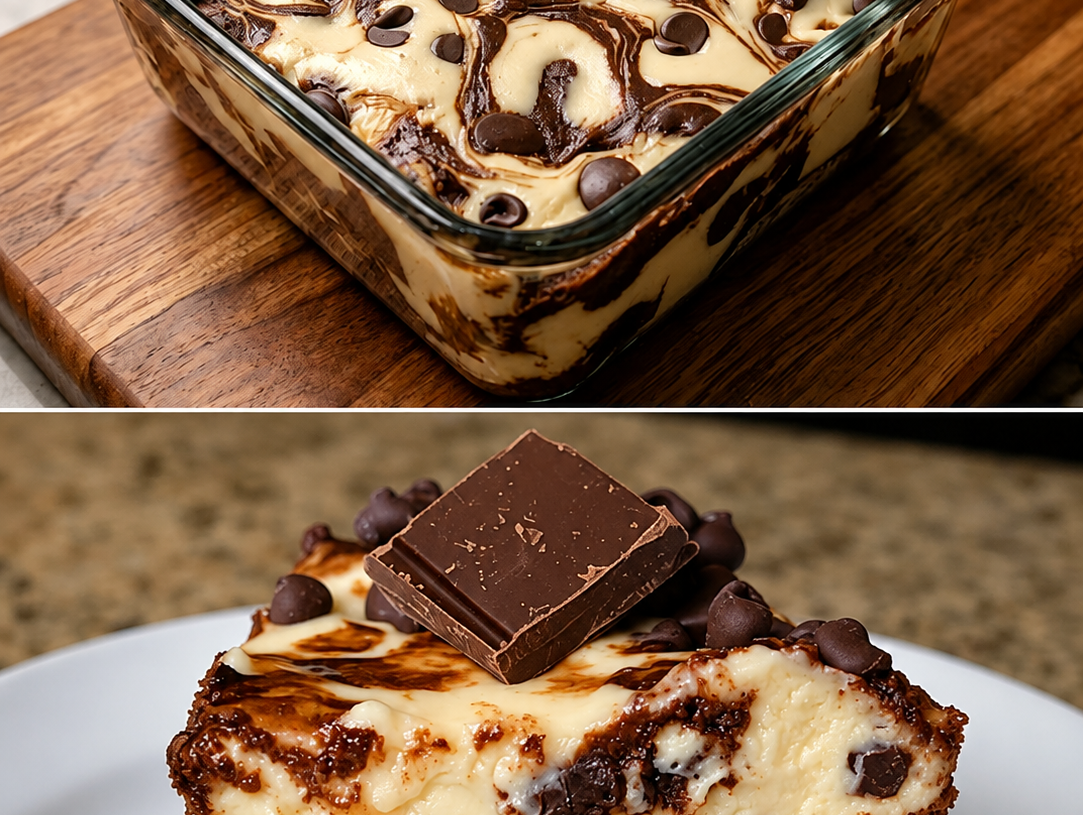
This Brownie Cheesecake combines two irresistible desserts in one: a rich, fudgy chocolate brownie base topped with a smooth, creamy cheesecake layer and scattered chocolate chips. Every bite delivers the perfect contrast between dense chocolate brownie and silky cheesecake.
Made with protein-rich Greek yogurt, cream cheese, and eggs, this version gives a classic dessert a more high-protein, lower-carb profile without sacrificing its indulgent texture. It is an excellent choice when you want something chocolatey, creamy, and satisfying.
The marbled chocolate-and-vanilla appearance makes it especially beautiful for entertaining, while the simple preparation makes it practical enough for weekend baking or make-ahead desserts.
Can This Brownie Cheesecake Support Weight Loss Goals?
This Brownie Cheesecake can fit into a balanced weight-management eating pattern when enjoyed in an appropriate portion. Using Greek yogurt, eggs, and reduced-sugar ingredients increases the protein content compared with many traditional cheesecake recipes, which can make each serving more satisfying.
Portion size still matters because cheesecake remains an energy-dense dessert. Choosing a smaller serving alongside a protein-rich meal can help keep the overall meal balanced.
Does Brownie Cheesecake Fit a High-Protein Lifestyle?
Yes, this version is designed to be considerably more protein-friendly than a traditional brownie cheesecake. Greek yogurt, reduced-fat cream cheese, and eggs contribute substantial protein while almond flour keeps the carbohydrate content lower than a conventional flour-based brownie. Using unsweetened cocoa and a zero-calorie sweetener can further reduce added sugar. Depending on the protein powder and dairy products selected, each serving can provide around 14–17g of protein.
Why This Recipe Is Special
🍫 Two desserts in one: A fudgy brownie base meets creamy cheesecake.
💪 Protein-friendly: Greek yogurt, eggs, cream cheese, and protein powder boost protein.
🌿 Lower-carb option: Almond flour replaces traditional wheat flour.
🥄 Creamy and fudgy: The contrasting textures make every bite satisfying.
✨ Beautiful presentation: Chocolate swirls and chocolate chips create an eye-catching finish.
My Personal Experience
The brownie layer stays wonderfully fudgy.
I love that the chocolate base remains dense and soft instead of becoming dry or cakey.
The creamy cheesecake layer makes the texture even more indulgent.
The cheesecake topping balances the chocolate perfectly.
The mild vanilla cheesecake cuts through the richness of the cocoa layer.
A few chocolate chips on top add little pockets of melted chocolate.
It feels like a special dessert without complicated techniques.
The batter and cheesecake mixture are both straightforward to prepare.
Once assembled, the oven does most of the work.
It tastes even better chilled.
Refrigerating the cheesecake gives the layers time to firm up beautifully.
The chilled texture makes it easier to slice into neat squares.
Perfect For
This Brownie Cheesecake is perfect for weekend desserts, family gatherings, birthday celebrations, meal-prep treats, afternoon snacks, and chocolate cravings. It can also work well for a high-protein dessert rotation when portions are kept moderate.
Because it stores well in the refrigerator, you can prepare it ahead of time and enjoy individual slices throughout the week.
Why You’ll Love This Recipe
Rich chocolate flavor
Unsweetened cocoa and sugar-free chocolate chips create a deep chocolate taste.
The cheesecake layer keeps the dessert from becoming overwhelmingly rich.
Creamy cheesecake topping
Greek yogurt and cream cheese create a smooth, velvety layer.
It sets beautifully while remaining tender and creamy.
Protein-packed ingredients
Eggs, Greek yogurt, cream cheese, and protein powder contribute to the protein content.
This makes it more suitable for high-protein dessert menus.
Lower-carb ingredients
Almond flour replaces conventional wheat flour in the brownie base.
A sugar-free sweetener helps reduce added sugar and total carbohydrates.
Make-ahead friendly
The cheesecake actually benefits from chilling before serving.
This makes it convenient for parties and meal preparation.
Common Mistakes to Avoid
Overbaking the cheesecake: Remove it when the center still has a slight jiggle; overbaking can make the topping dry or cracked.
Using cold cream cheese: Cold cream cheese can leave lumps, so allow it to soften before mixing.
Overmixing the cheesecake batter: Excessive mixing incorporates too much air and can cause the cheesecake layer to puff and collapse.
Cutting it while warm: The layers need time to set; slicing too early can cause the cheesecake topping to smear or separate.
Required Equipment
8-inch square baking pan — creates thick, bakery-style brownie cheesecake layers.
Mixing bowls — keep the brownie and cheesecake mixtures organized.
Electric hand mixer — quickly produces a smooth cheesecake mixture.
Rubber spatula — folds ingredients gently without overmixing.
Parchment paper — makes the finished cheesecake much easier to remove.
Wire cooling rack — allows the baked cheesecake to cool evenly.
Sharp knife — creates cleaner slices after chilling.
Storage Instructions
Allow the Brownie Cheesecake to cool completely before refrigerating. Cover the pan tightly with plastic wrap or transfer individual portions into airtight containers.
Refrigerator: Store for up to 5 days. Keep refrigerated because the cheesecake layer contains dairy and eggs.
Freezer: Freeze individual slices for up to 2 months. Wrap each piece tightly in plastic wrap and place it inside a freezer-safe container or bag.
To serve, thaw frozen slices overnight in the refrigerator. For the best texture, enjoy chilled rather than reheating.
Recipe Details
Preparation Time: 20 minutes
Cooking Time: 35–42 minutes
Cooling Time: 45 minutes
Chilling Time: 2–4 hours
Total Time: About 3 hours 45 minutes including chilling
Servings: 12 slices
Best Season: All-season
Total Calories: Approximately 235 calories per serving
Nutrition is an approximate estimate and will vary depending on the specific protein powder, cream cheese, yogurt, sweetener, and chocolate chips used.
Short 3-Line Description
Rich fudgy brownies meet a creamy, protein-friendly vanilla cheesecake layer in this irresistible dessert.
Almond flour, Greek yogurt, and protein powder help create a lower-carb, higher-protein treat.
Finish with chocolate chips and a few chocolate swirls for an impressive bakery-style look.
📝 Ingredients
For the Brownie Base
¾ cup superfine almond flour
⅓ cup unsweetened cocoa powder
½ cup granulated monk fruit or erythritol sweetener
¼ cup chocolate protein powder
½ teaspoon baking powder
¼ teaspoon salt
2 large eggs, room temperature
¼ cup plain Greek yogurt
3 tablespoons unsalted butter, melted
1 teaspoon vanilla extract
¼ cup sugar-free dark chocolate chips
For the Cheesecake Layer
8 ounces reduced-fat cream cheese, softened
¾ cup plain Greek yogurt
¼ cup vanilla protein powder
⅓ cup monk fruit or erythritol sweetener
1 large egg
1 teaspoon vanilla extract
2 tablespoons sugar-free chocolate chips
For the Chocolate Swirl
1 tablespoon unsweetened cocoa powder
1 tablespoon prepared cheesecake batter
Ingredient note: For the best high-protein result, choose Greek yogurt with a high protein content and a protein powder you enjoy the flavor of. Sugar-free chocolate chips can be replaced with finely chopped dark chocolate if preferred.
Directions
- Prepare the Pan
Preheat the oven to 350°F (175°C). Line an 8-inch square baking pan with parchment paper, leaving some overhang on two sides for easy removal.
- Mix the Brownie Dry Ingredients
In a medium bowl, whisk together almond flour, cocoa powder, protein powder, baking powder, sweetener, and salt.
The mixture should look evenly blended with no visible clumps of cocoa.
- Add the Wet Ingredients
In another bowl, whisk the eggs, Greek yogurt, melted butter, and vanilla until smooth.
Gradually add the wet mixture to the dry ingredients and stir just until combined.
High-protein tip: Avoid overmixing once the flour is incorporated because excessive mixing can make the brownie layer dense and tough.
- Add the Chocolate Chips
Fold in the ¼ cup of sugar-free chocolate chips.
The brownie batter should be thick and fudgy rather than pourable like cake batter.
- Make the Cheesecake Batter
Using a hand mixer on low to medium speed, beat the softened cream cheese until smooth, about 30–60 seconds.
Add Greek yogurt, protein powder, sweetener, egg, and vanilla. Beat just until creamy and combined.
- Build the Layers
Spread the brownie batter evenly into the prepared pan.
Spoon the cheesecake mixture over the brownie layer and gently spread it toward the edges without disturbing the brownie underneath.
- Create the Chocolate Swirls
Remove about 1 tablespoon of cheesecake batter and mix it with 1 tablespoon cocoa powder.
Drop small spoonfuls of the chocolate mixture over the cheesecake layer. Use a toothpick or thin knife to gently swirl the chocolate through the surface.
Do not over-swirl—the goal is to create visible ribbons of chocolate.
- Add Chocolate Chips
Scatter the remaining 2 tablespoons of sugar-free chocolate chips over the top.
Press them very lightly into the cheesecake surface so they stay in place while baking.
- Bake
Place the pan in the preheated 350°F (175°C) oven.
Bake for approximately 35–42 minutes. The edges should look set while the center should still have a slight gentle jiggle.
Do not wait for the center to become completely firm in the oven. It will continue setting as it cools.
- Cool
Remove the pan and place it on a wire rack.
Allow the cheesecake to cool at room temperature for approximately 45 minutes.
- Chill
Cover and refrigerate for at least 2–4 hours, preferably overnight.
Chilling is important because it allows the cheesecake layer to firm up and makes the brownie base easier to slice.
- Slice and Serve
Lift the cheesecake from the pan using the parchment overhang.
Cut into 12 squares using a sharp knife. For especially clean cuts, wipe the knife between slices.
Serve chilled with optional sugar-free chocolate shavings or a small spoonful of Greek yogurt.
Nutrition Facts
Per Serving – Approximate
Nutrient Amount
Calories 235 kcal
Total Fat 16 g
Cholesterol 65 mg
Sodium 190 mg
Potassium 175 mg
Total Carbohydrates 12 g
Fiber 4 g
Net Carbs 8 g
Sugars 2 g
Protein 16 g
Calcium 115 mg
These values are approximate and can vary significantly according to the brands and sweeteners used.
Notes
For cleaner slices: Chill overnight before cutting.
For extra chocolate flavor: Add ½ teaspoon espresso powder to the brownie batter.
For a stronger cheesecake flavor: Add 1 teaspoon fresh lemon juice to the cheesecake mixture.
For more protein: Use a Greek yogurt and protein powder combination that provides a higher protein content per serving.
For allergies: This recipe contains dairy, eggs, and almonds; use appropriate substitutions if needed.
Reheating: This dessert is best served chilled and generally does not need reheating.
Freezer tip: Freeze individual portions rather than the entire cheesecake so you can thaw only what you need.
Chocolate variation: Dark sugar-free chocolate chips work particularly well with the cocoa brownie base.
Sweetener note: If using a sweetener blend other than monk fruit/erythritol, adjust the quantity according to its sweetness level.
Frequently Asked Questions
- Can I make Brownie Cheesecake ahead of time?
Yes, it is ideal for making ahead because the cheesecake layer becomes firmer and easier to slice after several hours of refrigeration.
- How do I keep the cheesecake layer from cracking?
Avoid overmixing the eggs and remove the cheesecake from the oven while the center still has a slight jiggle.
- Can I use regular flour instead of almond flour?
Yes, but the carbohydrate and nutritional values will change, and the brownie texture may be slightly different.
- Can I use cottage cheese instead of Greek yogurt?
Yes, blended cottage cheese can be used for part of the Greek yogurt, although the cheesecake layer may have a slightly different texture.
- Can I make this recipe more chocolatey?
Absolutely—add espresso powder, extra cocoa powder, or a small amount of sugar-free dark chocolate to intensify the chocolate flavor.
- How long should Brownie Cheesecake chill before serving?
For the best texture, chill it for at least 2–4 hours, although overnight chilling produces the cleanest slices.