
Description
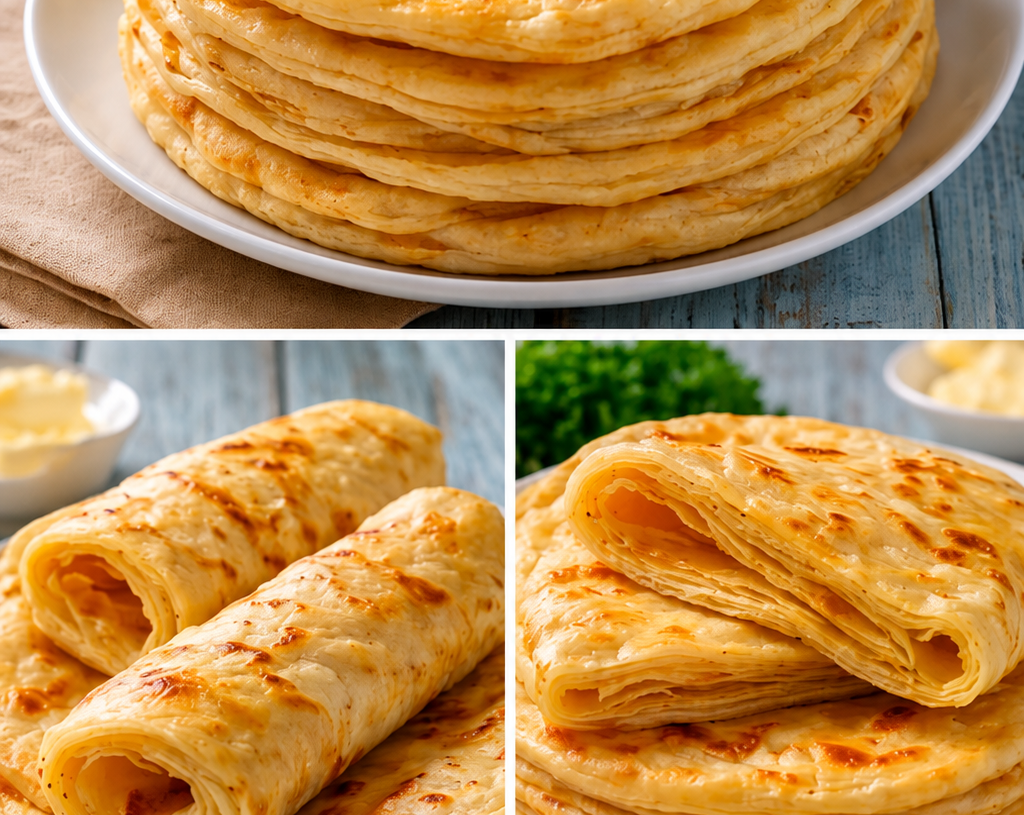
Flaky Layered Paratha is a wonderfully crisp, golden flatbread with delicate layers that stay tender and soft inside. This high-protein version uses Greek yogurt, egg, and vital wheat gluten alongside whole-wheat flour to give the classic paratha a protein boost while preserving its irresistible flaky texture.
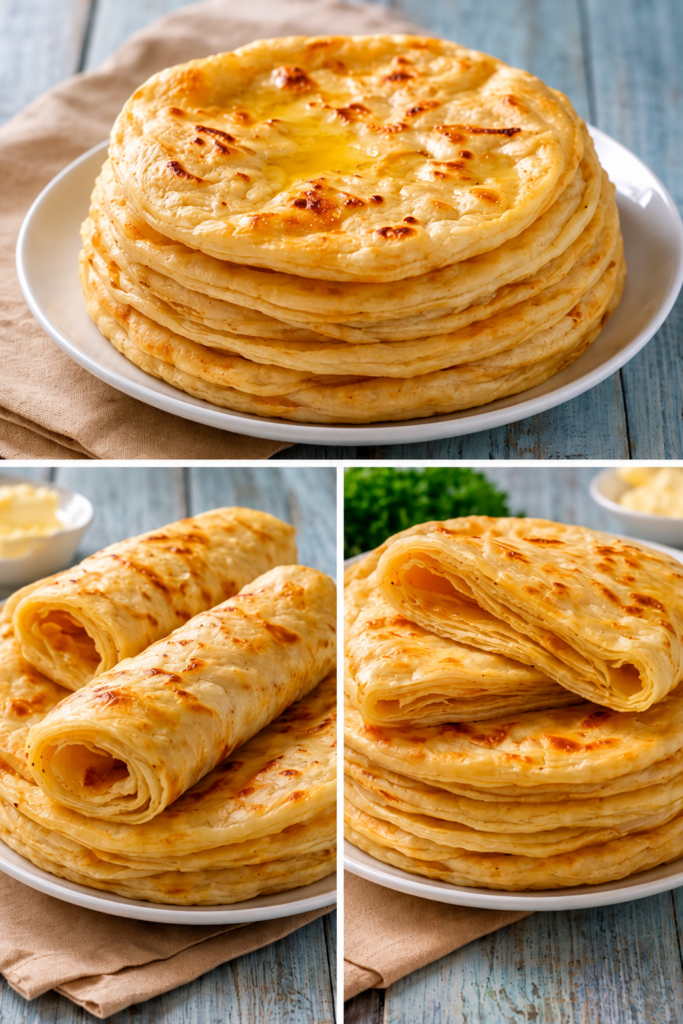
Each paratha is cooked until beautifully golden with crisp edges and visible layers that separate when you tear into it. Serve it hot with eggs, grilled chicken, cottage cheese, yogurt, or your favorite savory curry for a satisfying and protein-friendly meal.
Can This Flaky Layered Paratha Support Weight Loss Goals?
It can fit into a balanced weight-management eating pattern when portions and toppings are considered. The added Greek yogurt, egg, and vital wheat gluten increase the protein content compared with a traditional flour-and-fat paratha, which can make the meal more satisfying.
However, paratha is still a calorie-dense food because it contains flour and cooking fat, so serving size matters. Pairing one paratha with lean protein and vegetables rather than several parathas with calorie-heavy sides can create a more balanced plate.
Does Flaky Layered Paratha Fit a High-Protein Lifestyle?
Yes, this upgraded version is more protein-focused than traditional paratha because it combines whole-wheat flour with Greek yogurt, egg, and vital wheat gluten.
One serving provides approximately 11g of protein, depending on the exact ingredients and flour brands used.
The estimated net carbs are about 27g per paratha, so this recipe is protein-friendly but is not keto or very low-carb.
For an even higher-protein meal, serve it with eggs, grilled chicken, cottage cheese, or Greek yogurt.
Why This Recipe Is Special
- Protein Boosted: Greek yogurt, egg, and vital wheat gluten increase the protein content.
- Flaky & Layered: Rolling, folding, and layering the dough creates the classic paratha texture.
- Golden & Crispy: A hot skillet produces beautifully browned surfaces and crisp edges.
- Versatile: Enjoy it for breakfast, lunch, dinner, or as a satisfying snack.
- Homemade Comfort Food: It delivers the warmth and flavor of traditional paratha with a more protein-conscious ingredient profile.
My Personal Experience
- The layers are the best part:
I love watching the dough puff slightly as it cooks and seeing the delicate layers separate.
The outside becomes crisp while the middle stays pleasantly soft and chewy. - Greek yogurt keeps the dough tender:
Adding Greek yogurt gives the dough a softer texture without relying entirely on extra oil or butter.
It also makes the recipe an easy way to add more protein to a classic flatbread. - It works with almost anything:
The mildly savory flavor pairs beautifully with eggs, chicken, yogurt, vegetables, or curries.
Fresh from the skillet, it is especially delicious with a little butter melting over the top.
Perfect For
Flaky Layered Paratha is perfect for protein-focused breakfasts, weekend brunches, family dinners, meal-prep meals, and comforting weeknight dishes. It is especially useful when you want a homemade flatbread that provides more protein than a basic paratha.
For a balanced high-protein meal, serve one paratha with scrambled eggs, grilled chicken, cottage cheese, Greek yogurt, or a vegetable-and-protein curry.
Why You’ll Love This Recipe
- Crispy outside, soft inside:
The layered dough creates an irresistible contrast between golden crispness and tender centers.
Every bite has a satisfying combination of flaky and chewy textures. - Higher in protein:
Greek yogurt, egg, and vital wheat gluten give this paratha a meaningful protein boost.
It is a practical upgrade for people who want traditional foods to contribute more protein. - Easy skillet cooking:
You don’t need a special oven or complicated equipment to make these parathas.
A hot skillet or tawa is enough to create beautifully browned layers. - Freezer-friendly:
Cooked parathas can be frozen and reheated whenever you need a quick meal.
This makes them convenient for busy mornings and meal-prep days. - Customizable:
Add garlic, herbs, chili flakes, cumin, or dried fenugreek for a different flavor profile.
You can also adjust the cooking fat according to your preference.
Common Mistakes to Avoid
- Making the dough too dry: Dry dough is difficult to roll and can produce tough, cracked layers.
- Skipping the resting time: Resting allows the gluten to relax, making the dough much easier to stretch and roll.
- Using too much flour while rolling: Excess flour can prevent the layers from sticking together properly.
- Cooking over very high heat: Extremely high heat can burn the outside before the center is fully cooked.
Required Equipment
- Large mixing bowl — provides enough room to knead the dough comfortably.
- Rolling pin — helps create thin, even layers.
- Heavy skillet or tawa — distributes heat evenly for consistent browning.
- Pastry brush or spoon — makes it easy to spread the butter or oil between layers.
- Kitchen towel — keeps the prepared dough balls covered so they do not dry out.
Storage Instructions
Refrigerator: Allow cooked parathas to cool completely, then place them in an airtight container with parchment paper between each one. Refrigerate for up to 3–4 days.
Freezer: Wrap individual parathas in parchment or plastic wrap and place them in a freezer-safe bag or airtight container. Freeze for up to 2 months for the best texture.
Reheating: Reheat refrigerated parathas in a dry skillet over medium heat for about 1–2 minutes per side. Frozen parathas can be reheated directly in a skillet over medium-low heat until hot and crisp.
Proper storage does not reduce the protein content significantly, although texture may become slightly softer after refrigeration.
Recipe Details
Preparation Time: 25 minutes
Resting Time: 30 minutes
Cooking Time: 20 minutes
Total Time: 1 hour 15 minutes
Servings: 8 parathas
Best Season: All-season
Total Calories: Approximately 220 calories per serving
Short 3-Line Description
Golden, crispy, and beautifully layered, this homemade paratha is comfort food with a protein boost.
Greek yogurt, egg, and vital wheat gluten add protein while keeping the interior tender.
Serve it hot with eggs, chicken, yogurt, or vegetables for a satisfying meal.
📝 Ingredients
For the Dough
- 2 cups (240g) whole-wheat flour
- ¼ cup (30g) vital wheat gluten — boosts protein and improves the dough’s elasticity.
- ½ cup (120g) plain nonfat Greek yogurt
- 1 large egg
- ½ teaspoon salt
- ½ teaspoon baking powder
- ½ cup warm water, approximately, added gradually
- 1 teaspoon olive oil, for kneading
For the Layers
- 3 tablespoons melted butter or ghee
- 2 tablespoons whole-wheat flour, for dusting and layering
- 1 teaspoon olive oil or ghee, for cooking each batch as needed
Optional Flavor Boost
- ½ teaspoon cumin seeds
- ½ teaspoon dried fenugreek leaves
- ¼ teaspoon red chili flakes
- 1 tablespoon chopped fresh cilantro
Directions
1. Combine the dry ingredients
Add the whole-wheat flour, vital wheat gluten, salt, and baking powder to a large mixing bowl. Whisk together until evenly distributed.
2. Add the protein-rich ingredients
Add the Greek yogurt and egg. Mix with a spoon or your hands until a shaggy dough begins to form.
High-protein tip: Greek yogurt adds moisture and protein, while vital wheat gluten helps prevent the added protein ingredients from making the dough too fragile.
3. Add warm water gradually
Pour in the warm water a little at a time, mixing continuously. Stop when the dough becomes soft and pliable but not sticky.
You may not need the entire ½ cup depending on the flour and yogurt.
4. Knead the dough
Add 1 teaspoon olive oil and knead for approximately 6–8 minutes over a lightly floured surface.
The finished dough should feel smooth, elastic, and soft rather than stiff.
5. Rest the dough
Place the dough in a lightly oiled bowl and cover it with a clean kitchen towel. Let it rest for 30 minutes at room temperature.
This resting period is important because it relaxes the gluten and makes rolling much easier.
6. Divide into portions
Divide the dough into 8 equal portions and roll each portion into a smooth ball.
Keep the remaining dough balls covered while working so they do not develop a dry surface.
7. Create the first layer
Take one dough ball and roll it into a thin circle approximately 7–8 inches wide.
Brush the surface lightly with melted butter or ghee and sprinkle with a small amount of whole-wheat flour.
8. Fold for flaky layers
Fold the dough into pleats or accordion-style folds, then coil the folded strip into a spiral.
Tuck the end underneath and gently flatten the coil with your fingers.
9. Roll again
Roll the coiled dough gently into a 6–7-inch round.
Do not press too aggressively, because excessive pressure can flatten the layers and make the finished paratha less flaky.
10. Preheat the skillet
Heat a heavy skillet or tawa over medium heat for about 3–4 minutes.
The skillet should be hot enough that the dough begins cooking immediately when placed on the surface, but it should not smoke.
11. Cook the first side
Place the rolled paratha onto the hot skillet and cook for approximately 45–60 seconds.
When small bubbles appear and the bottom develops light golden spots, flip it.
12. Cook the second side
Brush the cooked surface lightly with butter, ghee, or olive oil. Cook for another 45–60 seconds.
Flip again and cook for another 30–45 seconds per side, pressing gently around the edges with a spatula.
13. Look for the right texture
The paratha is ready when both sides are golden brown with darker toasted spots, the edges look crisp, and the center feels cooked but still flexible.
Avoid overcooking because the extra heat can make the protein-rich dough dry.
14. Finish the remaining parathas
Repeat the rolling, layering, and cooking process with the remaining dough.
Stack finished parathas under a clean kitchen towel to keep them warm and soft.
15. Serve immediately
Gently press or clap each warm paratha between your hands for a few seconds to encourage the flaky layers to separate.
Serve hot with Greek yogurt, eggs, grilled chicken, cottage cheese, vegetables, or your favorite curry.
Nutrition Facts
Per Serving — Approximate
- Calories: 220 kcal
- Fat: 7.5g
- Saturated Fat: 3.2g
- Cholesterol: 30mg
- Sodium: 230mg
- Potassium: 170mg
- Total Carbohydrates: 31g
- Fiber: 4g
- Net Carbs: 27g
- Sugars: 1.5g
- Protein: 11g
- Calcium: 45mg
Note: Nutrition values are approximate and can vary considerably depending on the flour, Greek yogurt, butter/ghee, and vital wheat gluten brands used.
Notes
- For maximum flakiness: Don’t skip the butter/ghee layer between the folds.
- For a softer paratha: Keep cooked parathas covered with a clean towel immediately after cooking.
- For extra protein: Serve with Greek yogurt, cottage cheese, eggs, or grilled chicken rather than adding excessive cooking fat.
- For more flavor: Add cumin, dried fenugreek, garlic powder, chili flakes, or fresh cilantro to the dough.
- For a lighter version: Use a small amount of olive oil instead of butter or ghee.
- Allergy note: This recipe contains wheat/gluten, egg, and dairy. Vital wheat gluten makes this unsuitable for gluten-free diets.
- Low-carb note: Although this is higher in protein than traditional paratha, it is not a low-carb or keto recipe because whole-wheat flour remains the primary carbohydrate source.
- Reheating: A skillet is preferred over the microwave because it restores some of the crisp texture.
Frequently Asked Questions
1. Can I make these parathas ahead of time?
Yes, you can cook them ahead and refrigerate or freeze them for convenient meals later.
2. Can I replace Greek yogurt?
Yes, thick plain yogurt can be substituted, although the exact amount of water may need slight adjustment.
3. Can I make this recipe without vital wheat gluten?
Yes, simply replace it with an equal amount of whole-wheat flour, but the protein content and elasticity will be lower.
4. How do I make the paratha extra flaky?
Use a thin layer of butter or ghee between the dough folds and avoid rolling the final dough too aggressively.
5. Is this paratha keto-friendly?
No, this version is protein-enhanced but still contains enough wheat-based carbohydrates that it is not suitable for a strict keto diet.
6. What is the best high-protein way to serve it?
Pair one paratha with eggs, grilled chicken, cottage cheese, or Greek yogurt to create a more protein-rich and balanced meal.