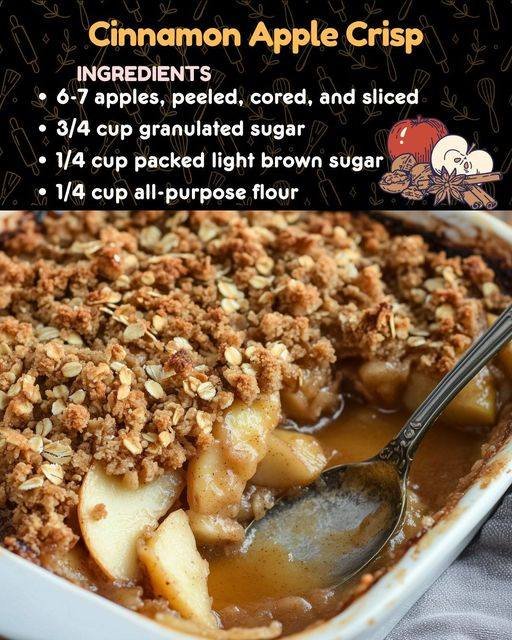
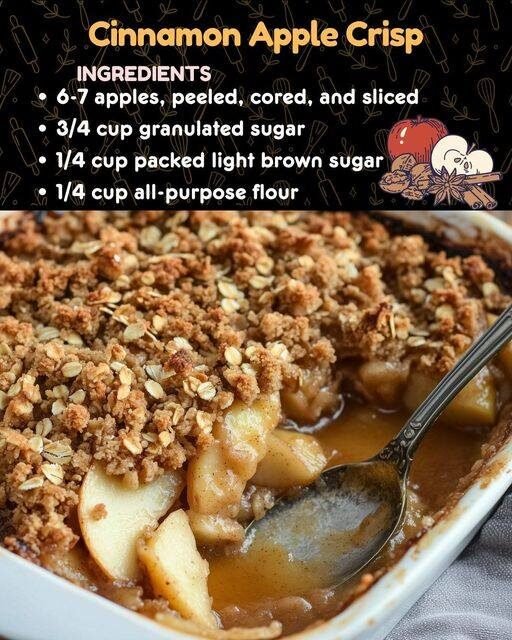
Old-Fashioned Apple Crisp: A Guilt-Free Delight
Welcome to our Old-Fashioned Apple Crisp recipe, a comforting dessert that combines the warm, sweet flavors of baked apples with a crispy topping. This delightful dish is designed for those following the WW (formerly Weight Watchers) program, ensuring you can indulge without straying from your health goals. In this comprehensive guide, we will delve into the ingredients, detailed step-by-step instructions, nutritional information, SmartPoints, and tips for creating the perfect apple crisp.
Ingredients
For the Apple Filling:
6 cups of peeled, cored, and sliced apples (about 6 medium apples; Granny Smith or Honeycrisp are great choices)
1 tablespoon lemon juice
1/4 cup granulated sugar (or a sugar substitute to reduce points)
1 teaspoon ground cinnamon
1/4 teaspoon nutmeg (optional)
1 tablespoon all-purpose flour (for thickening)
For the Crisp Topping:
1 cup rolled oats
1/2 cup all-purpose flour (or almond flour for a low-carb option)
1/2 cup brown sugar (or a sugar substitute)
1/2 teaspoon ground cinnamon
1/4 teaspoon salt
1/4 cup unsalted butter, melted (or coconut oil for a dairy-free version)
Optional Toppings:
Whipped cream (light or sugar-free)
Vanilla ice cream (light or sugar-free)
Equipment Needed
Oven
Mixing bowls
9×13-inch baking dish
Knife and cutting board
Measuring cups and spoons
Whisk or fork
Instructions
Step 1: Preparing the Apples
Select Your Apples: Choose a mix of sweet and tart apples to create depth in flavor. Granny Smith apples provide a lovely tartness, while Honeycrisp apples add sweetness and crunch.
Peel and Slice: Carefully peel, core, and slice the apples into thin wedges. Aim for uniform slices to ensure even cooking.
Mix with Lemon Juice: In a large mixing bowl, toss the apple slices with lemon juice to prevent browning and enhance their natural flavor.
Step 2: Creating the Apple Filling
Combine Ingredients: Add the granulated sugar (or sugar substitute), cinnamon, nutmeg, and flour to the apple mixture. Toss gently until the apples are well coated.
Transfer to Baking Dish: Pour the apple mixture into a greased 9×13-inch baking dish, spreading it evenly.
Step 3: Preparing the Crisp Topping
Mix Dry Ingredients: In a separate mixing bowl, combine the rolled oats, flour, brown sugar (or sugar substitute), cinnamon, and salt. Mix until well combined.
Add Butter: Drizzle the melted butter over the oat mixture and stir until the mixture resembles coarse crumbs. This will create that delicious crispy topping.
Step 4: Assembling the Crisp
Top the Apples: Evenly spread the oat topping over the apple filling, ensuring that it covers the apples completely. This helps to lock in moisture and creates a crunchy texture.
Step 5: Baking
Preheat the Oven: Preheat your oven to 350°F (175°C). Proper preheating ensures even cooking.
Bake: Place the baking dish in the oven and bake for 35-40 minutes, or until the apples are tender and the topping is golden brown. Keep an eye on it to prevent over-browning.
Step 6: Cooling and Serving
Cool Slightly: Once baked, remove the apple crisp from the oven and allow it to cool for about 10-15 minutes. This cooling period helps the filling set up a bit.
Serve: Scoop generous portions into bowls. Optionally, top with whipped cream or a scoop of vanilla ice cream for a delightful finishing touch.
Step 7: Storing Leftovers
Store Properly: If you have leftovers, store them in an airtight container in the refrigerator for up to 3 days. Reheat in the microwave or oven before serving.

Nutritional Information (Per Serving, based on 8 servings)
Calories: 210
Protein: 2g
Fat: 7g
Carbohydrates: 36g
Fiber: 3g
Net Carbs: 33g
WW SmartPoints: 6 (may vary based on ingredient substitutions)
Useful Information
Choosing the Right Apples
The type of apples you choose can greatly affect the flavor and texture of your apple crisp. Tart apples like Granny Smith balance well with the sweetness of the sugar, while sweeter varieties like Fuji or Honeycrisp add complexity to the dish.
Tips for Perfect Crisp
Don’t Skip the Flour: The flour in both the filling and topping helps to thicken the juices released by the apples, preventing the crisp from becoming too soggy.
Experiment with Spices: Feel free to add spices like ginger or allspice for an additional flavor twist.
Serving Suggestions: Pair your apple crisp with a dollop of Greek yogurt for added protein and creaminess.
Variations
Nutty Topping: Add chopped nuts like walnuts or pecans to the topping for added crunch and flavor.
Fruit Combinations: Experiment by adding other fruits such as berries or pears to the apple filling for a mixed fruit crisp.
Gluten-Free Option: Use gluten-free flour and oats to make this recipe suitable for those with gluten sensitivities.
Conclusion
This Old-Fashioned Apple Crisp is a warm, inviting dessert that satisfies your sweet tooth while keeping your WW points in check. Whether served warm from the oven or enjoyed as leftovers, it’s a versatile dish perfect for any occasion. This recipe brings together the wholesome goodness of apples with a crispy topping, creating a balance of flavors and textures that everyone will love. Indulge in this classic dessert and enjoy the taste of nostalgia with every bite!
By following this detailed guide, you’ll create a delicious, guilt-free Old-Fashioned Apple Crisp that is perfect for family gatherings, holiday celebrations, or simply as a comforting treat at the end of the day. Enjoy every moment of preparing and savoring this delightful dish!

