Introduction
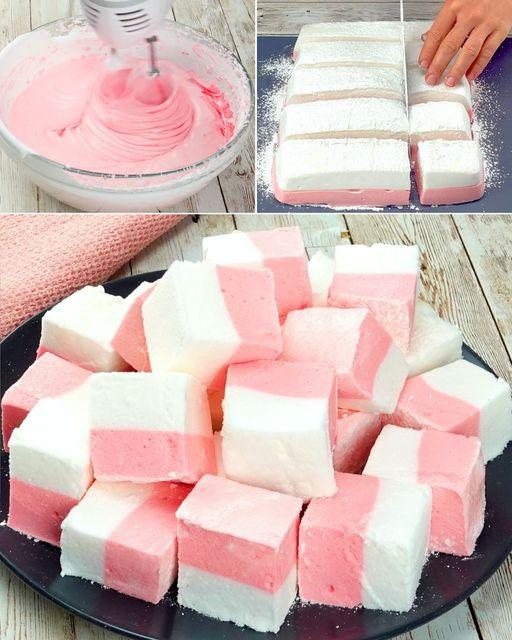
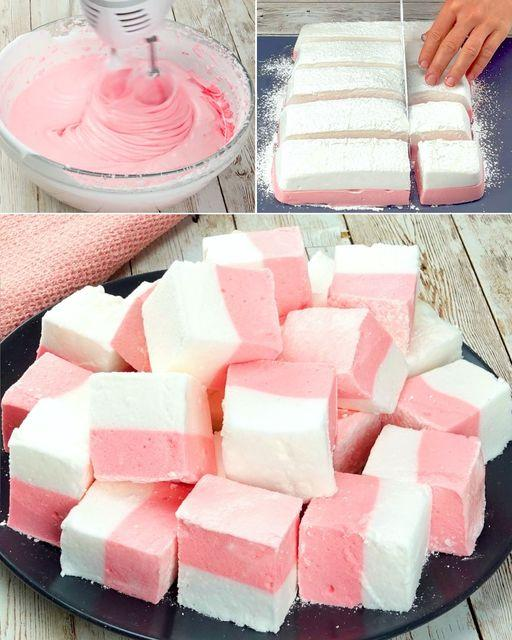
Indulging in marshmallows on a keto diet may seem impossible, but with this no-fail fluffy keto marshmallow recipe, you can enjoy this nostalgic treat without the guilt. These marshmallows are sugar-free, low-carb, and incredibly fluffy, making them perfect for snacking, adding to hot cocoa, or even roasting over a fire. This recipe is designed for both novice and experienced cooks, ensuring that you achieve perfect marshmallows every time.
In this comprehensive guide, we will cover everything from the ingredients and equipment needed to detailed step-by-step instructions, variations, and nutritional information. Let’s dive into the delightful world of keto marshmallows!
Ingredients
For the Marshmallows
- 1 cup water (divided)
- 3 tablespoons gelatin powder (unflavored)
- 1 cup erythritol or other keto-friendly sweetener (granulated)
- 1/4 teaspoon salt
- 1 teaspoon vanilla extract
- 1/4 teaspoon cream of tartar (optional; helps stabilize)
- 1/2 teaspoon powdered stevia (optional; for added sweetness)
For Dusting
- 1/4 cup erythritol (or a mix of erythritol and coconut flour) for coating
Equipment Needed
- Stand mixer or hand mixer
- Saucepan
- Whisk
- 9×9-inch (or similar) baking dish (lightly greased or lined with parchment paper)
- Measuring cups and spoons
- Thermometer (candy thermometer recommended)
- Sifter (for dusting)
- Spatula

Instructions
Step 1: Prepare the Gelatin
- Bloom the Gelatin: In a small bowl, add 1/2 cup of cold water. Sprinkle 3 tablespoons of gelatin powder over the water. Allow it to sit undisturbed for about 5-10 minutes. This process, known as blooming, will hydrate the gelatin and prepare it for use.
- Heat the Remaining Water: In a medium saucepan, add the remaining 1/2 cup of water. Heat over medium heat until it starts to simmer, but do not let it boil.
Step 2: Combine Ingredients
- Add Sweetener: Once the water is simmering, add 1 cup of erythritol (or your preferred keto sweetener) and 1/4 teaspoon of salt. Stir constantly until the sweetener dissolves completely.
- Incorporate Gelatin: After the sweetener has dissolved, add the bloomed gelatin mixture to the saucepan. Continue stirring until the gelatin is fully dissolved and the mixture is smooth.
Step 3: Whip the Mixture
- Cool the Mixture: Remove the saucepan from heat and allow the mixture to cool slightly, about 5 minutes. You want it warm but not hot, around 110°F (43°C).
- Prepare for Mixing: Transfer the mixture to a stand mixer bowl (or use a large mixing bowl if using a hand mixer).
- Add Flavoring: Stir in 1 teaspoon of vanilla extract and 1/4 teaspoon of cream of tartar (if using). The cream of tartar will help stabilize the marshmallow mixture.
- Whip the Mixture: Begin whipping the mixture on low speed, gradually increasing to high. Whip for about 10-15 minutes until the mixture becomes thick, fluffy, and white, resembling marshmallow fluff. The volume will increase significantly.
Step 4: Set the Marshmallows
- Prepare the Baking Dish: While the mixture is whipping, lightly grease your baking dish (9×9-inch) or line it with parchment paper for easy removal later.
- Transfer to Dish: Once the marshmallow mixture is whipped to perfection, pour it into the prepared baking dish. Use a spatula to spread it evenly.
- Dust with Erythritol: Sift 1/4 cup of erythritol over the top of the marshmallow mixture to prevent sticking.
- Let It Set: Cover the dish with plastic wrap or a clean kitchen towel and allow it to set at room temperature for at least 4 hours, or overnight if possible. This time allows the marshmallows to firm up properly.
Step 5: Cut and Dust
- Prepare to Cut: After the marshmallows have set, dust a clean cutting surface with a little erythritol to prevent sticking.
- Cut the Marshmallows: Turn the marshmallow slab out onto the cutting surface. Using a sharp knife or pizza cutter, cut the marshmallows into squares of your desired size.
- Dust the Sides: Dust the cut sides of the marshmallows with more erythritol to prevent them from sticking together.
Step 6: Store and Enjoy
- Storage: Store the marshmallows in an airtight container at room temperature. They should stay fresh for about 1-2 weeks, although they may become slightly firmer over time.
- Serving Suggestions: Enjoy the marshmallows on their own, or use them in keto-friendly desserts like s’mores, hot cocoa, or even as a topping for keto ice cream.
Step 7: Troubleshooting and Tips
- Gelatin Quality: Make sure to use high-quality unflavored gelatin, as this is crucial for achieving the perfect texture.
- Sweetener Alternatives: If you prefer, you can experiment with other keto-friendly sweeteners like monk fruit or allulose, but be aware that this may affect the texture and sweetness.
- Flavor Variations: To make flavored marshmallows, consider adding a few drops of food-safe extracts (like peppermint, almond, or coconut) during the whipping process.
Nutritional Information (Per Marshmallow, based on 20 servings)
- Calories: 20
- Total Fat: 0g
- Saturated Fat: 0g
- Cholesterol: 0mg
- Sodium: 20mg
- Total Carbohydrates: 1g
- Dietary Fiber: 0g
- Sugars: 0g
- Sugar Alcohols: 1g (from erythritol)
- Protein: 1g
SmartPoints (WW)
- SmartPoints: 0 (for one marshmallow, depending on the specific sweetener used)
- PersonalPoints: May vary based on individual preferences and specific WW program adjustments.
Conclusion
Making keto-friendly marshmallows at home is not only simple but incredibly rewarding. These no-fail fluffy keto marshmallows provide a guilt-free way to enjoy a classic treat that can enhance various desserts or stand alone as a delightful snack. With the right ingredients and techniques, you can enjoy this low-carb delicacy while adhering to your keto lifestyle. Give this recipe a try, and relish the fluffy goodness of homemade keto marshmallows!

