No-Bake Homemade Crunch: A Keto Low-Carb Recipe
Indulging in a sweet treat while following a keto or low-carb lifestyle doesn’t have to be difficult. This no-bake homemade crunch recipe offers a satisfying, crispy texture and a delightful flavor profile without the carbs. Perfect as a snack or a dessert, it combines healthy fats and protein, making it a nutritious choice for anyone looking to maintain their dietary goals.
Ingredients
For the Crunch Base:
- 1 cup unsweetened almond flour – 12g net carbs
- 1/2 cup unsweetened shredded coconut – 4g net carbs
- 1/4 cup chia seeds – 0g net carbs
- 1/4 cup unsweetened cocoa powder – 8g net carbs
- 1/2 cup sugar-free chocolate chips – 4g net carbs
- 1/4 cup nut butter (almond or peanut) – 3g net carbs
- 1/4 cup unsweetened vanilla-flavored almond milk – 1g net carbs
- 1/4 cup erythritol (or another keto-friendly sweetener) – 0g net carbs
- 1 teaspoon vanilla extract – 0g net carbs
- Pinch of salt – 0g net carbs
Total Net Carbs:
- Whole Dish: Approximately 34g net carbs
- Per Serving (16 servings): Approximately 2g net carbs
Instructions
Step 1: Prepare Your Workspace
Begin by gathering all ingredients and tools. You will need a mixing bowl, a spatula, a measuring cup, and a square baking dish (8×8 inches) lined with parchment paper for easy removal.
Step 2: Combine Dry Ingredients
In a large mixing bowl, combine the unsweetened almond flour, unsweetened shredded coconut, chia seeds, unsweetened cocoa powder, sugar-free chocolate chips, and a pinch of salt. Whisk these dry ingredients together to ensure they are evenly distributed, creating a flavorful and textured base for your crunch.
Step 3: Prepare the Wet Mixture
In a separate bowl, mix the nut butter, unsweetened almond milk, erythritol (or your preferred sweetener), and vanilla extract. Use a whisk or a fork to blend until the mixture is smooth and creamy. This will serve as the binding agent for your crunch, enhancing both flavor and texture.
Step 4: Combine Dry and Wet Ingredients
Pour the wet mixture into the bowl with the dry ingredients. Use a spatula to gently fold the ingredients together until everything is well combined. The mixture should be thick but cohesive, allowing for easy shaping in the next step.
Step 5: Press into the Baking Dish
Transfer the mixture to the prepared baking dish. Using your spatula or your hands, press the mixture firmly into the bottom of the dish, creating an even layer. This step is crucial for achieving the right texture, as a well-pressed mixture will hold together better once set.
Step 6: Chill the Mixture
Place the baking dish in the refrigerator for at least 30 minutes. Chilling allows the mixture to firm up, making it easier to cut into bars or squares later. This step also enhances the flavors as they meld together during the chilling process.
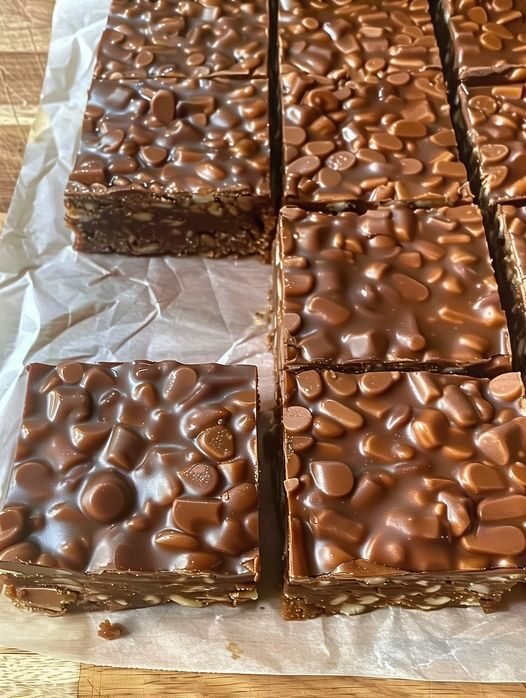
Step 7: Cut into Servings
After chilling, remove the baking dish from the refrigerator. Using a sharp knife, cut the mixture into squares or rectangles, depending on your desired serving size. The crunch will hold its shape well thanks to the nut butter and chia seeds.
Step 8: Store Properly
Store the homemade crunch bars in an airtight container in the refrigerator. They will keep well for up to a week, maintaining their texture and flavor. If you prefer a longer shelf life, you can freeze them for up to 3 months.
Step 9: Enjoying Your Crunch
These no-bake homemade crunch bars are perfect for on-the-go snacking, dessert, or a midday pick-me-up. Their rich, chocolatey flavor combined with the crunchiness of the almond flour and coconut makes them a satisfying treat that aligns with your keto lifestyle.
Step 10: Nutritional Information
- Calories per serving: Approximately 120 calories
- Total Fat: 9g
- Saturated Fat: 2g
- Net Carbohydrates: 2g
- Fiber: 2g
- Protein: 4g
Step 11: Variations
- Nut Butter Substitutions: Feel free to use different nut butters like cashew or sunflower seed butter to alter the flavor.
- Add-ins: You can mix in chopped nuts, seeds, or even dried berries (in moderation) for added texture and flavor.
- Flavor Enhancements: Experiment with different extracts such as almond or peppermint for a unique twist.
Step 12: Serving Suggestions
These crunch bars can be enjoyed as-is or paired with a dollop of whipped coconut cream for an extra indulgent dessert. They also make a great topping for keto-friendly ice cream.
Step 13: Health Benefits
This no-bake crunch is rich in healthy fats and protein, making it a filling snack that can help curb cravings and provide sustained energy. The use of chia seeds adds omega-3 fatty acids and fiber, enhancing its nutritional profile.
Step 14: Meal Prep
These bars are ideal for meal prepping. Make a double batch and store them in the fridge for a week’s worth of snacks or desserts. They are perfect for busy individuals looking for quick, healthy options.
Step 15: Keto-Friendly Ingredients
Using ingredients like almond flour, sugar-free chocolate chips, and erythritol ensures that this recipe stays low in carbs while still being delicious. Always check labels for any hidden sugars or carbs when selecting products.
Step 16: Tips for Success
- Texture Adjustment: If the mixture seems too dry, add a little more almond milk; if too wet, incorporate a bit more almond flour.
- Taste Testing: Feel free to adjust the sweetness by adding more erythritol according to your preference.
- Uniform Size: When cutting the bars, aim for uniform sizes for even portioning and easier serving.
Step 17: Kid-Friendly Version
This recipe can also be a great way to introduce children to healthier snacks. The chocolate flavor and crunchiness are appealing to kids, making it a fun and nutritious option.
Step 18: Community Feedback
Encourage feedback from family and friends after they try your homemade crunch bars. Their insights can help you refine the recipe and explore new flavor combinations.
Step 19: Storing Long-Term
If you choose to freeze the bars, wrap each piece individually in parchment paper and store them in a zip-top freezer bag. This makes it easy to grab a serving without thawing the entire batch.
Step 20: Conclusion
This no-bake homemade crunch recipe is an excellent addition to any keto or low-carb meal plan. With its satisfying crunch, rich chocolate flavor, and healthful ingredients, it’s a treat that you can feel good about indulging in. Enjoy this delicious, guilt-free snack anytime, knowing it fits seamlessly into your dietary goals!