
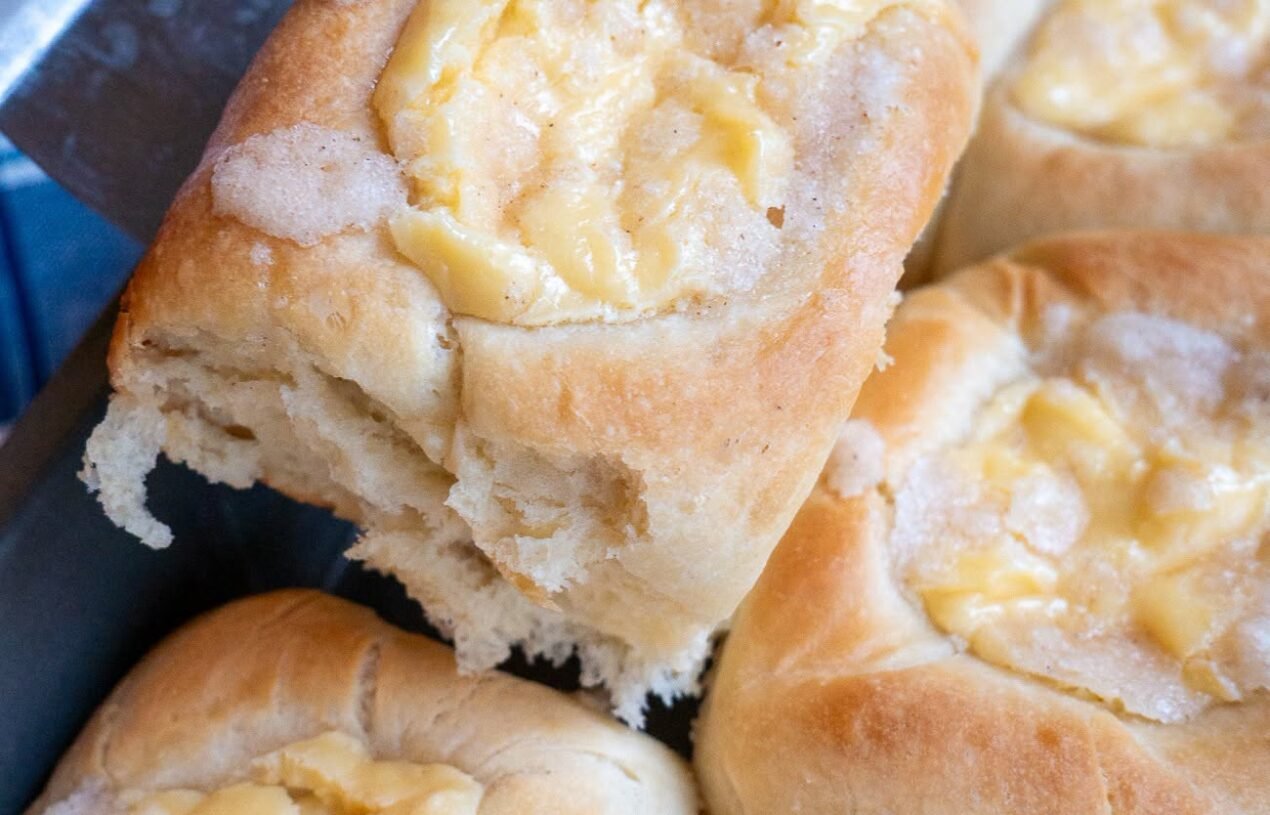
Lightened-Up Cheesy Bakery Rolls
These Lightened-Up Cheesy Bakery Rolls are inspired by the soft, golden cheese-topped rolls shown in your photo. They have a tender, fluffy center, a lightly crisp golden exterior, and a savory cheese topping that makes them feel like something you would pick up from a neighborhood bakery.
For a lighter everyday version, this recipe uses smaller portions, reduced-fat cheese, less added fat, and part whole-wheat flour while keeping enough regular flour to preserve the soft texture. The goal isn’t to make bread “diet food,” but to create a balanced, portion-friendly baked option that can fit comfortably into an overall nutritious eating pattern.
Recipe at a Glance
Recipe Name: Lightened-Up Cheesy Bakery Rolls
Category: Breakfast, Snack, Side Dish, Baking
Cuisine: American bakery-inspired
Prep Time: 25 minutes
Rising Time: 60–75 minutes
Bake Time: 15–18 minutes
Total Time: About 2 hours
Yield: 12 rolls
Difficulty: Moderate
Serving Size: 1 roll
Why You’ll Love These Rolls
These rolls are inspired by classic bakery-style cheese rolls but are prepared with a few practical adjustments. The dough remains soft and fluffy, while the cheese topping provides the rich, savory flavor that makes these rolls so appealing.
Instead of loading the dough with butter, this version uses a smaller amount of olive oil. A combination of all-purpose and whole-wheat flour adds a little more fiber and gives the rolls a pleasant, slightly nutty flavor.
Reduced-fat cheddar keeps the topping cheesy while helping moderate the amount of fat in each serving. You can also use a sharp cheddar because its stronger flavor means you don’t need an enormous amount of cheese to make the rolls taste satisfying.
Ingredients
For the Dough
- 1½ cups (180 g) all-purpose flour
- 1 cup (120 g) white whole-wheat flour
- 2¼ teaspoons (7 g) active dry yeast
- 1 tablespoon granulated sugar
- ¾ teaspoon salt
- ¾ cup (180 ml) warm low-fat milk, approximately 105–110°F (40–43°C)
- 1 large egg
- 1 tablespoon olive oil
- 2–4 tablespoons warm water, only if needed
For the Cheese Topping
- ¾ cup (75 g) reduced-fat sharp cheddar cheese, finely shredded
- 2 tablespoons finely grated Parmesan cheese
- 1 tablespoon plain Greek yogurt
- 1 teaspoon olive oil
- ¼ teaspoon garlic powder
- ¼ teaspoon dried parsley
- ⅛ teaspoon black pepper
Optional Finishing Ingredients
- 1 tablespoon chopped fresh parsley
- Pinch of paprika
- Pinch of dried Italian herbs
Equipment
You’ll need:
- Large mixing bowl
- Small bowl
- Measuring cups and spoons
- Wooden spoon or spatula
- Baking sheet
- Parchment paper
- Clean kitchen towel
- Pastry brush
- Wire cooling rack
A stand mixer fitted with a dough hook can also be used, although these rolls can easily be made by hand.
Instructions
1. Prepare the Yeast
Place the warm milk in a small bowl.
Add the sugar and active dry yeast.
Stir gently and allow the mixture to stand for approximately 5–10 minutes.
The surface should become slightly foamy. This indicates that the yeast is active.
If nothing happens, the yeast may be old or the milk may have been too hot or too cold.
2. Combine the Dry Ingredients
In a large mixing bowl, combine the all-purpose flour, whole-wheat flour, and salt.
Mix thoroughly so the salt is evenly distributed.
Keeping the dry ingredients well combined helps create a more uniform dough.
3. Add the Wet Ingredients
Add the egg and olive oil to the yeast mixture.
Whisk gently until combined.
Pour the mixture into the bowl containing the flour.
4. Form the Dough
Use a wooden spoon to mix until a shaggy dough begins to form.
If the mixture appears very dry, add warm water 1 tablespoon at a time.
Don’t add all the water at once.
The exact amount of liquid needed can vary depending on the flour, humidity, and measuring method.
5. Knead the Dough
Transfer the dough to a lightly floured work surface.
Knead for approximately 7–9 minutes.
The dough should become smoother and elastic.
It may feel slightly tacky, but it shouldn’t be excessively sticky.
Avoid adding large amounts of flour because this can make the finished rolls dense.
6. First Rise
Place the dough into a lightly oiled bowl.
Cover with a clean kitchen towel or plastic wrap.
Leave it in a warm, draft-free location for approximately 60 minutes, or until noticeably larger.
The dough doesn’t necessarily need to double perfectly; it simply needs to become visibly puffy.
7. Prepare the Cheese Mixture
While the dough rises, prepare the topping.
Combine the shredded cheddar, Parmesan, Greek yogurt, olive oil, garlic powder, dried parsley, and black pepper.
Mix until the ingredients are evenly incorporated.
The Greek yogurt helps create a creamy mixture while keeping the amount of added fat relatively modest.
8. Prepare the Baking Sheet
Line a baking sheet with parchment paper.
Lightly spray the parchment if desired.
This prevents sticking and makes cleanup easier.
9. Divide the Dough
Once the dough has risen, gently press it down to release excess air.
Divide it into 12 approximately equal pieces.
For consistent portions, you can weigh the dough and divide the total weight by 12.
10. Shape the Rolls
Shape each piece into a smooth round.
Place the rolls on the prepared baking sheet.
Leave a little space between each one so they can expand.
11. Second Rise
Cover the rolls loosely with a clean towel.
Allow them to rest for approximately 20–30 minutes.
They should become noticeably softer and puffier.
This second rise helps produce a lighter texture.
12. Preheat the Oven
While the rolls are undergoing their second rise, preheat your oven to:
375°F (190°C).
Allow the oven to fully preheat before baking.
13. Add the Cheese Topping
Gently press down the center of each roll using the back of a spoon.
Don’t flatten the entire roll.
Place approximately 1 tablespoon of the cheese mixture over the center of each roll.
Spread it slightly while leaving a border around the edges.
14. Add Optional Seasoning
If desired, sprinkle the tops with a tiny amount of paprika or Italian herbs.
Fresh parsley can be added after baking for a brighter appearance.
15. Bake
Place the baking sheet in the preheated oven.
Bake for approximately 15–18 minutes.
The rolls should be lightly golden and the cheese topping should be melted and beginning to brown.
Avoid overbaking because this can dry out the bread.
16. Check for Doneness
The bottoms should be lightly golden.
The rolls should feel cooked and set rather than doughy.
If you have an instant-read thermometer, the center of the bread should generally reach approximately 190–200°F (88–93°C).
17. Cool Briefly
Remove the rolls from the oven.
Allow them to cool on the baking sheet for approximately 5 minutes.
Then transfer them to a wire rack.
This prevents the bottoms from becoming overly moist from trapped steam.
18. Garnish
Sprinkle the warm rolls with chopped fresh parsley if desired.
A tiny amount of freshly grated Parmesan can also be added, although it isn’t necessary.
19. Serve Warm
These rolls are especially delicious while warm.
The bread should be soft and fluffy, while the cheese topping remains creamy and savory.
Serve one alongside soup, salad, eggs, chicken, or roasted vegetables for a complete meal.
20. Store the Leftovers
Allow leftover rolls to cool completely before storing.
Place them in an airtight container.
Keep at room temperature for approximately 1–2 days, or refrigerate for longer storage.
For best texture, reheat briefly before serving.
What Makes This a Lighter Recipe?
Traditional bakery-style cheese rolls can become quite rich when the dough and topping contain generous amounts of butter, cheese, and other high-fat ingredients.
This version takes a more moderate approach.
The dough uses 1 tablespoon of olive oil rather than a large quantity of butter.
The recipe also combines all-purpose flour with white whole-wheat flour, which contributes additional fiber while maintaining a soft texture.
The cheese topping is intentionally measured rather than added freely. This is important because cheese can add a lot of calories and fat when portions become large.
Using sharp cheddar is another useful strategy. Its stronger flavor allows a relatively modest amount of cheese to provide plenty of savory flavor.
How to Make the Rolls Even More Flavorful
You don’t need large amounts of cheese or butter to make these rolls flavorful.
Try adding garlic powder, dried parsley, black pepper, oregano, or Italian seasoning to the topping.
Fresh herbs can also make the finished rolls taste brighter.
A small amount of smoked paprika gives the cheese topping a subtle smoky character.
For a slightly spicy version, add a pinch of crushed red pepper flakes.
Can I Use Only All-Purpose Flour?
Yes.
If you prefer an especially soft and traditional bakery texture, replace the whole-wheat flour with an equal amount of all-purpose flour.
However, the nutrition profile will change slightly.
The whole-wheat flour is included here to provide additional fiber and a little more nutritional variety.
Can I Use Regular Cheese?
Absolutely.
Regular cheddar can replace reduced-fat cheddar in an equal amount.
The resulting rolls will generally contain more calories and fat per serving.
For a particularly flavorful result, try sharp cheddar rather than mild cheddar.
Can I Make Them Without an Egg?
Yes.
The egg contributes richness, structure, and tenderness.
If necessary, you can replace it with approximately 3 tablespoons of unsweetened applesauce or another suitable egg substitute, although the texture will be somewhat different.
Can I Make These Rolls Ahead?
Yes.
Prepare and shape the rolls, then cover them and refrigerate them before the final rise.
When ready to bake, allow them to sit at room temperature until slightly puffy before adding the topping and baking.
Because yeast activity slows in the refrigerator, the final rise may take longer.
Freezing Instructions
These rolls freeze well.
Allow completely baked rolls to cool.
Place them in a freezer-safe container or bag and separate layers with parchment paper.
Freeze for up to approximately 2 months for best quality.
Thaw at room temperature and reheat in a 325°F (165°C) oven for several minutes.
Serving Suggestions
These cheesy rolls work well as a side dish rather than necessarily being the entire meal.
Serve one with:
- Vegetable soup
- Chicken vegetable soup
- Lentil soup
- Tomato soup
- Large green salad
- Grilled chicken
- Roasted vegetables
- Scrambled eggs
- Vegetable omelet
For a more balanced plate, combine the roll with a protein source and plenty of vegetables.
Portion Guidance
Because these are bread-based rolls with cheese, portion size matters.
The recipe makes 12 rolls, and one roll is the suggested serving.
If you’re serving them as part of dinner, one roll alongside protein and vegetables can be a satisfying addition.
If serving them as a snack, pair one with a protein-rich food such as plain Greek yogurt or a boiled egg rather than relying on several rolls alone.
Nutrition Information
The following is an estimated nutrition profile for 1 roll, based on dividing the recipe into 12 equal portions.
| Nutrient | Approximate Amount |
|---|---|
| Calories | 190 kcal |
| Protein | 8 g |
| Carbohydrates | 27 g |
| Fat | 6 g |
| Saturated Fat | 2.5 g |
| Fiber | 2 g |
| Sugar | 3 g |
| Sodium | 330–400 mg |
| Calcium | 110 mg |
| Iron | 1.5 mg |
Nutrition values are estimates. Exact numbers depend on the brands of flour, milk, cheese, yogurt, and other ingredients used, as well as the final size of each roll.
Frequently Asked Questions
Are these rolls suitable for a balanced diet?
Yes. They contain carbohydrates from flour, protein from dairy and egg, and moderate amounts of fat from cheese and olive oil. They work best as part of a varied meal rather than as the sole component of a meal.
Are these actually “weight-loss rolls”?
No individual food can guarantee weight loss. A better description is lighter or portion-conscious cheesy rolls. Overall dietary patterns and individual nutritional needs matter much more than labeling a single recipe as a weight-loss food.
Can I reduce the cheese further?
Yes. You can reduce the cheddar to ½ cup (50 g). The topping will be lighter but still flavorful.
Can I add vegetables?
Definitely. Finely chopped spinach, mushrooms, bell peppers, or green onions can be incorporated into the cheese topping.
Make sure vegetables with high water content are cooked and drained first.
Why are my rolls dense?
Dense rolls can result from old yeast, insufficient rising time, adding too much flour, or kneading incorrectly.
Allow the dough enough time to become visibly puffy before baking.
Why did my cheese topping slide off?
If the center of the roll is very rounded, the cheese can slide during baking.
Creating a shallow indentation in the center helps keep the topping in place.
Can I use instant yeast?
Yes.
Instant yeast can generally be mixed directly with the dry ingredients. Follow the instructions on your yeast package.
Can I make smaller rolls?
Yes.
You can divide the dough into 16 smaller portions. Remember that the nutrition information per roll will change accordingly.
Recipe Card
Lightened-Up Cheesy Bakery Rolls
Soft homemade bakery-style rolls topped with creamy garlic cheddar and Parmesan. Made with a combination of all-purpose and whole-wheat flour, moderate cheese, and olive oil for a lighter everyday version.
Ingredients
Dough
- 1½ cups all-purpose flour
- 1 cup white whole-wheat flour
- 2¼ tsp active dry yeast
- 1 tbsp sugar
- ¾ tsp salt
- ¾ cup warm low-fat milk
- 1 large egg
- 1 tbsp olive oil
- 2–4 tbsp warm water, if needed
Cheese Topping
- ¾ cup reduced-fat sharp cheddar
- 2 tbsp Parmesan
- 1 tbsp Greek yogurt
- 1 tsp olive oil
- ¼ tsp garlic powder
- ¼ tsp dried parsley
- ⅛ tsp b