
Ingredients You’ll Need
Base Ingredients:
- 1 (15-ounce) can of chickpeas (garbanzo beans)
- 1 tablespoon olive oil (or avocado oil)
- Salt to taste
For the Four Flavor Variations:
- Cinnamon Sugar:
- 1 tablespoon granulated sugar (or coconut sugar)
- ½ teaspoon ground cinnamon
- Pinch of salt
- Chili Lime:
- ½ teaspoon chili powder
- ¼ teaspoon cayenne pepper
- Zest of 1 lime
- ½ teaspoon lime juice
- Salt to taste
- BBQ:
- 1 teaspoon smoked paprika
- ½ teaspoon garlic powder
- ½ teaspoon onion powder
- ½ teaspoon brown sugar
- ¼ teaspoon chili powder
- Salt and pepper to taste
- Ranch:
- ½ teaspoon garlic powder
- ½ teaspoon onion powder
- ½ teaspoon dried dill
- ½ teaspoon dried parsley
- ¼ teaspoon black pepper
- Salt to taste
Step 1: Preparing the Chickpeas
Drain and rinse the chickpeas thoroughly under cold running water to remove any excess brine from the can. This step ensures your chickpeas roast evenly and develop a perfect crunch. After rinsing, pat them completely dry using paper towels or a clean kitchen towel. Removing moisture is key — any remaining water will cause them to steam instead of crisping up.
Step 2: Removing the Skins (Optional but Recommended)
For an ultra-crispy texture, gently rub the chickpeas with a towel to loosen and remove the thin skins. While this step is optional, it helps achieve a more even and crisp coating in the air fryer.
Step 3: Seasoning Base
Place the dried chickpeas in a medium mixing bowl. Add olive oil and a small pinch of salt. Toss well until every chickpea is lightly coated. The oil helps the seasoning stick and promotes even browning during air frying.
Step 4: Air Frying
Preheat your air fryer to 390°F (200°C) for 3–5 minutes. Spread the chickpeas in a single layer in the air fryer basket. Avoid overcrowding for best results — air circulation is what makes them crisp.
Air fry for 12–15 minutes, shaking the basket every 5 minutes for even cooking. Keep an eye on them after 10 minutes to prevent over-browning. They’re done when they’re golden brown, dry, and crunchy.
Step 5: Seasoning After Cooking
Once your chickpeas are perfectly crispy, transfer them to a bowl immediately. Toss with your chosen seasoning blend while they’re still warm — this helps the spices adhere better. For the Cinnamon Sugar flavor, sprinkle the sugar and cinnamon mix while the chickpeas are slightly warm but not too hot, to avoid melting the sugar.
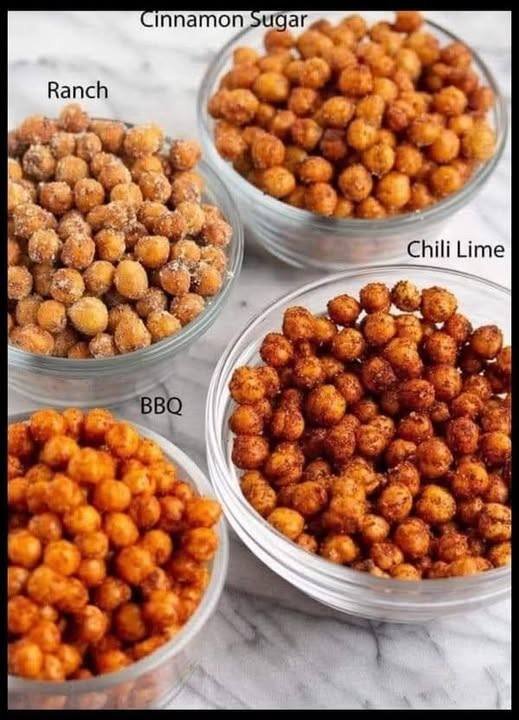
Flavor Variations Explained
- Cinnamon Sugar Chickpeas – A healthy twist on a sweet treat. These are lightly coated in cinnamon and sugar, giving you a dessert-like crunch that pairs beautifully with yogurt or coffee.
- Chili Lime Chickpeas – Perfectly tangy, spicy, and refreshing. The combination of zesty lime and fiery chili creates a bold flavor explosion that’s great for snacking or topping salads.
- BBQ Chickpeas – Smoky and savory with just a hint of sweetness. This version gives you that barbecue flavor without any guilt, and they’re great for satisfying those salty snack cravings.
- Ranch Chickpeas – If you love ranch seasoning, this one’s for you. The mix of herbs and spices delivers that familiar ranch taste — crunchy, savory, and addictive.
Step 6: Cooling and Storing
Allow the chickpeas to cool completely before storing. This step prevents moisture buildup, which can make them soft. Store in an airtight container at room temperature for up to 4–5 days. For the best crunch, leave the lid slightly ajar if your environment isn’t humid.