

Recipe Overview
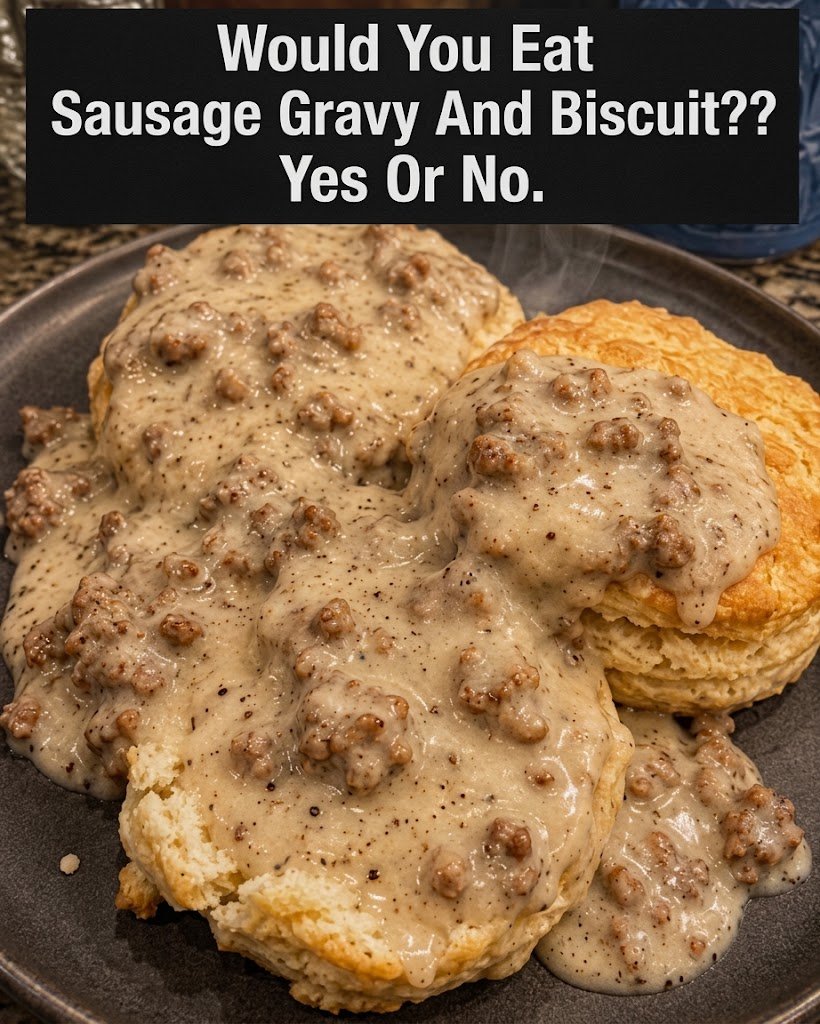
Sausage Gravy & Biscuits is a classic comfort-food breakfast made with fluffy, buttery homemade biscuits covered in a generous layer of rich, creamy sausage gravy. The biscuits are tender inside with lightly crisp, golden edges, while the gravy is savory, peppery, creamy, and filled with browned pieces of breakfast sausage.
This recipe is designed to produce a hearty homemade breakfast that tastes much better than using packaged gravy or refrigerated biscuits. The most important techniques are keeping the biscuit butter cold, handling the dough gently, properly browning the sausage, and adding the milk gradually to create a smooth gravy.
Prep time: About 25 minutes
Bake/cook time: About 30 minutes
Total time: About 55 minutes
Servings: 6–8 people
Difficulty: Easy to moderate
Ingredients
For the Homemade Biscuits
- 2 cups all-purpose flour
- 1 tablespoon baking powder
- 1 teaspoon salt
- ½ teaspoon baking soda
- 1 teaspoon granulated sugar
- ½ cup cold unsalted butter, cut into small cubes
- ¾ cup cold buttermilk
- Additional buttermilk, if needed
- 2 tablespoons melted butter, for brushing the baked biscuits
The combination of baking powder and baking soda provides plenty of lift, while the buttermilk gives the biscuits a subtle tang and helps keep the interior tender.
For the Sausage Gravy
- 1 pound breakfast pork sausage
- 3 tablespoons butter, only if additional fat is needed
- ¼ cup all-purpose flour
- 2½ to 3 cups whole milk
- ½ teaspoon salt, or to taste
- 1 to 1½ teaspoons freshly ground black pepper
- ¼ teaspoon garlic powder
- ¼ teaspoon onion powder
- ¼ teaspoon smoked paprika, optional
- A small pinch of cayenne pepper, optional
Whole milk creates a creamy gravy without making it unnecessarily heavy. If you prefer an extra-rich gravy, part of the milk can be replaced with heavy cream.
Preparing the Biscuit Dough
Preheat the Oven
Start by preheating the oven to 425°F (220°C).
Allow the oven to fully preheat before the biscuits go inside. A properly heated oven is important because the cold butter in the dough needs to melt rapidly and create steam. That steam helps separate the layers and gives the biscuits their characteristic flaky texture.
Line a large baking sheet with parchment paper. If you don’t have parchment, lightly grease the baking sheet with butter or cooking spray.
Combine the Dry Ingredients
Add the flour, baking powder, baking soda, salt, and sugar to a large mixing bowl.
Whisk everything together for about 20–30 seconds.
This step is more important than it might seem. You want the baking powder, baking soda, and salt evenly distributed throughout the flour so every biscuit rises consistently and has balanced seasoning.
Add the Cold Butter
Cut the butter into small cubes before adding it to the flour.
Add the cold butter to the bowl and work it into the flour using a pastry cutter, two forks, or your fingertips.
Continue until the mixture resembles coarse crumbs.
You don’t want every piece of butter completely incorporated. Small pieces of butter should remain visible throughout the mixture.
Those pieces will melt during baking and create little pockets of steam, which contribute to flaky layers.
Keep Everything Cold
Cold ingredients are one of the secrets to excellent biscuits.
If the kitchen is warm or you’ve been working with the dough for several minutes, the butter may begin softening. If that happens, place the bowl in the refrigerator for about 5–10 minutes before continuing.
Try not to use room-temperature butter for this recipe.
Add the Buttermilk
Make a small well in the center of the flour and butter mixture.
Pour in about ¾ cup cold buttermilk.
Use a wooden spoon or rubber spatula to gently stir everything together.
Mix only until the flour is mostly moistened.
The dough should look rough and shaggy rather than smooth.
Adjust the Biscuit Dough
If the mixture looks very dry and there is still a significant amount of loose flour at the bottom of the bowl, add another tablespoon of buttermilk.
Add additional buttermilk gradually rather than pouring in a large amount at once.
You want a dough that holds together but remains slightly sticky.
Adding too much liquid can produce dense, heavy biscuits.
Shaping the Biscuits
Transfer the Dough
Lightly flour a clean countertop or large cutting board.
Turn the dough onto the floured surface.
Use your hands to gently gather the dough together.
Don’t knead it aggressively.
Biscuits don’t require the extensive kneading associated with bread. Too much handling can develop the gluten and make the finished biscuits tough.
Flatten the Dough
Gently pat the dough into a rectangle approximately ¾ to 1 inch thick.
You don’t need a rolling pin, although you can use one if preferred.
The goal is to press the dough evenly without compressing it excessively.
Create Flaky Layers
Fold one side of the dough toward the center and then fold the opposite side over it.
Gently flatten the dough again.
Repeat this folding process approximately 2–3 times.
This creates multiple layers of dough and butter.
Don’t continue folding excessively because too much handling can make the biscuits tough.
Cut the Biscuits
Once the dough is approximately 1 inch thick, dip a biscuit cutter into flour.
Press the cutter straight down into the dough.
Avoid twisting the cutter.
Twisting can compress the edges of the dough and prevent the biscuits from rising as high.
Place each cut biscuit onto the prepared baking sheet.
Arrange the Biscuits
For biscuits with softer sides, place them relatively close together so they touch or nearly touch.
For more browned and crispy edges, leave some space between each biscuit.
If you have leftover dough scraps, gently bring them together and cut additional biscuits. Try not to repeatedly knead and reshape the scraps because those biscuits may become slightly tougher.
Bake the Biscuits
Place the baking sheet in the fully preheated oven.
Bake for approximately 12–16 minutes.
The exact time will depend on the size and thickness of your biscuits.
Look for a golden-brown top and lightly browned edges.
The biscuits should feel firm on top but still tender when broken open.
Brush With Butter
Remove the biscuits from the oven and immediately brush the tops with melted butter.
The butter adds flavor and gives the biscuits a beautiful glossy finish.
Set the biscuits aside somewhere warm while you prepare the sausage gravy.
Preparing the Sausage
Heat the Skillet
Place a large heavy-bottomed skillet over medium heat.
A cast-iron skillet works particularly well because it distributes heat evenly and retains heat nicely.
Add the breakfast sausage directly to the skillet.
Break Up the Sausage
Use a wooden spoon, spatula, or meat chopper to break the sausage into small pieces.
For sausage gravy, small crumbles work better than large chunks because they distribute throughout the gravy and allow you to get sausage in every bite.
Brown the Sausage
Cook the sausage for approximately 6–8 minutes, stirring and breaking it apart regularly.
Continue cooking until there is no visible pink meat and the sausage has developed some golden-brown edges.
Don’t rush this step.
The browned bits created when the sausage contacts the hot skillet contribute a tremendous amount of flavor to the finished gravy.
Check the Rendered Fat
Once the sausage is browned, look at the amount of fat in the skillet.
You need enough fat to combine with the flour and create a roux.
Ideally, you want approximately 3 tablespoons of fat.
If your sausage is relatively lean and doesn’t produce enough fat, add approximately 1–3 tablespoons of butter.
If there is an excessive amount of grease, carefully spoon some out.
Don’t remove every bit of fat because the fat is necessary for both flavor and thickening.
Making the Gravy
Add the Flour
Sprinkle ¼ cup all-purpose flour evenly over the browned sausage.
Stir continuously so the flour becomes coated with the sausage fat.
The flour will initially make the mixture look thick and somewhat pasty.
That’s exactly what you want.
Cook the Flour
Continue cooking the sausage and flour mixture for approximately 1–2 minutes.
Stir constantly.
Cooking the flour briefly removes its raw taste and develops a slightly nutty flavor.
Don’t cook it until deeply browned. For traditional sausage gravy, you want the roux to remain relatively light so the finished gravy stays creamy and pale.
Add the Milk Gradually
Slowly pour the whole milk into the skillet.
While adding the milk, stir continuously.
Instead of dumping all the milk in at once, add it gradually in several additions.
This allows the flour mixture to incorporate smoothly into the liquid and greatly reduces the chance of lumps.
Make sure to scrape the bottom and sides of the skillet as you stir. The browned sausage bits stuck to the pan are full of flavor.
Continue Stirring
As more milk is incorporated, the mixture will initially look thin.
Don’t worry.
The gravy needs time to heat and thicken.
Continue stirring frequently, particularly around the bottom edges of the skillet where the flour can settle.
Bring the Gravy to a Gentle Simmer
Increase the heat slightly until the gravy reaches a gentle simmer.
You should see small bubbles appearing throughout the mixture.
Avoid bringing the gravy to a hard boil.
Aggressive boiling can cause the milk to scorch or produce a less smooth texture.
Once the gravy begins simmering, reduce the heat to medium-low.
Let the Gravy Thicken
Allow the gravy to simmer for approximately 5–8 minutes.
Stir frequently.
As the flour cooks and the liquid heats, the gravy will gradually become thicker and creamier.
The sausage will also release additional flavor into the sauce during this time.
Seasoning the Gravy
Add the Black Pepper
Add approximately 1 teaspoon freshly ground black pepper to begin with.
Black pepper is one of the defining flavors of classic sausage gravy.
Taste the gravy after it has simmered and add additional pepper if desired.
If you enjoy a strong pepper flavor, you can easily use 1½ teaspoons or more.
Add the Salt
Add approximately ½ teaspoon salt, then taste.
Breakfast sausage often contains a significant amount of salt, so avoid automatically adding a large quantity.
It’s much easier to add more salt than to fix gravy that has become too salty.
Add Garlic and Onion Powder
Stir in the garlic powder and onion powder.
These aren’t absolutely necessary for traditional sausage gravy, but they add another layer of savory flavor without overpowering the sausage.
Add Optional Heat
If you like spicy sausage gravy, add a small pinch of cayenne pepper.
You can also use crushed red pepper flakes or substitute hot breakfast sausage for mild sausage.
Start with a small amount and increase gradually.
Add Smoked Paprika
A small amount of smoked paprika is optional.
It gives the gravy a subtle smoky character and a slightly warmer color.
Don’t use too much because the sausage should remain the dominant flavor.
Checking the Gravy
Test the Thickness
Dip a spoon into the gravy and lift it out.
The gravy should coat the back of the spoon.
Run your finger through the coating. If the line remains visible for a moment, the gravy has reached a good consistency.
Remember that gravy continues thickening as it cools.
Thin the Gravy if Necessary
If the gravy becomes too thick, add milk one or two tablespoons at a time.
Stir thoroughly after each addition.
Continue until the gravy reaches a smooth, spoonable consistency.
Thicken the Gravy if Necessary
If the gravy is still too thin after simmering for several minutes, continue cooking it over medium-low heat.
Give it another few minutes while stirring frequently.
Avoid adding a large amount of dry flour directly to finished gravy because it can create lumps.
Taste One Final Time
Before serving, taste the gravy again.
Adjust the salt and pepper according to your preference.
This is also the time to add a little more cayenne if you want additional heat.
For extra richness, stir in a small pat of butter just before removing the gravy from the heat.
Combining the Biscuits and Gravy
Let the Gravy Rest Briefly
Remove the skillet from the heat and allow the gravy to rest for approximately 2–3 minutes.
It will thicken slightly during this time.
If it becomes thicker than you prefer, simply stir in a small splash of milk.
Split the Warm Biscuits
Place warm biscuits on individual plates.
Use a knife to split them horizontally, or gently pull them apart with your hands.
The inside should be soft, tender, and flaky.
Spoon on the Gravy
Ladle a generous amount of sausage gravy over the biscuit halves.
Don’t be shy with the gravy.
The ideal serving has enough sauce to soak slightly into the biscuit while still leaving some flaky biscuit exposed around the edges.
Add Fresh Black Pepper
Finish each serving with a little freshly cracked black pepper.
For color, you can sprinkle over a small amount of chopped parsley or fresh chives.
Serving Suggestions
Serve With Eggs
Fried, scrambled, or soft-boiled eggs pair beautifully with biscuits and gravy.
A fried egg with a slightly runny yolk is particularly delicious because the yolk adds another layer of richness.
Serve With Breakfast Potatoes
Crispy hash browns, home fries, or roasted breakfast potatoes make an excellent side.
The crispy potatoes provide a nice textural contrast to the soft biscuits and creamy gravy.
Add Crispy Bacon
For an especially hearty breakfast, serve the biscuits and gravy with crispy bacon.
The smoky, salty bacon complements the savory sausage.
Add Fresh Fruit
Because biscuits and gravy are rich and filling, fresh fruit makes a refreshing side.
Try berries, orange slices, melon, grapes, or sliced apples.
Tips for the Best Biscuits
Keep the Butter Cold
Cold butter produces the flaky texture that makes homemade biscuits special.
If your butter starts melting before the biscuits reach the oven, chill the dough briefly.
Don’t Overmix
Once the buttermilk has been added, mix only until the ingredients come together.
A slightly rough-looking dough is preferable to a perfectly smooth dough.
Don’t Twist the Cutter
Press the biscuit cutter straight down and lift it straight back up.
This helps preserve the layers around the edges.
Don’t Make the Biscuits Too Thin
A biscuit around ¾–1 inch thick gives you a good balance of height, tenderness, and structure.
Very thin biscuits won’t provide the same substantial base for the gravy.
Tips for the Best Sausage Gravy
Use Good Breakfast Sausage
A flavorful pork breakfast sausage makes a noticeable difference.
Mild sausage works well for a traditional version, while hot sausage can be used if you prefer spice.
Brown the Meat Well
Don’t stop cooking as soon as the sausage is no longer pink.
Allow some pieces to become golden brown.
Those browned pieces provide concentrated savory flavor.
Don’t Burn the Roux
The flour should cook but remain relatively light in color.
If the flour becomes dark brown or smells burnt, it’s better to start over because burnt flour will give the entire gravy a bitter taste.
Add Milk Slowly
Gradual incorporation is one of the easiest ways to prevent lumpy gravy.
Keep stirring as you pour.
Don’t Overcook the Gravy
Once the gravy is thick, creamy, and flavorful, remove it from the heat.
Excessive cooking can make it unnecessarily thick.
Storage
Store Leftover Gravy
Allow leftover gravy to cool slightly before transferring it to an airtight container.
Refrigerate within about two hours of cooking.
The gravy can generally be refrigerated for 3–4 days.
Store Leftover Biscuits
Place cooled biscuits in an airtight container or resealable bag.
They are best within the first couple of days, although they can remain usable for several days when properly stored.
Reheating
Reheat the Gravy Gently
Place the gravy in a saucepan over low to medium-low heat.
Add a small splash of milk and stir frequently.
The refrigerated gravy will usually be considerably thicker than when freshly made, so the added milk helps restore its creamy consistency.
Reheat the Biscuits in the Oven
For the best texture, place the biscuits in a 300–350°F oven for several minutes.
This warms the center while helping restore some of the exterior texture.
Microwaving works in a pinch, but the biscuits may become softer.
Freezing
Freeze the Unbaked Biscuits
For the best freezer results, cut the biscuit dough into rounds before baking.
Arrange the unbaked biscuits on a tray and freeze until solid.
Transfer them to a freezer-safe bag or container.
They can be baked directly from frozen; simply allow a few additional minutes of baking time.
Freezing the Gravy
Sausage gravy can be frozen, although its texture may change slightly after thawing because of the dairy.
If you freeze it, thaw it slowly in the refrigerator.
Reheat gently in a saucepan and add a little milk while stirring to bring the texture back together.
Troubleshooting
If the Biscuits Are Dense
The most common causes are overmixing, using warm butter, or using old baking powder.
Handle the dough gently and make sure your leavening agents are fresh.
If the Biscuits Don’t Rise
Make sure your baking powder and baking soda are still active.
Also avoid twisting the biscuit cutter and don’t flatten the dough excessively.
If the Gravy Is Lumpy
Whisk vigorously while adding milk.
If small lumps remain, continue whisking over low heat.
For severe lumps, the gravy can be carefully passed through a fine-mesh strainer, although properly incorporating the milk should prevent this problem.
If the Gravy Is Too Salty
Add a little more unsalted milk to dilute the saltiness.
Avoid adding more sausage.
The best approach is to season gradually from the beginning because sausage itself contributes salt.
If the Gravy Is Too Thick
Stir in warm milk one tablespoon at a time until the desired consistency is reached.
If the Gravy Is Too Thin
Continue simmering over medium-low heat for several additional minutes.
Stir frequently until it thickens.
Final Presentation
For the most appetizing presentation, place two warm biscuit halves on each plate and spoon the sausage gravy generously over the top.
Allow some golden biscuit edges to remain visible underneath the creamy gravy.
Finish with freshly cracked black pepper and a little chopped parsley or chives if desired.
The finished dish should have flaky, buttery biscuits, creamy peppery gravy, and plenty of browned sausage throughout.
Serve immediately while the biscuits are warm and the gravy is silky and hot.