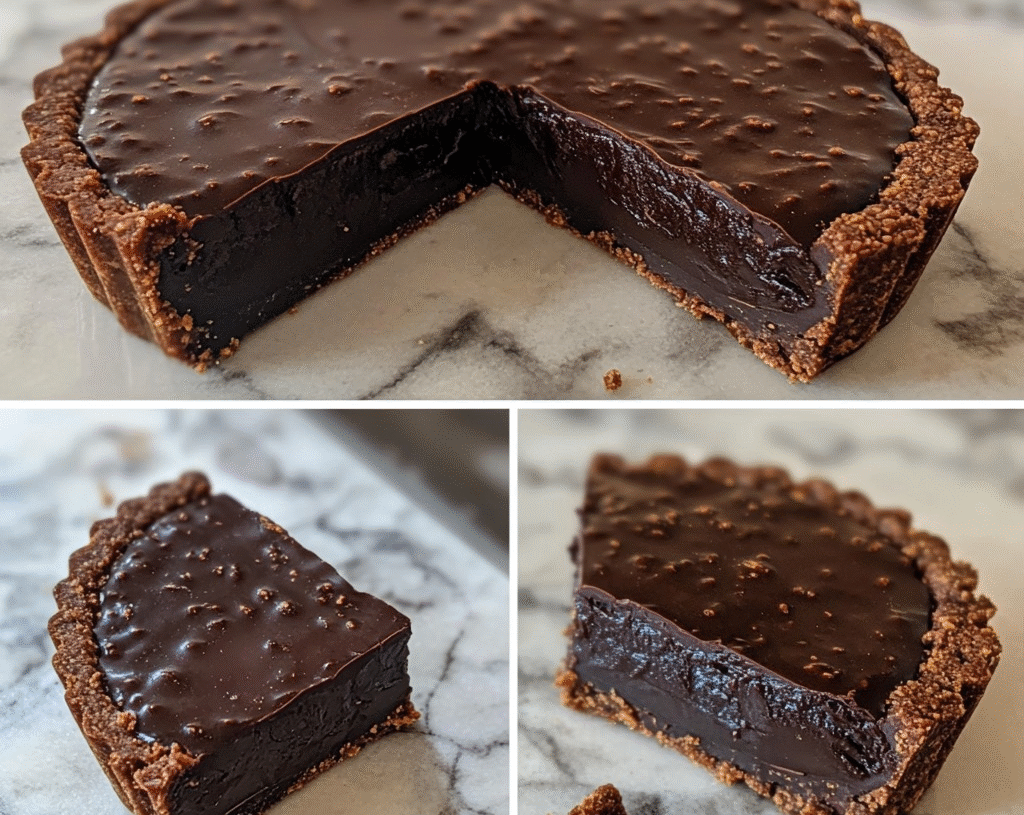
Vegan Chocolate Tart Recipe
Welcome to our detailed guide on creating a rich and indulgent Vegan Chocolate Tart! This elegant dessert is perfect for any occasion, from casual gatherings to formal celebrations. With its creamy chocolate filling nestled in a crisp, flaky crust, this tart is sure to impress both vegan and non-vegan guests alike. In this comprehensive guide, we will walk you through the entire process, providing you with all the necessary measurements, instructions, and tips for a perfect outcome.
Ingredients
For the Tart Crust:
- 1 ½ cups all-purpose flour: The base of your tart, providing structure.
- 1/4 cup cocoa powder: Adds chocolate flavor and deepens the color of the crust.
- 1/4 cup powdered sugar: Sweetens the crust; you can use a sugar substitute if desired.
- 1/2 teaspoon salt: Balances the sweetness.
- 1/2 cup coconut oil (solid but softened): Acts as the fat in the crust; can be substituted with vegan butter.
- 3-4 tablespoons cold water: Helps bring the dough together.
For the Chocolate Filling:
- 1 cup dark chocolate chips (dairy-free): The star of the tart; choose high-quality chocolate for the best flavor.
- 1 cup full-fat coconut milk: Provides creaminess and richness; canned coconut milk works best.
- 1/4 cup maple syrup: Sweetens the filling naturally.
- 1 teaspoon vanilla extract: Enhances the chocolate flavor.
- 1 tablespoon cornstarch: Helps thicken the filling and stabilize it.
For Garnishing (Optional):
- Fresh berries (strawberries, raspberries, or blueberries): Adds freshness and a pop of color.
- Mint leaves: For a touch of elegance and flavor.
- Cocoa powder or grated dark chocolate: For dusting on top.
Instructions
Step 1: Prepare the Tart Crust
- Preheat the Oven: Preheat your oven to 350°F (175°C). This ensures that your tart crust will bake evenly and become crisp.
- Mix the Dry Ingredients: In a large mixing bowl, whisk together the all-purpose flour, cocoa powder, powdered sugar, and salt. This step is important for ensuring that the dry ingredients are well-combined and evenly distributed.
- Add the Coconut Oil: Using a pastry cutter or your fingers, cut in the softened coconut oil until the mixture resembles coarse crumbs. If using vegan butter, the process is the same. The goal is to incorporate the fat evenly without melting it.
- Add Cold Water: Gradually add the cold water, one tablespoon at a time, mixing until the dough comes together. You may need 3 to 4 tablespoons, depending on humidity. Be careful not to overwork the dough; it should be soft but not sticky.
- Chill the Dough: Form the dough into a disc, wrap it in plastic wrap, and refrigerate for about 30 minutes. Chilling the dough makes it easier to roll out and helps prevent shrinking during baking.
Step 2: Roll Out the Dough
- Roll Out the Dough: Once chilled, place the dough on a lightly floured surface. Roll it out to about 1/8-inch thickness, making sure it’s large enough to fit your tart pan (typically a 9-inch tart pan). If the dough cracks, simply patch it up with your fingers.
- Transfer to the Tart Pan: Carefully transfer the rolled-out dough to the tart pan, pressing it gently into the corners and up the sides. Trim any excess dough hanging over the edges. Prick the bottom of the crust with a fork to prevent bubbling during baking.
Step 3: Bake the Tart Crust
- Blind Bake the Crust: Place a piece of parchment paper over the crust and fill it with pie weights or dried beans. This helps keep the crust from puffing up. Bake in the preheated oven for 15 minutes.
- Remove Weights and Bake Again: Carefully remove the parchment paper and weights. Return the crust to the oven and bake for an additional 5-7 minutes until firm and slightly crisp. Remove from the oven and let it cool while you prepare the filling.
Step 4: Prepare the Chocolate Filling
- Melt the Chocolate: In a heatproof bowl, combine the dark chocolate chips and full-fat coconut milk. You can melt them together in the microwave in 30-second intervals, stirring in between, or over a double boiler on the stovetop until smooth.
- Add Sweeteners and Flavoring: Once the chocolate has melted and is smooth, stir in the maple syrup, vanilla extract, and cornstarch. Mix until well combined. The cornstarch will help stabilize the filling and ensure a smooth texture.
Step 5: Assemble the Tart
- Pour the Filling into the Crust: Carefully pour the chocolate filling into the cooled tart crust. Use a spatula to smooth the top if needed.
- Chill the Tart: Refrigerate the tart for at least 2 hours or until the filling is set. The cooling time allows the filling to firm up, making it easier to slice.
Step 6: Serve the Tart
- Garnish (Optional): Once set, remove the tart from the refrigerator. Garnish with fresh berries, mint leaves, or a dusting of cocoa powder or grated dark chocolate for an elegant presentation.
- Slice and Serve: Carefully slice the tart using a sharp knife. Serve chilled or at room temperature. Pair with coconut whipped cream for an extra indulgent treat.
Step 7: Storing Leftovers
- Store Leftovers: Any leftover tart can be stored in an airtight container in the refrigerator for up to a week. For longer storage, freeze individual slices wrapped in plastic wrap and foil.
Nutritional Information (per slice, serves 12)
- Calories: 240
- Total Fat: 18g
- Saturated Fat: 15g
- Cholesterol: 0mg
- Sodium: 70mg
- Total Carbohydrates: 23g
- Dietary Fiber: 3g
- Net Carbohydrates: 20g
- Protein: 3g
- SmartPoints (WW): 7
Tips for Success
- Choosing Chocolate: Use high-quality dark chocolate chips to ensure a rich flavor. Look for brands that are specifically labeled as dairy-free.
- Texture Adjustment: If you prefer a creamier filling, you can add a tablespoon of almond milk or more coconut milk when melting the chocolate.
- Serving Ideas: This tart pairs beautifully with coffee or herbal tea, making it an excellent dessert for gatherings.
Variations
- Flavor Infusion: Consider adding a teaspoon of espresso powder to the filling for a mocha flavor, or a dash of sea salt on top for a salted chocolate experience.
- Nut Crust: For a gluten-free option, replace part of the flour with ground almonds or walnuts for a nutty, flavorful crust.
Conclusion
This Vegan Chocolate Tart is a luxurious dessert that showcases the rich flavors of chocolate while adhering to plant-based principles. Whether for a special celebration or an everyday treat, this tart is sure to delight with its decadent filling and crisp crust. Enjoy the process of making this beautiful dessert, and share it with friends and family for a delightful experience!