Homemade Bread Recipe: A Low-Points Weight Watchers Option
Introduction
Welcome to our comprehensive guide for making homemade bread that’s delicious and fits into your Weight Watchers plan. This recipe combines simplicity with taste, allowing you to bake your own bread from scratch using just a few basic ingredients. Homemade bread not only enhances the flavor and texture of your meals but also gives you control over the ingredients. This guide will walk you through every step of the process, ensuring you end up with a perfectly baked loaf while keeping your Weight Watchers points in check.
Ingredients
Here’s what you’ll need for this classic homemade bread recipe:
- 4 tablespoons (60 ml) olive oil: Adds richness and helps to keep the bread moist.
- 1 tablespoon (10 g) dry yeast: Essential for leavening the bread and giving it a light, airy texture.
- 1 teaspoon salt: Enhances the flavor of the bread.
- 1 1/3 cups (320 ml) warm water: Activates the yeast and provides the necessary moisture for the dough.
- 4 3/4 cups (570 g) plain flour: The base of the bread, providing structure and texture.
Instructions
1. Prepare the Yeast Mixture:
- In a small bowl, combine the warm water with the dry yeast. Stir gently to dissolve the yeast.
- Let the mixture sit for about 5-10 minutes until it becomes frothy. This step is crucial for ensuring that the yeast is active and ready to leaven the dough.
2. Mix Dry Ingredients:
- In a large mixing bowl, combine the plain flour and salt. Whisk them together to distribute the salt evenly throughout the flour.
3. Combine Ingredients:
- Create a well in the center of the flour mixture. Pour in the yeast mixture along with the olive oil.
- Using a wooden spoon or spatula, mix the ingredients together until they form a rough dough. This may take about 2-3 minutes.
4. Knead the Dough:
- Turn the dough out onto a lightly floured surface. Begin kneading the dough by folding it over and pressing it with the heels of your hands.
- Knead the dough for about 8-10 minutes, or until it becomes smooth and elastic. If the dough is too sticky, sprinkle a little more flour as needed.
5. First Rise:
- Lightly oil a large bowl. Place the kneaded dough into the bowl, turning it once to coat the top with oil.
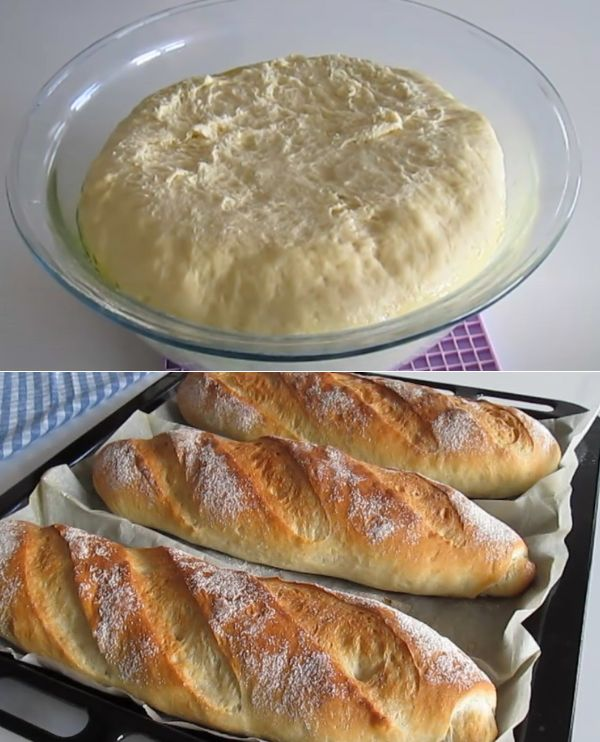
- Cover the bowl with a damp cloth or plastic wrap. Allow the dough to rise in a warm, draft-free area for about 1-2 hours, or until it has doubled in size.
6. Shape the Dough:
- After the dough has risen, punch it down to release the air bubbles. Transfer it to a lightly floured surface and shape it into a loaf.
- Place the shaped dough into a greased loaf pan, or onto a baking sheet if you prefer a free-form loaf.
7. Second Rise:
- Cover the dough loosely with a cloth or plastic wrap. Let it rise again for about 30-45 minutes, or until it has puffed up and nearly doubled in size.
8. Preheat the Oven:
- While the dough is undergoing its second rise, preheat your oven to 375°F (190°C). This ensures that the oven is at the right temperature for baking when the dough is ready.
9. Bake the Bread:
- Once the dough has risen adequately, place it in the preheated oven.
- Bake for approximately 30-35 minutes, or until the bread is golden brown and sounds hollow when tapped on the bottom. The internal temperature should reach around 190°F (88°C).
10. Cool the Bread:
- Remove the bread from the oven and let it cool in the pan for about 10 minutes. Transfer the bread to a wire rack to cool completely before slicing.
Additional Tips
- Yeast Activation: Ensure that your water is warm but not too hot, as high temperatures can kill the yeast. Ideally, it should be between 100-110°F (38-43°C).
- Flour Substitutes: For a lighter texture, you can use part whole wheat flour or bread flour. Adjust the amount of water slightly as needed, as different flours absorb moisture differently.
- Adding Flavor: Feel free to add herbs, garlic, or cheese to the dough for additional flavor. These add-ins may increase the points, so adjust accordingly.
- Storing Bread: Store the cooled bread in an airtight container at room temperature for up to 4 days. For longer storage, freeze slices in a resealable bag and toast them as needed.
- Troubleshooting: If your bread doesn’t rise as expected, check the freshness of your yeast or ensure that your dough was kept in a warm enough environment.
Nutritional Information
Per Slice (based on a standard loaf divided into 12 slices):
- Calories: 160
- Total Fat: 6 grams
- Saturated Fat: 1 gram
- Cholesterol: 0 milligrams
- Sodium: 180 milligrams
- Total Carbohydrates: 22 grams
- Dietary Fiber: 1 gram
- Sugars: 0 grams
- Net Carbs: 21 grams
- Protein: 4 grams
Weight Watchers SmartPoints
On the Weight Watchers Freestyle plan, each slice of this homemade bread is approximately 4 SmartPoints. This value assumes a standard loaf with 12 slices. Points may vary slightly depending on exact ingredient measurements and portion sizes.
Conclusion
Making your own bread at home can be a rewarding experience, and with this recipe, you can enjoy a fresh, homemade loaf that aligns with your Weight Watchers goals. By using simple ingredients and following the steps outlined, you’ll create a delicious bread that is perfect for sandwiches, toast, or simply enjoying with a bit of butter. Experiment with different variations and toppings to make this bread your own. Enjoy the process and the tasty results of your baking efforts!
Feel free to share your results and any variations you try in the comments below. Happy baking!