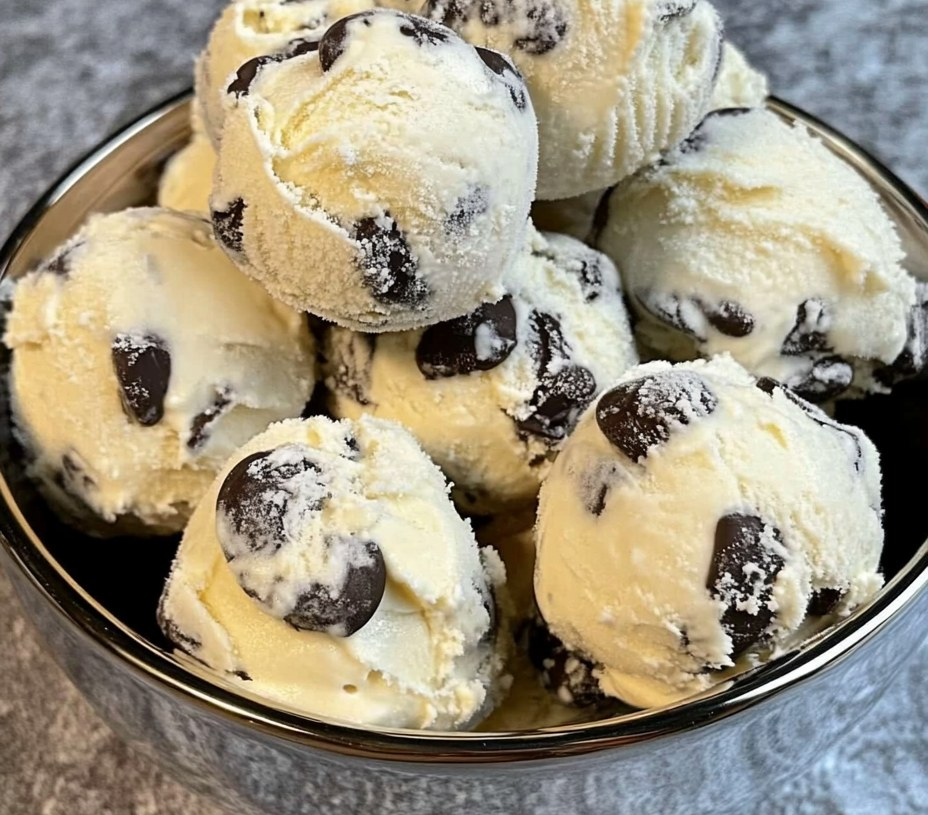
WW Low-Point Chocolate Chip Ice Cream Balls: The Perfect Sweet Treat
Craving something sweet but don’t want to derail your Weight Watchers or low-point plan? Look no further! These Chocolate Chip Ice Cream Balls are the perfect guilt-free dessert. With only 2 SmartPoints per serving when using fat-free whipped topping, they are a great way to indulge your sweet tooth without sacrificing your healthy eating goals.
This simple, no-bake dessert is ideal for those who want to satisfy their sweet cravings without the added calories or sugar. If you’re following the Weight Watchers program, you’ll love how easy it is to make, and how perfectly they fit into your daily SmartPoints allowance. Plus, the best part is that they require minimal effort and can be made ahead of time.
Whether you’re looking for a quick dessert to serve at a family dinner, meal prepping for the week, or treating yourself to something sweet after a long day, these Chocolate Chip Ice Cream Balls are sure to be a hit.
Ingredients for WW Low-Point Chocolate Chip Ice Cream Balls:
Here’s what you’ll need to make these easy, low-point chocolate chip ice cream balls. These ingredients are carefully selected to ensure low SmartPoints while still delivering a satisfying sweet treat.
Main Ingredients:
- 2 cups fat-free whipped topping (also known as fat-free Cool Whip)
- 1 package sugar-free vanilla pudding mix (you can also use sugar-free cheesecake flavor for a twist)
- 1/3 cup mini chocolate chips (use sugar-free chocolate chips if desired)
- 1 teaspoon vanilla extract (optional, for extra flavor)
- 1 tablespoon light or reduced-fat cream cheese (optional for a creamier texture, can be omitted for a dairy-free version)
Equipment:
- Mini muffin pan (12-cup size)
- Spoon or cookie scoop (for portioning)
- Freezer-safe container (to store the balls once frozen)
Instructions for Making WW Low-Point Chocolate Chip Ice Cream Balls:
Step 1: Mix the Whipped Topping and Pudding Mix
In a large mixing bowl, combine the 2 cups of fat-free whipped topping with the entire package of sugar-free vanilla pudding mix. Using a hand whisk or a spatula, stir until the pudding mix is completely incorporated and the whipped topping is smooth. The pudding mix will help thicken the whipped topping and add that signature creamy texture to the ice cream balls.
Tip: If you like a slightly tangier flavor, you can also use a sugar-free cheesecake pudding mix as it will enhance the richness of the ice cream balls.
Step 2: Add the Chocolate Chips
Fold in the 1/3 cup of mini chocolate chips into the mixture. Stir gently to distribute the chocolate chips evenly without breaking them apart. If you prefer a more chocolaty treat, feel free to add an extra tablespoon or two of chocolate chips. You can also swap the mini chips for chopped dark chocolate for a more decadent flavor, but be mindful of the SmartPoints.
Note: For a lower-carb version, choose sugar-free chocolate chips. Some brands, like Lily’s, offer chips sweetened with stevia, which helps keep the points lower.
Step 3: Portion into the Muffin Pan
Using a spoon or a cookie scoop, portion the mixture into a mini muffin pan. Fill each muffin cup with about 1.5 to 2 tablespoons of the mixture. You should end up with 12 portions, one for each cup of the pan. Gently smooth out the top of each mound to make them even and rounded.
Tip: If you don’t have a mini muffin pan, you can also use silicone ice cube trays or a regular muffin pan. Just make sure the portions are relatively small to keep the points low.
Step 4: Freeze the Ice Cream Balls
Place the mini muffin pan in the freezer and freeze for at least 4 hours or until the ice cream balls are fully set. The cold temperature will help the whipped topping mixture firm up and hold its shape, giving you a delightful treat that’s both creamy and firm.
Tip: For best results, allow them to freeze overnight. This ensures the texture is just right when you’re ready to serve them.
Step 5: Serve and Enjoy
Once the ice cream balls have frozen, remove the pan from the freezer. Pop each ball out of the muffin tin and place them on a serving plate or store them in a freezer-safe container for later use. They will stay fresh in the freezer for up to 2 weeks, making them an excellent make-ahead dessert option.
Optional Garnishes: For an extra touch, you can garnish with a sprinkle of cocoa powder, a drizzle of sugar-free chocolate syrup, or even fresh berries like raspberries or strawberries. These additions will only add minimal points but elevate the presentation.
Nutritional Information (Per Serving):
Here’s the nutritional breakdown for each serving of this dessert, which is one chocolate chip ice cream ball. Keep in mind that the information below is for 1 ice cream ball (approximately 1.5-2 tbsp per ball):
- Calories: 40 kcal
- Protein: 1g
- Fat: 2g
- Total Carbohydrates: 5g
- Fiber: 1g
- Net Carbs: 4g
- Sugars: 1g (or less, if using sugar-free chocolate chips)
- Sodium: 35mg
- Cholesterol: 0mg
WW SmartPoints Breakdown:
- 2 SmartPoints per serving (1 ice cream ball) if made with fat-free whipped topping and sugar-free pudding mix.
- If you use a higher-point whipped topping, such as regular whipped topping or sugar-free pudding mix, the SmartPoints may increase. In some cases, it could increase to 3 SmartPoints per ball.
For those who are following a Blue or Purple Plan on Weight Watchers, the points will remain consistent. However, if you’re following the Green Plan, some ingredients may increase the points, particularly if you use full-fat whipped topping or non-sugar-free ingredients.
Why These Ice Cream Balls Are a Great Dessert Option:
1. Low-Calorie Indulgence
With just 40 calories per serving, these ice cream balls offer a guilt-free way to satisfy your sweet tooth. Whether you’re following the WW program or simply trying to reduce your sugar and calorie intake, these ice cream balls are the perfect solution for a low-calorie treat.
2. No-Bake and Easy to Prepare
One of the best things about this recipe is its simplicity. No baking, no complicated techniques, just mixing ingredients and freezing. It’s a great recipe to make with kids or as a quick dessert for unexpected guests.
3. Perfect for Meal Prepping
These ice cream balls are fantastic for meal prepping. Simply make them ahead of time, freeze them, and you’ll always have a low-point dessert on hand when the craving strikes. Keep them in the freezer and pull out a few when you need a sweet treat.
4. Customizable
Feel free to get creative with the base. Add sugar-free caramel drizzle, chopped nuts, or even a touch of instant coffee powder for a unique twist. For an even more indulgent experience, you can try coconut flakes or peanut butter chips instead of chocolate chips (just be mindful of the points).
5. Kid-Friendly
This is also a great recipe to make for kids. They’ll love the chocolatey, creamy flavor, and the portion control is built-in since each ball is one serving. Plus, it’s a great way to introduce them to the concept of healthier treats without feeling deprived.
Tips for Success:
- Storage: Store any leftovers in an airtight container in the freezer. They can last up to 2 weeks, but we doubt they’ll last that long!
- Use Silicone Molds: If you don’t have a mini muffin pan, you can use silicone molds for easier removal and to add fun shapes.
- Flavor Variations: Experiment with different flavors of pudding mix to create new versions of this treat—chocolate pudding mix, banana, or even lemon could work well.
Conclusion:
These WW Low-Point Chocolate Chip Ice Cream Balls are the perfect dessert for anyone looking to enjoy a sweet treat without the guilt. Whether you’re following the WW plan or just watching your calories, these frozen delights offer a delicious way to indulge while staying on track with your health goals. With only 2 SmartPoints per ball (when using fat-free whipped topping and sugar-free pudding mix), they make the perfect low-calorie, low-sugar dessert.
This recipe is simple, easy, and fully customizable, making it a great option for busy days or when you want a quick, no-bake dessert. So go ahead and enjoy your sweet treats, knowing you’re sticking to your goals while satisfying your cravings!
I hope this extended version of the recipe fits your needs. Let me know if you’d like to add any more details or adjust anything!