
Introduction:
Indulging in a delicious, creamy dessert doesn’t have to come at the cost of your Weight Watchers SmartPoints. The WW High-Protein Chocolate Ice Cream is a perfect treat for anyone looking to satisfy their sweet tooth without compromising their weight loss goals. Packed with protein and rich in flavor, this ice cream recipe is designed to be both nutritious and indulgent. It’s ideal for those on the Weight Watchers program, as it offers a great balance of macronutrients and is surprisingly low in SmartPoints.
If you’re someone who loves a good scoop of chocolate ice cream but struggles to find options that fit into your WW plan, this high-protein ice cream will quickly become a staple in your kitchen. Made with simple, healthy ingredients, it’s not only easy to make but also a great option for a post-workout treat, a guilt-free snack, or a sweet finish to any meal.
This recipe is versatile, customizable, and designed to be both filling and satisfying, helping to curb your cravings while also boosting your protein intake. So, let’s dive into the full details of how to create this creamy, dreamy treat.
Ingredients:
To make this WW High-Protein Chocolate Ice Cream, you’ll need the following ingredients:
- 2 cups unsweetened almond milk (or any plant-based milk of your choice)
- 1 cup plain non-fat Greek yogurt (unsweetened, for added creaminess and protein)
- 1/2 cup chocolate protein powder (make sure it’s low in sugar and carbs)
- 1/4 cup cocoa powder (unsweetened)
- 1/4 cup sweetener (such as stevia, monk fruit, or any zero-calorie sweetener)
- 1 tsp vanilla extract
- 1/4 tsp salt (to enhance the chocolate flavor)
- 1/2 cup dark chocolate chips (optional, for added texture and indulgence)
- 1/4 cup water (if needed, for thinning out the mixture)
- 1-2 tbsp powdered peanut butter (optional, for a subtle peanut butter flavor)
Optional Garnishes/Flavor Variations:
- Crushed nuts (almonds, walnuts, or pistachios) for extra crunch
- Chocolate shavings for garnish
- A drizzle of sugar-free caramel or chocolate syrup
Instructions:
Step 1: Prepare Your Ingredients
Start by measuring out all your ingredients before beginning the process. This ensures that you won’t miss anything, and it makes the recipe more efficient to follow.
Step 2: Mix the Base
In a medium-sized mixing bowl, combine the almond milk, Greek yogurt, chocolate protein powder, cocoa powder, sweetener, and vanilla extract. Use a hand whisk or electric mixer to blend everything together until it forms a smooth, lump-free mixture.
Tip: If you prefer a richer and thicker ice cream, use full-fat Greek yogurt, but the non-fat variety keeps the SmartPoints lower.
Step 3: Add Water If Needed
Depending on the consistency of your mixture, you may need to add a bit of water to thin it out. Start with 1-2 tablespoons and blend again. This step is important to ensure your ice cream has the right consistency for churning. If you prefer a firmer ice cream, feel free to skip the water.
Step 4: Chill the Mixture
Once the mixture is smooth, cover the bowl with plastic wrap or a lid and refrigerate for about 1-2 hours. This step helps chill the mixture, making the freezing process smoother and easier.
Step 5: Churn the Ice Cream
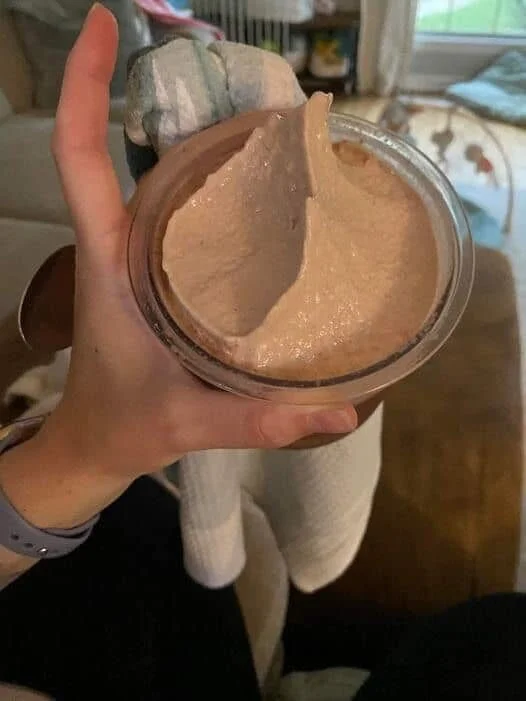
If you have an ice cream maker, pour the chilled mixture into the machine and churn according to the manufacturer’s instructions. This usually takes around 20-30 minutes, depending on your machine. The mixture should begin to thicken as it churns, resembling a soft-serve consistency.
If you don’t have an ice cream maker, don’t worry! You can still make this recipe without one. After refrigerating, pour the mixture into a shallow dish or a loaf pan, and freeze it for about 4-6 hours. Every 30 minutes, use a fork to scrape the mixture and break up the ice crystals. Repeat this process until the ice cream reaches your desired consistency.
Step 6: Add Chocolate Chips (Optional)
If you’re using chocolate chips or any mix-ins, add them in during the last 5 minutes of churning. Stir them in gently, allowing them to evenly distribute throughout the ice cream.
Step 7: Freeze and Set
Once the ice cream has reached your desired consistency, transfer it to a container for storage. Seal it tightly and freeze for at least another 2 hours or until fully set.
Step 8: Serve and Enjoy
Once the ice cream is fully set, scoop it into bowls or cones. If you want to get creative, add your favorite toppings such as chopped nuts, a sprinkle of cocoa powder, or a drizzle of sugar-free syrup.
Nutritional Information (Per Serving, Serves 6):
- Calories: 150 kcal
- Fat: 4g
- Saturated Fat: 1g
- Monounsaturated Fat: 2g
- Carbohydrates: 12g
- Fiber: 4g
- Sugar: 2g (mostly from natural sources)
- Protein: 15g
- Sodium: 50mg
- Cholesterol: 0mg
Note: The exact nutritional values may vary depending on your choice of sweetener, protein powder, and any optional ingredients added. These values are based on the core recipe with unsweetened almond milk, non-fat Greek yogurt, and stevia sweetener.
SmartPoints (WW):
- SmartPoints Value: 4 SmartPoints (per serving)
Given its high protein content, low sugar, and healthy fats, this high-protein chocolate ice cream is a fantastic treat that fits well into the Weight Watchers program. You can enjoy it without feeling guilty, even on days when you’re trying to keep your SmartPoints low. It’s the perfect blend of indulgence and nutrition!
Why This Recipe Works for Weight Watchers:
1. High in Protein:
With 15 grams of protein per serving, this ice cream helps keep you fuller for longer and supports muscle repair and growth. Protein is essential for maintaining a balanced diet, especially when following a program like Weight Watchers, which emphasizes healthy, nutrient-dense foods.
2. Low in Sugar:
This recipe uses a sugar-free sweetener to keep the sugar content to a minimum. With only 2 grams of sugar per serving, this treat won’t spike your blood sugar levels or affect your weight loss journey.
3. Healthy Fats:
The addition of unsweetened almond milk and optional peanut butter powder provides healthy fats that help with satiety and support overall health. Unlike many store-bought ice creams, this homemade version avoids unhealthy trans fats and high sugar content.
4. Customizable:
This recipe is versatile and easy to adapt. You can adjust the sweetness level by adding more or less sweetener based on your taste preferences. Additionally, you can customize the flavor by mixing in ingredients like peanut butter powder, coffee, or even adding a few drops of peppermint extract for a mint chocolate version.
Tips for Success:
- Choose a High-Quality Protein Powder: The protein powder you choose will significantly impact the flavor of your ice cream. Opt for a high-quality, low-sugar protein powder that complements the chocolate taste. Look for one with at least 20 grams of protein per serving for maximum benefit.
- Be Patient with Freezing: The longer you let the ice cream freeze, the firmer it will be. If you find that it’s too soft, simply let it freeze longer. For a creamy, soft-serve texture, you can enjoy it right after churning.
- Add Mix-Ins Carefully: If you’re adding chocolate chips, nuts, or other mix-ins, be mindful of the portion size to keep the SmartPoints low. A small amount of dark chocolate chips adds extra texture without significantly increasing the SmartPoints.
- Use Silicone Ice Cream Molds: If you prefer pre-portioned servings, consider pouring the mixture into silicone ice cream molds. These molds are perfect for making individual servings and can help you control portions while adding a fun, aesthetic twist to your homemade ice cream.
Final Thoughts:
This WW High-Protein Chocolate Ice Cream is the ideal solution for anyone who wants to enjoy a decadent, indulgent dessert without blowing their SmartPoints budget. Packed with protein, fiber, and low in sugar, it’s a great way to get a sweet treat while supporting your weight loss goals. Whether you enjoy it as a post-workout snack, an after-dinner treat, or simply as a healthy indulgence, this ice cream recipe is sure to satisfy your cravings and keep you on track.
By making it yourself at home, you can control every ingredient, ensuring a much healthier option compared to store-bought versions. It’s also a fun recipe to customize and make your own, whether by adding extra toppings or trying different flavor combinations. Enjoy a creamy, dreamy scoop of high-protein chocolate ice cream without any guilt!