Ingredients
For the Graham Cracker Crust:
- 2 cups graham cracker crumbs (about 14–16 full graham crackers)
- ½ cup granulated sugar
- ½ cup (1 stick) unsalted butter, melted
For the Cream Cheese Filling:
- 2 packages (8 oz each) full-fat cream cheese, softened
- 1 cup powdered sugar
- 1 teaspoon pure vanilla extract
- 1 container (8 oz) whipped topping (such as Cool Whip), thawed
or 1 cup heavy whipping cream, whipped to stiff peaks
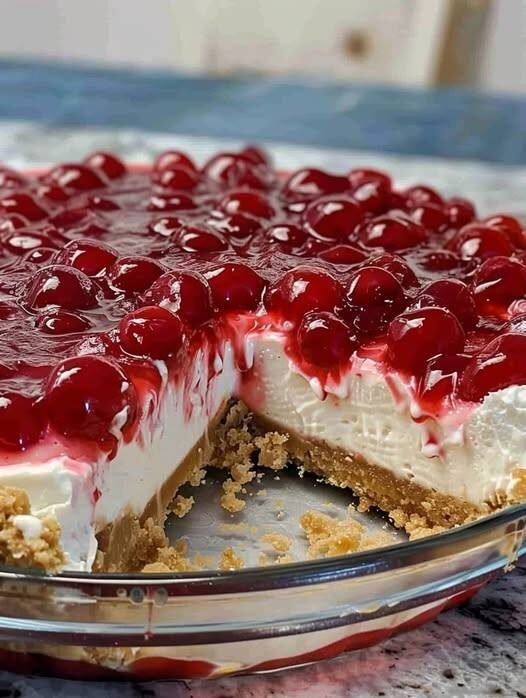
For the Topping:
- 2 cans (21 oz each) cherry pie filling

Step-by-Step Instructions
- Begin by preparing your pan. A 9×13-inch glass or ceramic baking dish works best for clean slicing and presentation. Lightly grease the dish or line it with parchment paper for easy removal.
- In a medium mixing bowl, combine the graham cracker crumbs and granulated sugar. Stir until evenly distributed.
- Pour in the melted butter and mix thoroughly until the crumbs resemble wet sand. The mixture should hold together when pressed between your fingers.
- Transfer the crumb mixture into the prepared baking dish. Using the bottom of a measuring cup or flat glass, firmly press the crust into an even layer across the bottom of the pan.
- For a firmer crust, refrigerate it for 20–30 minutes before adding the filling. This helps it set properly and prevents crumbling when sliced.
- In a large mixing bowl, beat the softened cream cheese using a hand mixer or stand mixer. Beat for 2–3 minutes until completely smooth and free of lumps.
- Gradually add the powdered sugar while mixing on low speed. Continue beating until fully incorporated.
- Add the vanilla extract and mix until combined. Scrape down the sides of the bowl to ensure even blending.
- If using whipped topping, gently fold it into the cream cheese mixture using a spatula. Do not overmix, as you want to maintain lightness.
- If using fresh whipped cream, beat the heavy cream in a separate chilled bowl until stiff peaks form, then fold gently into the cream cheese mixture.
- Spread the cream cheese filling evenly over the chilled crust. Use an offset spatula to smooth the top.
- Carefully spoon the cherry pie filling over the cream cheese layer. Spread it gently to avoid mixing the layers.
- Cover the dish tightly with plastic wrap and refrigerate for at least 4 hours, preferably overnight. This allows the layers to firm up and flavors to meld.
- Once fully chilled, slice into squares using a sharp knife. Wipe the knife clean between cuts for neat edges.
- Serve chilled and store leftovers in the refrigerator for up to 4 days.
Professional Tips for Best Results
Always use full-fat cream cheese for the richest texture. Reduced-fat versions can produce a softer filling that doesn’t set as firmly.
Ensure the cream cheese is fully softened before mixing. Cold cream cheese can result in lumps that are difficult to smooth out.
For clean, bakery-style slices, dip your knife in warm water and wipe it dry between each cut.
If preparing for a special occasion, garnish with fresh cherries or chocolate shavings for an elegant touch.
Variations and Flavor Options
Although cherry is traditional, you can substitute other pie fillings such as blueberry, strawberry, raspberry, or even lemon. Each variation creates a new flavor profile while maintaining the same creamy base.
For a chocolate twist, add ½ cup mini chocolate chips to the cream cheese layer or drizzle melted chocolate over the cherry topping.
If you prefer a firmer crust, bake the crust at 350°F (175°C) for 8–10 minutes and allow it to cool completely before adding the filling. This adds a slightly toasted flavor.