Classic Homemade Bread: 4-Ingredient Recipe
Introduction
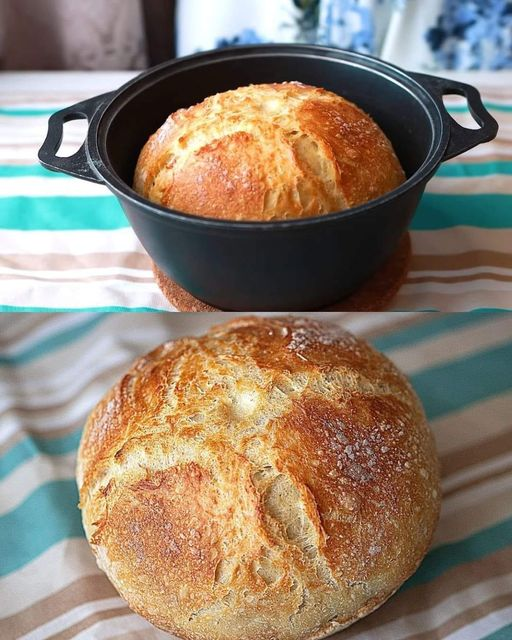
Homemade bread is one of life’s simple pleasures, and making it can be both easy and rewarding. This Classic Homemade Bread recipe requires just four basic ingredients, making it accessible for everyone, from beginner bakers to seasoned chefs. Whether you’re enjoying a slice with breakfast, creating a sandwich for lunch, or serving it alongside dinner, this bread is versatile, delicious, and satisfying. In this detailed guide, you will find all the information needed to prepare this delightful bread, along with nutritional information and tips for success.
Nutritional Information
Serving Size: 1 slice (approximately 1 oz)
- Calories: 80
- Protein: 2g
- Fat: 1g
- Carbohydrates: 15g
- Fiber: 1g
- Sugar: 0g
- SmartPoints (WW): 2
Ingredients
- 3 cups all-purpose flour: Can be substituted with whole wheat flour for added nutrition.
- 1 packet (2 1/4 teaspoons) active dry yeast: Essential for leavening the bread.
- 1 teaspoon salt: Enhances flavor.
- 1 cup warm water: Approximately 110°F (43°C) to activate the yeast.
Preparation Instructions
Step 1: Activate the Yeast
Start by activating the yeast. In a small bowl, combine the warm water and the packet of active dry yeast. Stir gently to dissolve the yeast, then let it sit for about 5-10 minutes until it becomes frothy. This indicates that the yeast is active and ready to use.
Step 2: Combine Dry Ingredients
In a large mixing bowl, whisk together the all-purpose flour and salt. Mixing the dry ingredients first ensures an even distribution of salt and helps in the overall flavor of the bread.
Step 3: Mix Wet and Dry Ingredients
Create a well in the center of the flour mixture. Pour in the frothy yeast mixture. Using a wooden spoon or spatula, stir the mixture until it begins to come together. It may look shaggy at first, but that’s perfectly normal.
Step 4: Knead the Dough
Turn the dough out onto a floured surface. Knead the dough for about 5-7 minutes until it is smooth and elastic. If the dough is too sticky, sprinkle a little more flour as needed. This step is crucial for developing gluten, which gives bread its structure.
Step 5: Let the Dough Rise
Form the kneaded dough into a ball and place it in a lightly greased bowl, turning the dough to coat it with oil. Cover the bowl with a damp cloth or plastic wrap. Allow the dough to rise in a warm, draft-free area for about 1 hour, or until it doubles in size.
Step 6: Preheat the Oven
While the dough is rising, preheat your oven to 375°F (190°C). This ensures that your oven is hot and ready for baking once the dough has completed its rise.
Step 7: Shape the Dough
Once the dough has risen, punch it down gently to release any air bubbles. Turn it out onto a lightly floured surface again. Shape the dough into a loaf by rolling it into a cylinder and tucking the ends underneath.
Step 8: Prepare the Baking Pan
Grease a standard loaf pan (9×5 inches) with a little oil or cooking spray. Place the shaped dough into the prepared loaf pan, ensuring it fits snugly.
Step 9: Second Rise
Cover the loaf pan with a damp cloth and let it rise for an additional 30 minutes, or until the dough rises slightly above the edge of the pan. This second rise is important for achieving a soft, airy texture.
Step 10: Bake the Bread
Once the dough has risen, place the loaf pan in the preheated oven. Bake for about 25-30 minutes, or until the bread is golden brown on top and sounds hollow when tapped. If you have a thermometer, the internal temperature should reach about 190°F (88°C).
Cooling and Slicing
Step 11: Cool the Bread
Remove the loaf from the oven and let it cool in the pan for about 10 minutes. After that, transfer the bread to a wire rack to cool completely. Allowing the bread to cool prevents it from becoming soggy.
Step 12: Slice and Serve
Once cooled, slice the bread with a serrated knife. Enjoy it plain, with a spread of vegan butter, or as a base for your favorite sandwiches.
Tips for Success
- Yeast Freshness: Always check the expiration date on your yeast packet. If in doubt, proof the yeast before using it.
- Kneading Technique: Use the heel of your hands to push the dough away from you, then fold it back. Repeat this motion to develop gluten.
- Ideal Rising Conditions: A warm oven (turned off) or a sunny spot in your kitchen is ideal for letting the dough rise.
Storage Tips
- Room Temperature: Store the bread in a sealed plastic bag or airtight container at room temperature for up to 3 days.
- Freezing: For longer storage, slice the bread and freeze it in a resealable bag. It will stay fresh for up to 3 months. Toast slices directly from the freezer.
Health Benefits
This Classic Homemade Bread recipe is not only easy to make but also offers nutritional benefits. By using whole wheat flour instead of all-purpose flour, you can increase fiber content, which is beneficial for digestive health. Homemade bread typically contains fewer preservatives and additives compared to store-bought options, making it a healthier choice.
Variations and Add-Ins
- Herb Bread: Add 1 tablespoon of dried herbs (like rosemary or thyme) to the flour mixture for an aromatic loaf.
- Seeds: Mix in 1/4 cup of seeds (like sunflower or pumpkin) for added texture and nutrition.
- Sweet Bread: Incorporate 2 tablespoons of honey or maple syrup into the warm water for a subtly sweet flavor.
Conclusion
This Classic Homemade Bread recipe is a wonderful way to introduce baking into your routine. With just four simple ingredients, you can create a loaf that is perfect for any occasion. The aroma of freshly baked bread is hard to resist, and knowing that you made it yourself adds to the satisfaction.
Final Thoughts
Baking bread at home can be a fulfilling experience, allowing you to control the ingredients and create something delicious. This recipe is perfect for beginners and provides a great foundation for exploring other baking techniques. Enjoy every slice of your homemade bread, and don’t hesitate to share it with family and friends—there’s nothing quite like the joy of sharing homemade food!