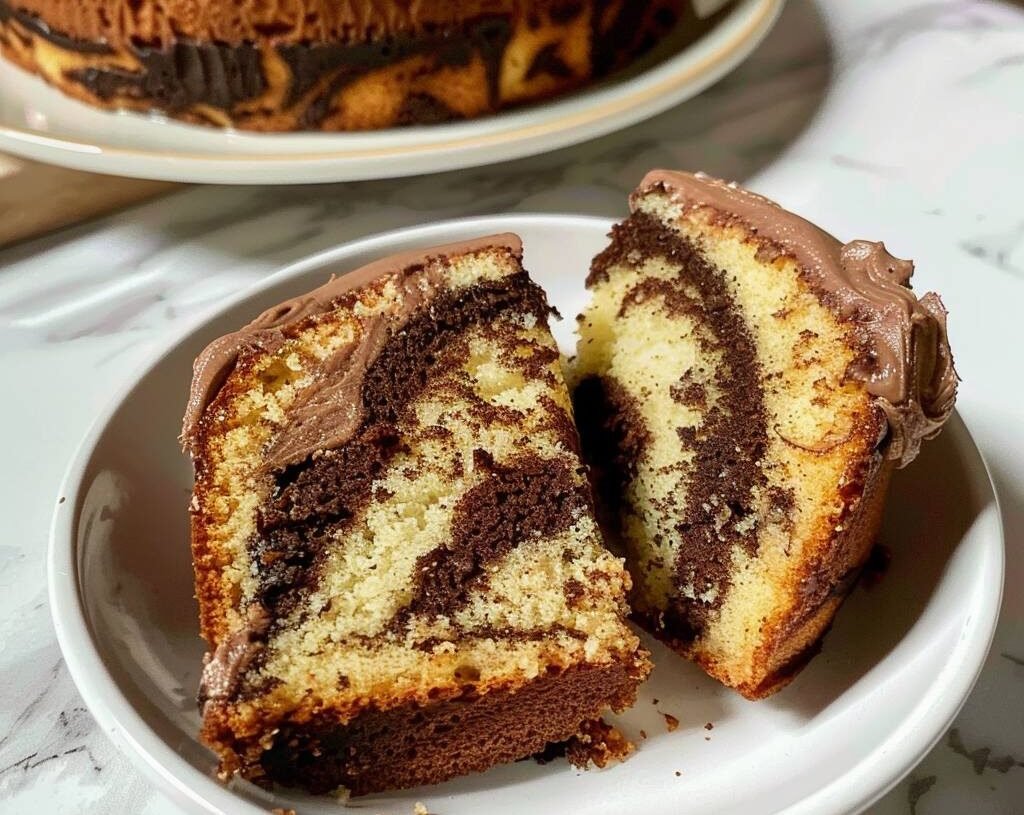
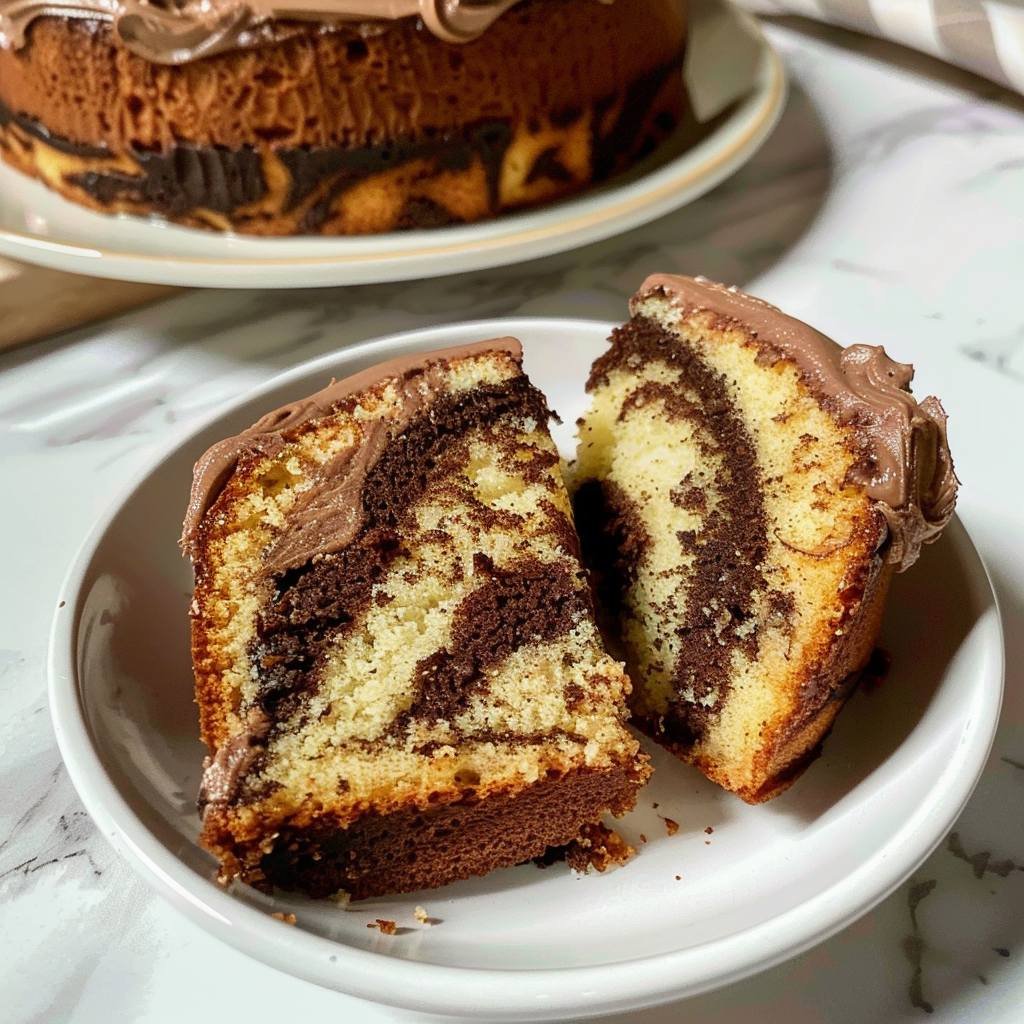
Introduction to Keto Marble Cake
Keto marble cake is a delightful dessert that combines the rich flavors of chocolate and vanilla in a beautifully marbled pattern. This cake is perfect for those on a ketogenic diet, as it is low in carbohydrates and high in healthy fats. The unique marbling effect makes it not only delicious but also visually appealing, making it a perfect treat for any occasion. In this detailed guide, we’ll walk you through each step of the process, ensuring you can create a stunning and tasty keto marble cake that fits perfectly into your dietary plan.
Why Choose a Keto Marble Cake?
The ketogenic diet emphasizes low-carb, high-fat foods to maintain ketosis, a state where the body burns fat for fuel instead of carbohydrates. Traditional cakes, made with wheat flour and sugar, are high in carbs and can quickly disrupt ketosis. This keto marble cake, however, uses almond flour and a keto-friendly sweetener, making it an excellent alternative. It satisfies your sweet tooth while keeping your carb intake low, making it an ideal dessert for keto enthusiasts.
Ingredients and Their Benefits
- Almond Flour (5 tablespoons): Almond flour is a low-carb, gluten-free alternative to wheat flour. It adds a mild, nutty flavor to the cake and is rich in healthy fats and protein, which are essential for a ketogenic diet. Almond flour helps keep the cake moist and tender.
- Egg (1 Grade A): Eggs are a staple in keto baking, providing structure and moisture to the cake. They are also an excellent source of protein and healthy fats, contributing to the cake’s nutritional value.
- Lakanto (2 tablespoons): Lakanto is a keto-friendly sweetener made from monk fruit and erythritol. It provides the sweetness needed for the cake without the added carbs, making it perfect for maintaining ketosis.
- Pure Butter (1 tablespoon): Butter adds a rich, creamy texture to the cake and is a great source of healthy fats. It helps create a moist and flavorful cake, essential for a satisfying dessert.
- Baking Powder (½ teaspoon): Baking powder acts as a leavening agent, helping the cake rise and achieve a light, fluffy texture. It is crucial for the cake’s structure and overall appearance.
- Pink Salt (a pinch): Pink salt enhances the flavors of the cake and balances the sweetness. It also provides essential minerals that are beneficial for overall health.
- Cocoa Powder (1 teaspoon): Cocoa powder adds a deep, rich chocolate flavor to the cake. It is low in carbs and high in antioxidants, making it a healthy addition to the recipe.
- Vanilla Essence (a few drops): Vanilla essence adds a sweet, aromatic flavor that complements the almond flour and chocolate. It enhances the overall taste of the cake, making each bite more enjoyable.
Preparing the Batter
Step 1: Beat the Egg
Start by cracking the egg into a mixing bowl. Use a whisk or an electric mixer to beat the egg until it is well combined and slightly frothy. Beating the egg helps incorporate air into the batter, which is essential for a light and fluffy cake.
Step 2: Add the Dry Ingredients
Gradually add the almond flour, Lakanto, baking powder, and a pinch of pink salt to the beaten egg. Mix the ingredients until they are well combined. The almond flour should be evenly distributed, and there should be no lumps in the batter. This step ensures a smooth and consistent texture for the cake.
Step 3: Incorporate the Wet Ingredients
Add the pure butter to the mixture. The butter should be softened to ensure it blends smoothly with the other ingredients. Add a few drops of vanilla essence for a subtle, sweet aroma. Mix the ingredients thoroughly until you achieve a smooth and homogeneous batter.
Creating the Marble Effect
Step 1: Prepare the Cocoa Mixture
Take one tablespoon of the prepared batter and place it in a separate bowl. Add the cocoa powder to this small portion of the batter and mix well until the cocoa is fully incorporated. This will be the chocolate part of your marble cake, adding a rich and delicious chocolate flavor.
Step 2: Layering the Batter
Grease a small cup or ramekin with butter or a keto-friendly cooking spray to prevent the cake from sticking. Begin by spooning a small amount of the vanilla batter into the cup. Next, add a small spoonful of the chocolate batter on top of the vanilla layer. Continue to alternate between the vanilla and chocolate batters until you have used all of the batter. This alternating process creates the marbled effect in the cake.
Step 3: Creating the Marble Pattern
Use a toothpick or a knife to gently swirl the layers of batter together. Be careful not to over-mix; you want to create a marbled pattern, not blend the batters completely. Swirling the batters together creates a beautiful and unique design that makes each cake visually appealing and distinct.
Baking the Cake
Step 1: Preheat the Oven
Preheat your oven to 180°C (350°F). Preheating the oven ensures that the cake bakes evenly and rises properly. An oven that is too cool can result in a dense cake, while an oven that is too hot can cause the outside to burn before the inside is fully cooked.
Step 2: Baking Time
Place the cup or ramekin with the batter in the preheated oven. Bake the cake for approximately 20 minutes or until a toothpick inserted into the center comes out clean. Baking times may vary depending on the size of your cup or ramekin and the oven’s temperature, so keep an eye on the cake as it bakes.
Cooling and Serving
Step 1: Cooling the Cake
Once the cake is fully baked, remove it from the oven and allow it to cool in the cup or ramekin for a few minutes. This cooling period helps the cake set and makes it easier to remove from the container. Cooling also enhances the flavors, making the cake even more delicious.
Step 2: Removing the Cake
Gently run a knife or spatula around the edges of the cake to loosen it from the cup or ramekin. Carefully invert the container onto a plate to release the cake. If you prefer, you can serve the cake directly from the cup or ramekin for a more rustic presentation.
Step 3: Serving Suggestions
Serve the keto marble cake warm or at room temperature. You can enjoy it as is or add a dollop of whipped cream or a drizzle of sugar-free syrup for an extra touch of sweetness. Fresh berries or a sprinkle of powdered erythritol can also make lovely garnishes, adding both flavor and visual appeal.
Nutritional Information and Benefits
Each serving of this keto marble cake is designed to be low in carbohydrates while providing a good balance of healthy fats and protein. Here’s a breakdown of the nutritional content per serving:
- Calories: Approximately 150-180
- Net Carbs: 2-3 grams
- Protein: 4-5 grams
- Fat: 14-16 grams
This cake is a great option for satisfying sweet cravings without compromising your keto diet. The combination of almond flour and Lakanto keeps the carb count low, while the butter and eggs provide essential fats and proteins, making this a nutritious and filling treat.
Common Mistakes and How to Avoid Them
- Using Cold Butter: Cold butter can create lumps in the batter, leading to an uneven texture. Ensure that your butter is softened before mixing it with the other ingredients.
- Over-Mixing the Batter: Over-mixing can result in a dense cake. Mix the ingredients just until they are combined to maintain a light and fluffy texture.
- Baking at Incorrect Temperature: Baking at too high or too low a temperature can affect the cake’s texture and appearance. Always preheat your oven and monitor the baking process to ensure the best results.
- Skipping the Greasing Step: Failing to grease the cup or ramekin can cause the cake to stick, making it difficult to remove. Always grease your container to ensure easy removal.
Frequently Asked Questions
- Can I use coconut flour instead of almond flour? Yes, you can use coconut flour, but it absorbs more liquid, so you will need to adjust the quantity and possibly add more liquid to maintain the right consistency.
- How do I store leftover cake? Store any leftover cake in an airtight container in the refrigerator for up to three days. Reheat it gently in the microwave or oven before serving.
- Can I add other flavors to the batter? Absolutely! You can add flavors like almond extract, lemon zest, or a pinch of cinnamon to customize your cake to your liking.
Conclusion
Keto marble cake is a delightful and versatile dessert that fits perfectly into a low-carb, ketogenic diet. This detailed guide provides all the information you need to create a delicious, visually appealing cake that will satisfy your sweet tooth while keeping you on track with your health goals. Whether you’re a seasoned keto enthusiast or new to the diet, this cake is sure to become a favorite in your recipe collection. Enjoy experimenting with different flavors and presentations to make each cake uniquely your own.
Additional Information for Your Website
For those looking to expand their collection of keto-friendly desserts, this keto marble cake offers a perfect combination of taste and nutrition. It highlights the creativity and flexibility of keto baking, demonstrating that you can enjoy delicious treats without compromising your dietary principles. By providing detailed instructions, tips, and variations, this recipe ensures that anyone can successfully create a stunning and tasty keto marble cake. Whether you’re sharing this recipe with friends or using it as a starting point for your own culinary experiments, it’s a valuable addition to any